Unityで機械学習を利用するML-Agentsというライブラリがv0.11.0(beta)にバージョンアップしていたので試してみました。(2019/11/05時点)
v0.9.1からしばらく動作確認をサボっていたらだいぶと変更点があって戸惑いました。
Release ML-Agents Beta 0.11.0 · Unity-Technologies/ml-agents
https://github.com/Unity-Technologies/ml-agents/releases/tag/0.11.0
Unity ML-Agentsについては下記が参考になります。
【Unity】Unityで機械学習する「ML-Agent」を色々と試して得た知見とか
http://tsubakit1.hateblo.jp/entry/2018/02/18/233000
Unityをまだインストールしていないという方は下記をご参考ください。
Macでhomebrewを使ってUnityをインストールする(Unity Hub、日本語化対応)
https://cloudpack.media/42142
手順
基本的には公式にある下記ドキュメントに沿えばよい感じです。
ml-agents/Installation.md at master · Unity-Technologies/ml-agents
https://github.com/Unity-Technologies/ml-agents/blob/master/docs/Installation.md
ml-agents/Basic-Guide.md at master · Unity-Technologies/ml-agents
https://github.com/Unity-Technologies/ml-agents/blob/master/docs/Basic-Guide.md#setting-up-ml-agents-within-unity
Pythonをインストールする
現在、Python 3.6.1以上での動作がサポートされています。3.5以前のバージョンはサポートされていないのでご注意ください。(2019/11/05現在)
ml-agents/Installation.md at master · Unity-Technologies/ml-agents
https://github.com/Unity-Technologies/ml-agents/blob/master/docs/Installation.md
In order to use ML-Agents toolkit, you need Python 3.6.1 or higher. Download and install the latest version of Python if you do not already have it.
We do not currently support Python 3.5 or lower.
v0.10.0でようやく3.7以上に対応してくれたみたいです。
Release ML-Agents Beta 0.10.0 · Unity-Technologies/ml-agents
https://github.com/Unity-Technologies/ml-agents/releases/tag/0.10.0
ML-Agents is now compatible with Python v3.7 and newer versions of Tensorflow up to 1.14.
お手元にPythonの環境がない方は下記をご参照ください。
MacでanyenvをつかってPython環境構築(bash、fish対応) – Qiita
https://cloudpack.media/42033
ML-Agentsリポジトリをダウンロード
適当なディレクトリにリポジトリをダウンロードします。
> mkdir 適当なディレクトリ
> cd 適当なディレクトリ
> git clone https://github.com/Unity-Technologies/ml-agents.git
必要なライブラリをインストールする
ML-Agentsのパッケージをpipを利用してPyPIからインストールします。
ここではPythonの仮想環境を作ってインストールします。
仮想環境?なにそれ?な方は下記をご参照(再掲
https://cloudpack.media/42033
> python --version

Python 3.7.4


> python -m venv venv
> . venv/bin/activate

# fishな方はこちら
> . venv/bin/activate.fish

> pip install mlagents
はい。
Unityアプリからサンプルプロジェクトを開く
Unity Hubでアプリを立ち上げます。Unity Hubがインストールされていない場合は下記をご参考ください。
Macでhomebrewを使ってUnityをインストールする(Unity Hub、日本語化対応)
https://cloudpack.media/42142
ML-Agentsを利用するにはUnityのバージョン2017.4以上が必要となります。今回は2019.2.10f1を利用しました。
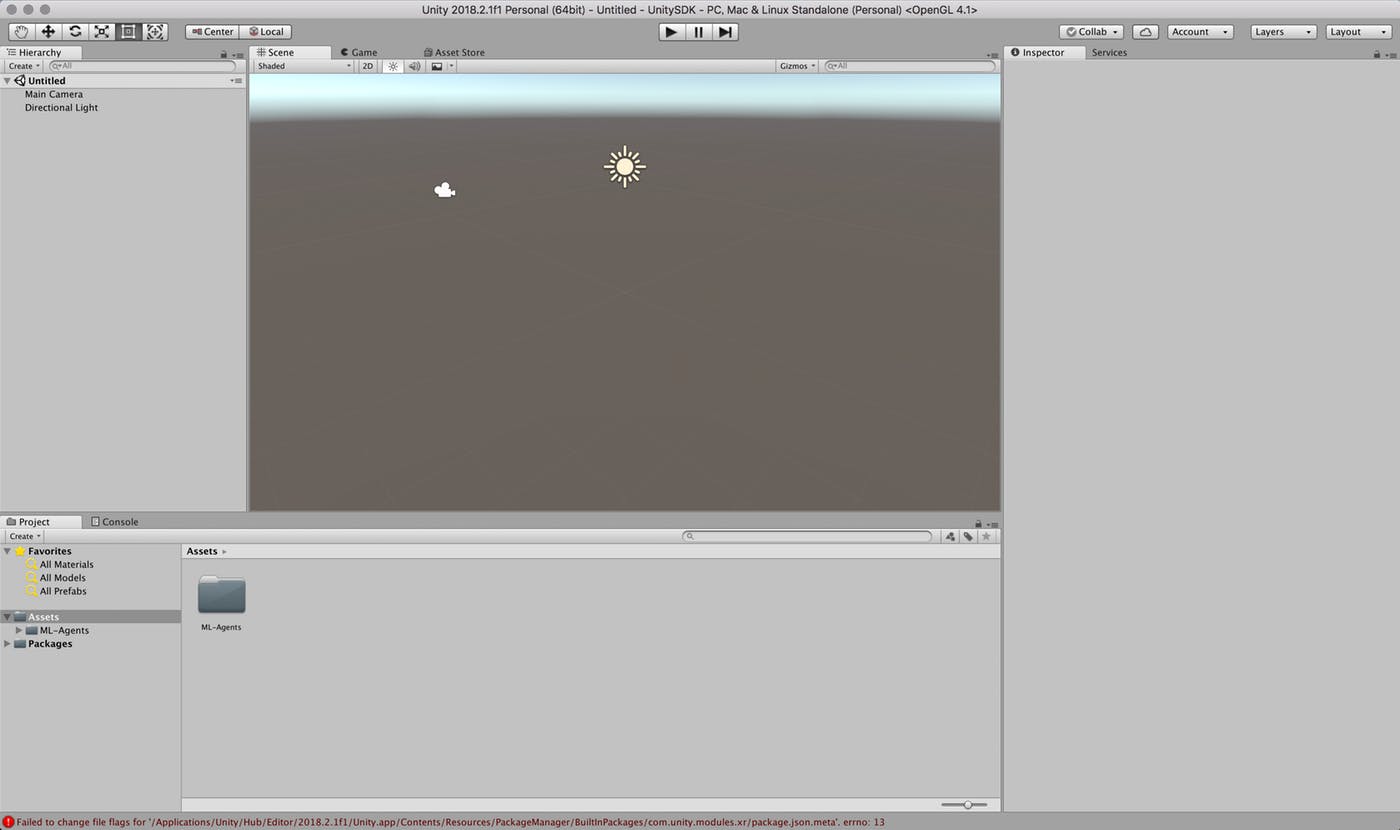
アプリが立ち上がったら「開く」ボタンから任意のディレクトリ/ml-agents/UnitySDKフォルダを選択します。
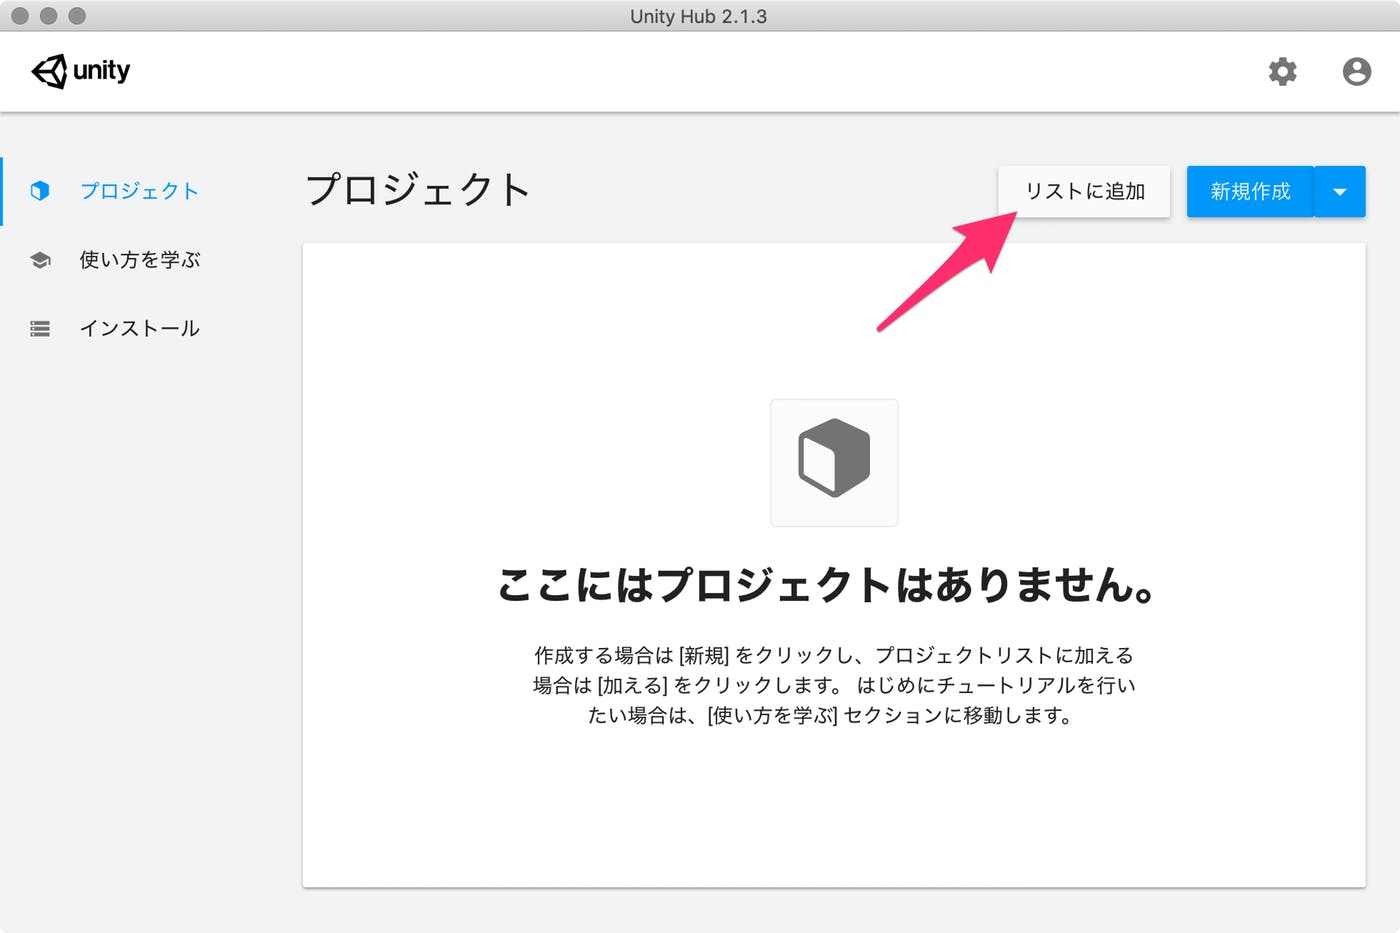
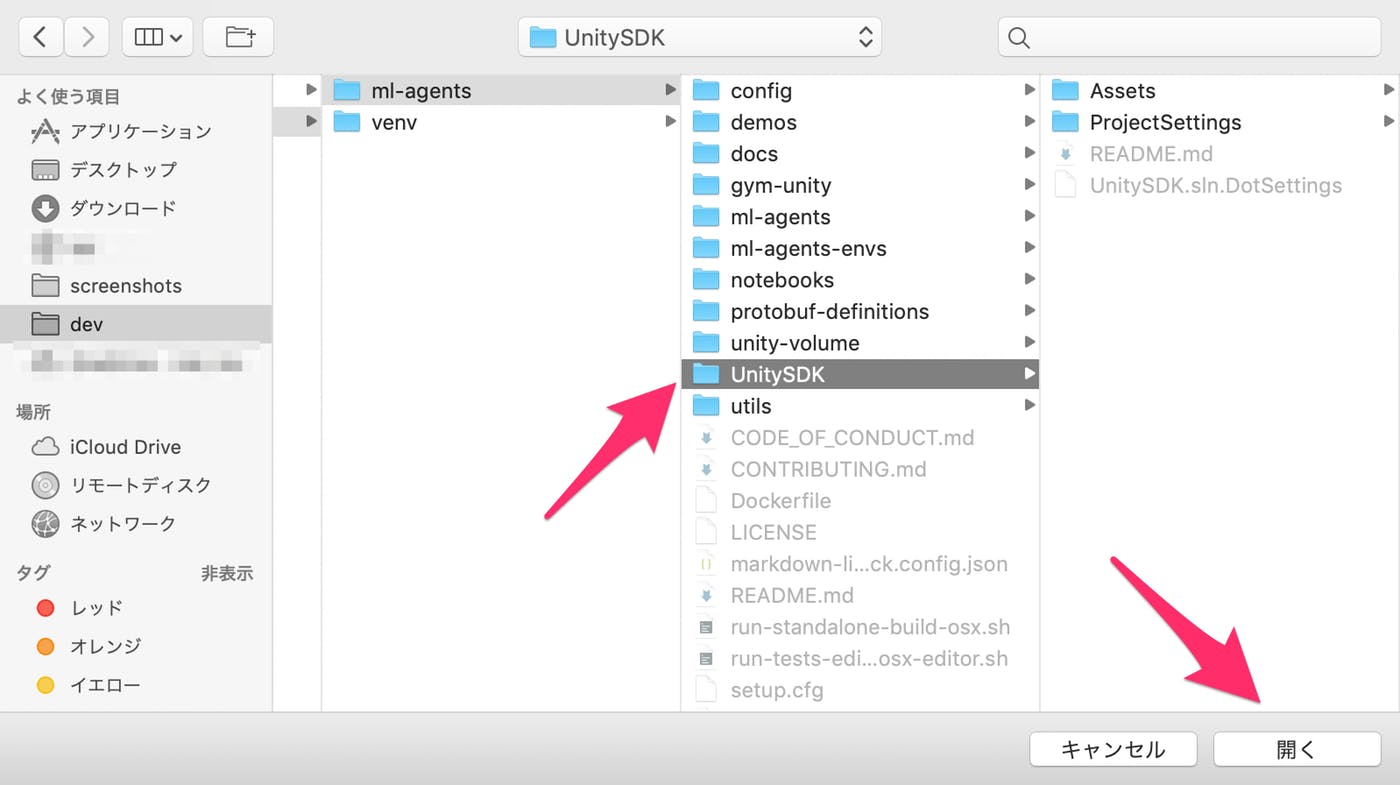
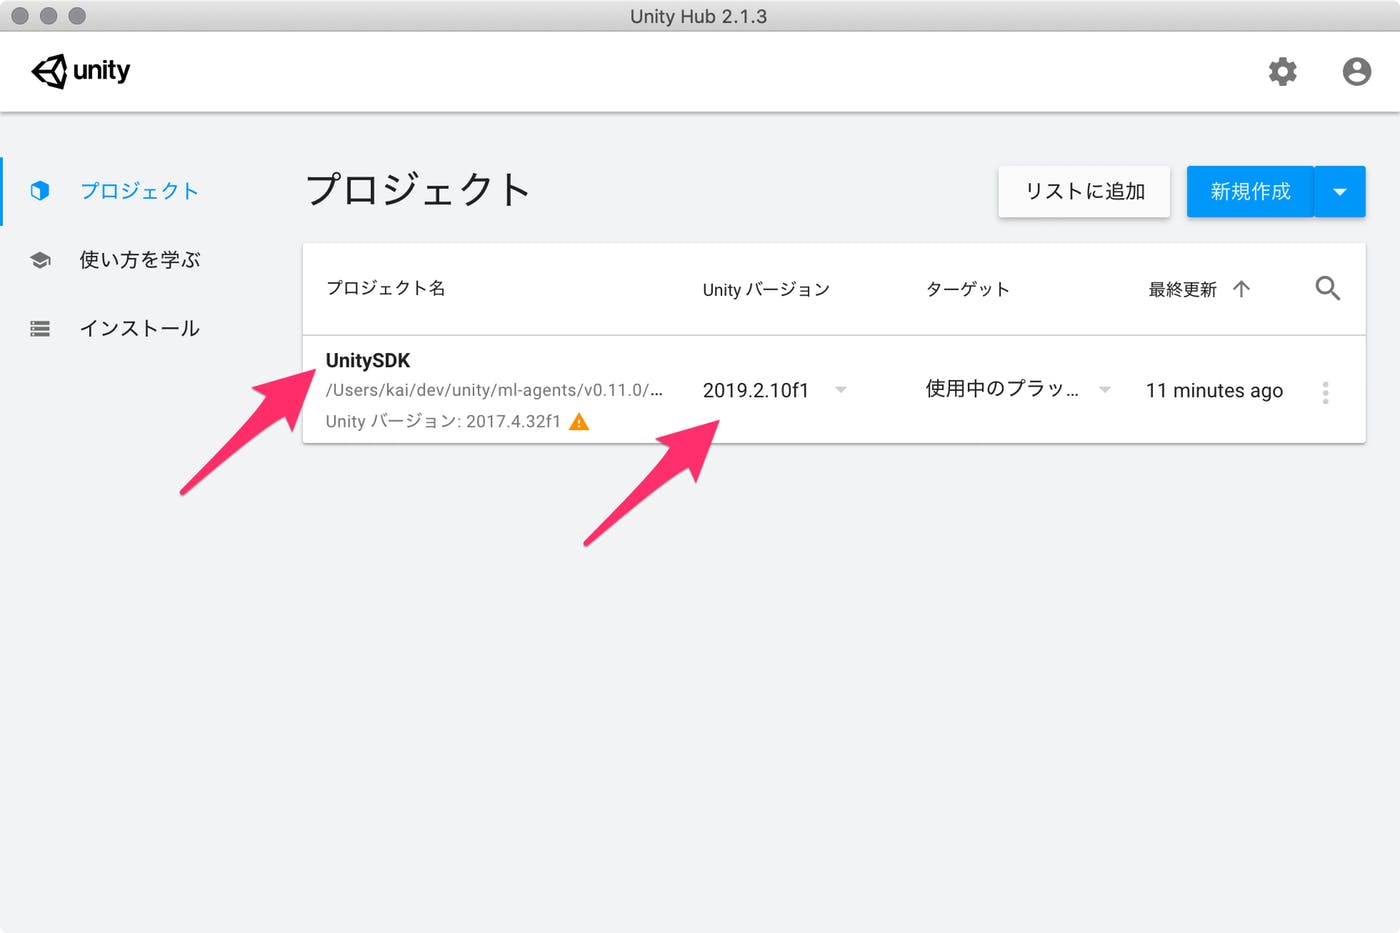
Unityエディタのバージョンによっては、アップグレードするかの確認ダイアログが立ち上がります。
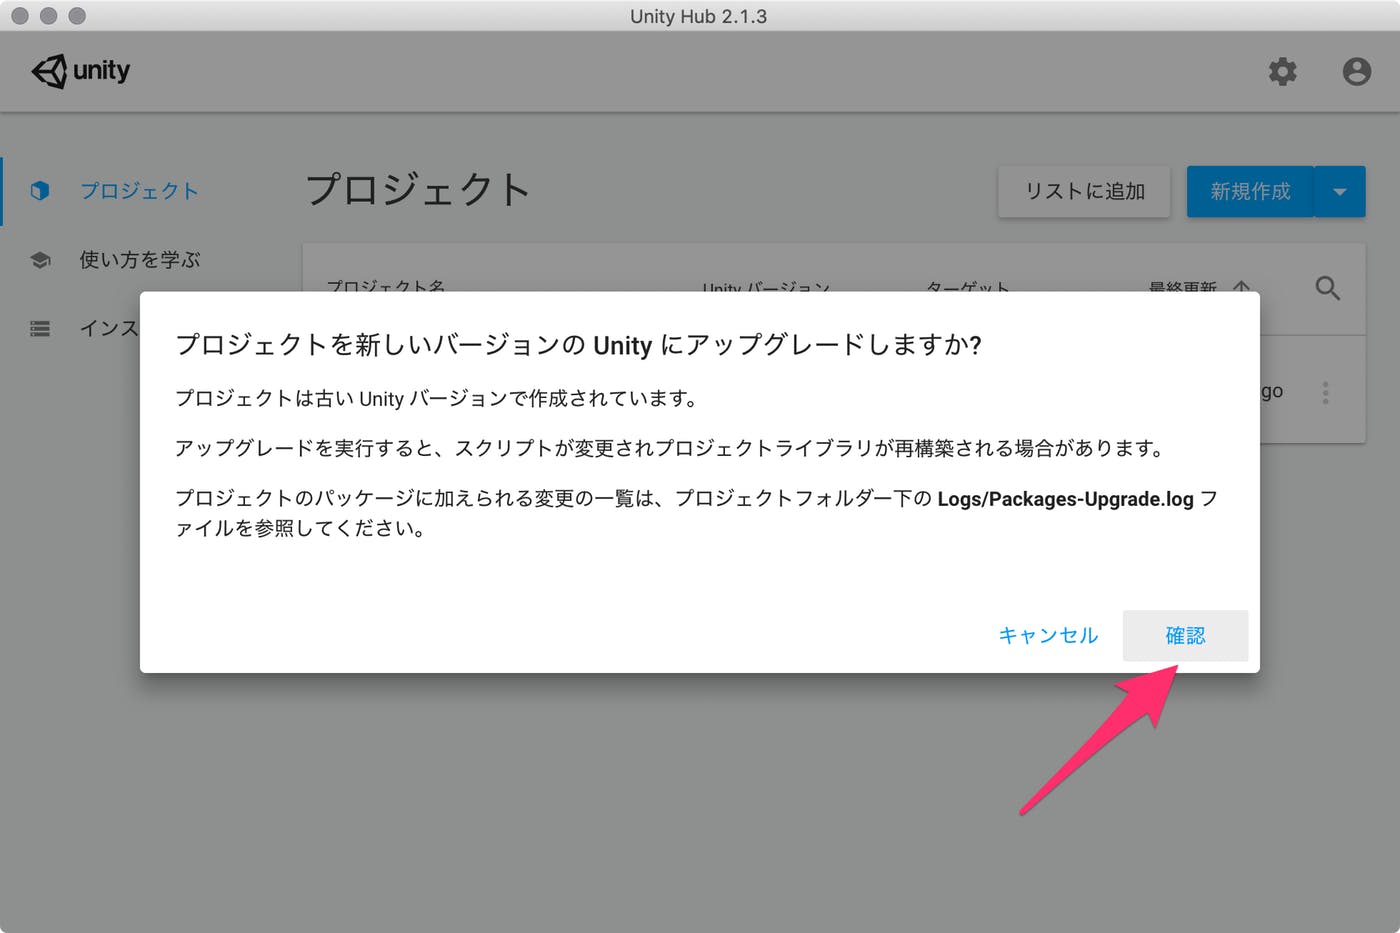
「確認」ボタンをクリックして進めます。アップグレード処理に少し時間がかかります。
Scenes(シーン)が開くか確認する
サンプルが動作するか、Unityでプロジェクトを読み込み、動作させてみます。
- Unityアプリの下パネルにある[Project]タブから以下のフォルダまで開く
- [Assets] > [ML-Agents] > [Examples] > [3DBall] > [Scenes]
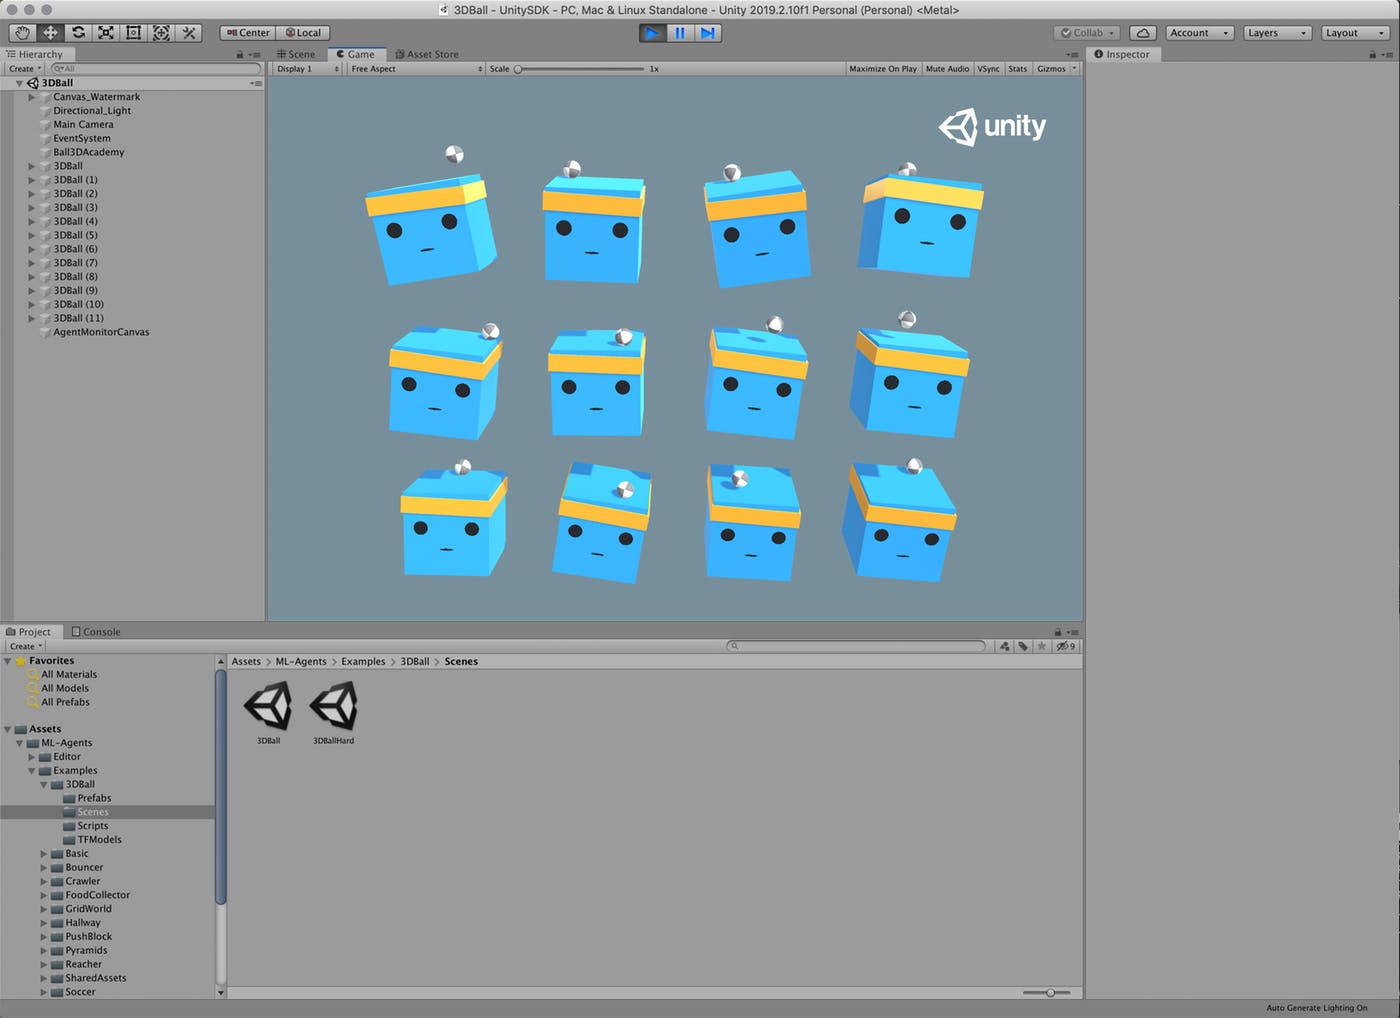
- 開いたら、[3DBall]ファイルがあるので、ダブルクリックして開く
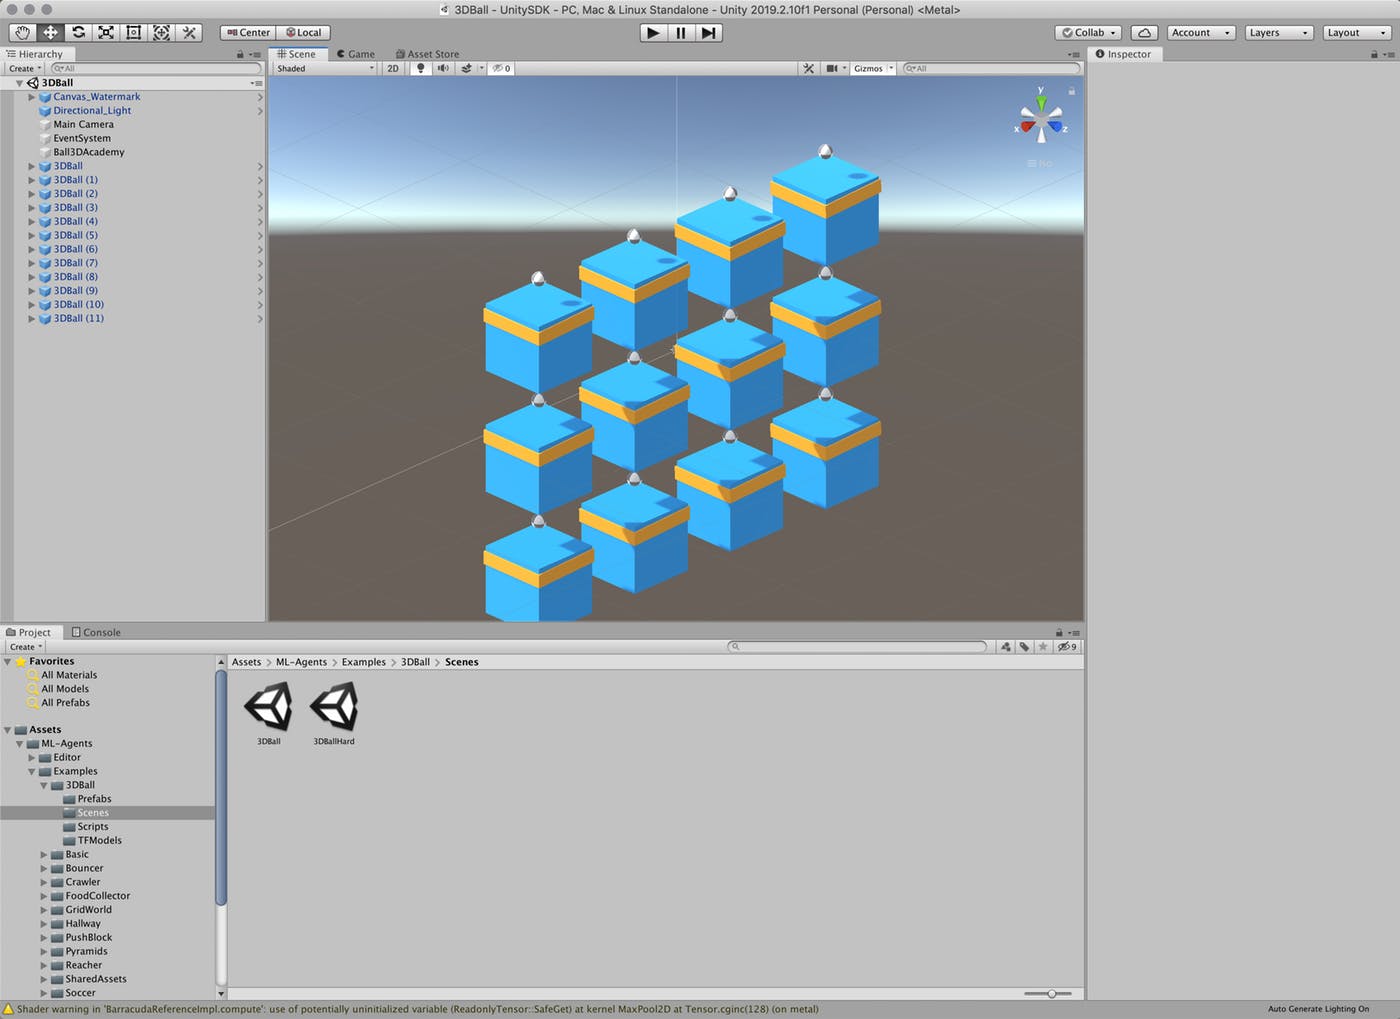
なんかでてきたー(感動
Unityの上にある再生ボタンをクリックします。
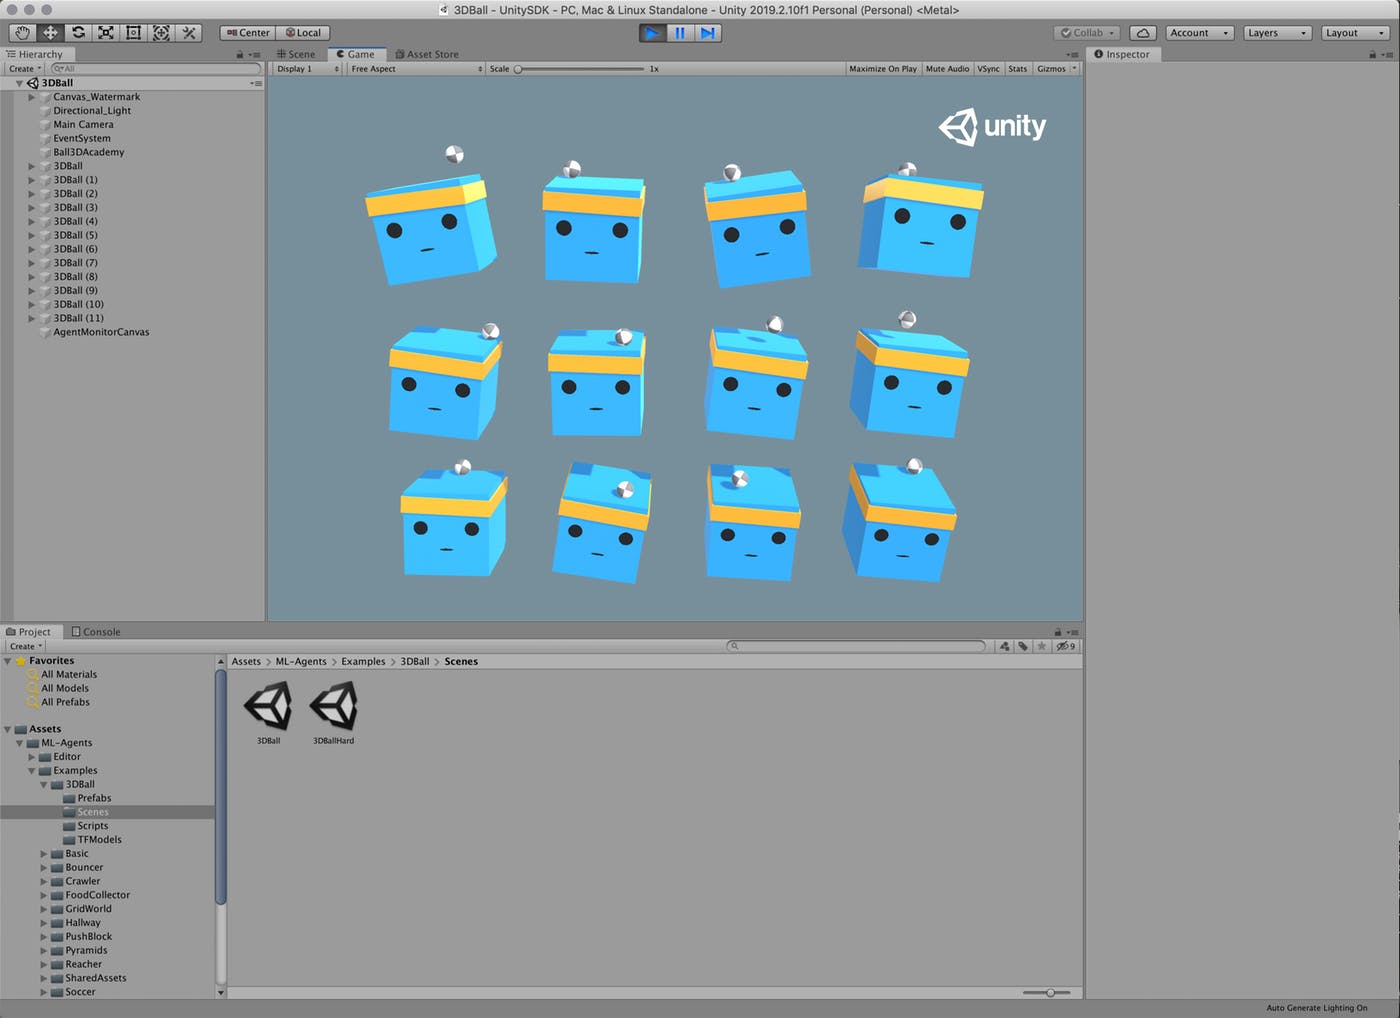
なんかうごいたー(感動
そして、かわいくなってるwww
読み込んだサンプルが動作することを確認できました。
現時点ではボールがボックス?からすぐに落ちてしまいます。これを機械学習で、落とさないようにさせるわけです。
Scenes(シーン)の設定
ML-Agentsで学習させるための設定です。
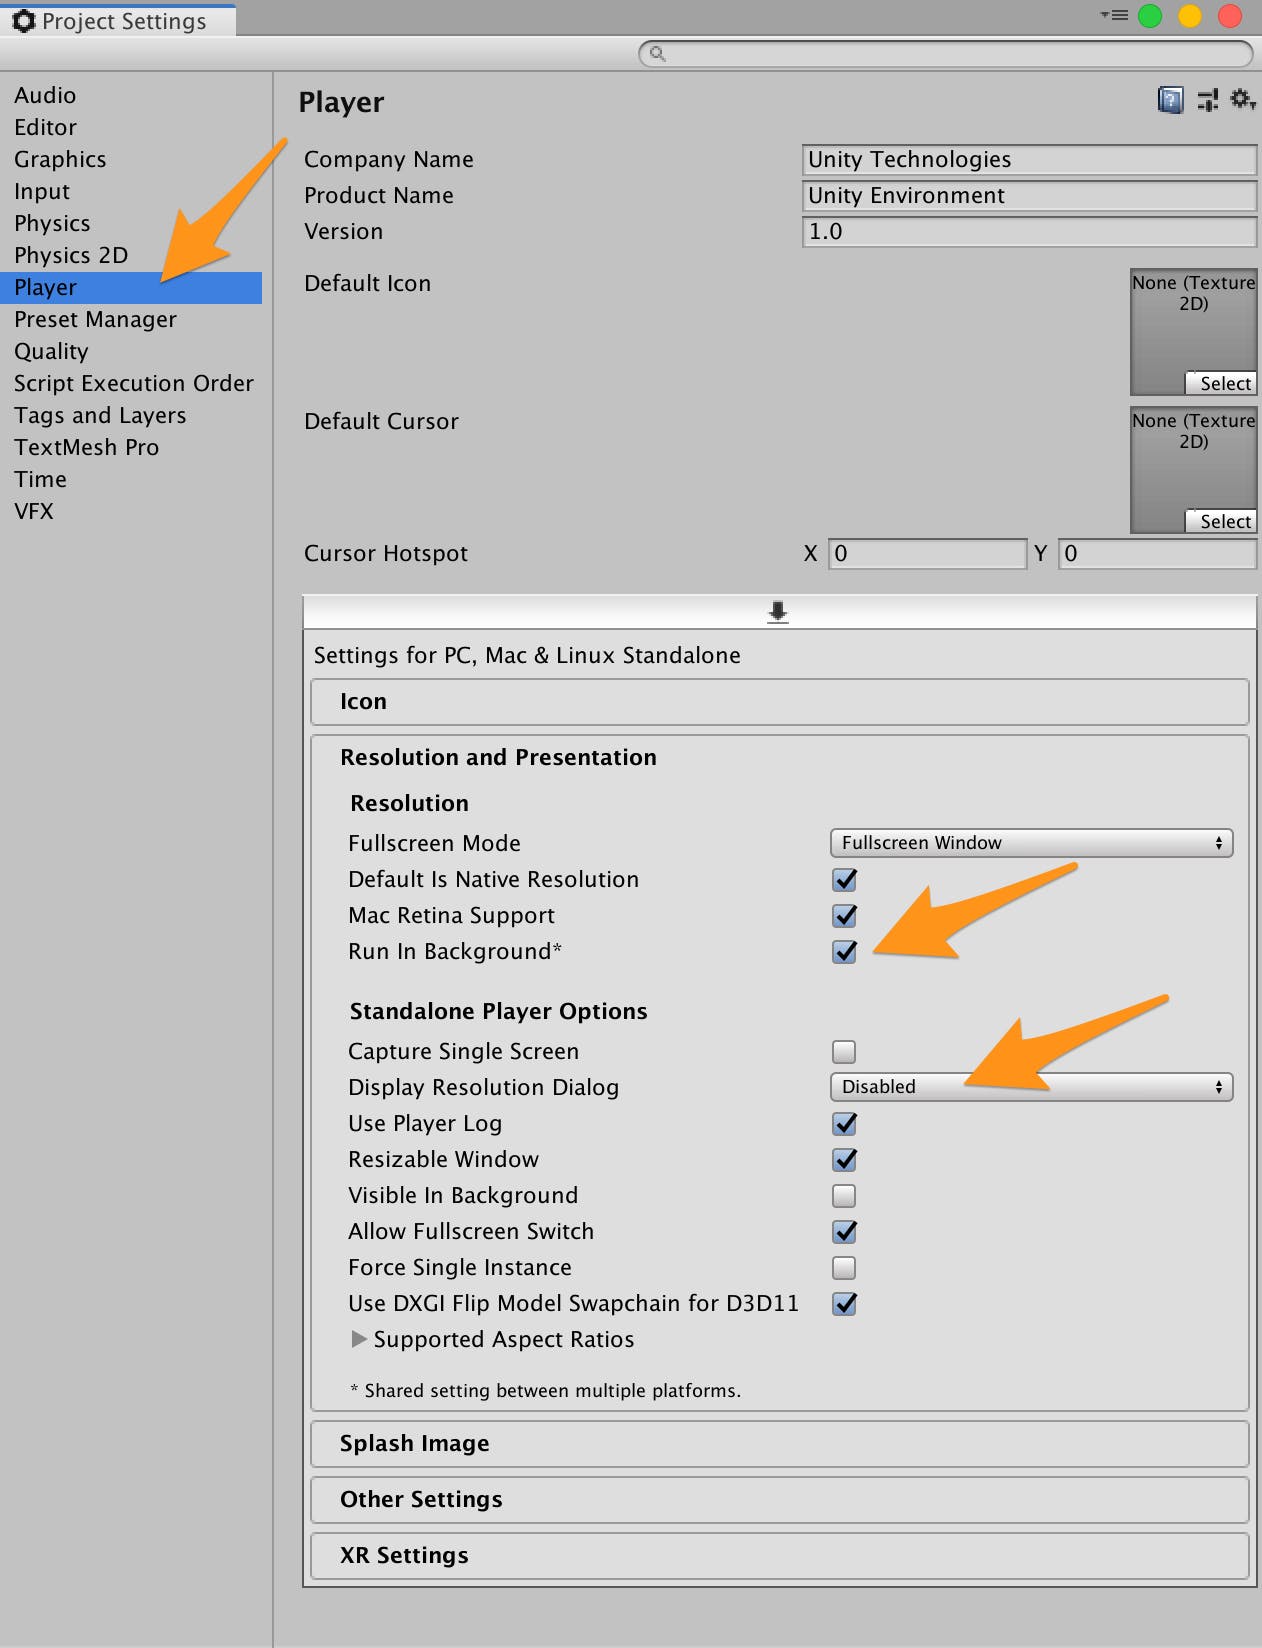
- Unityアプリの[Edit]メニューから[Project Settings]を開く
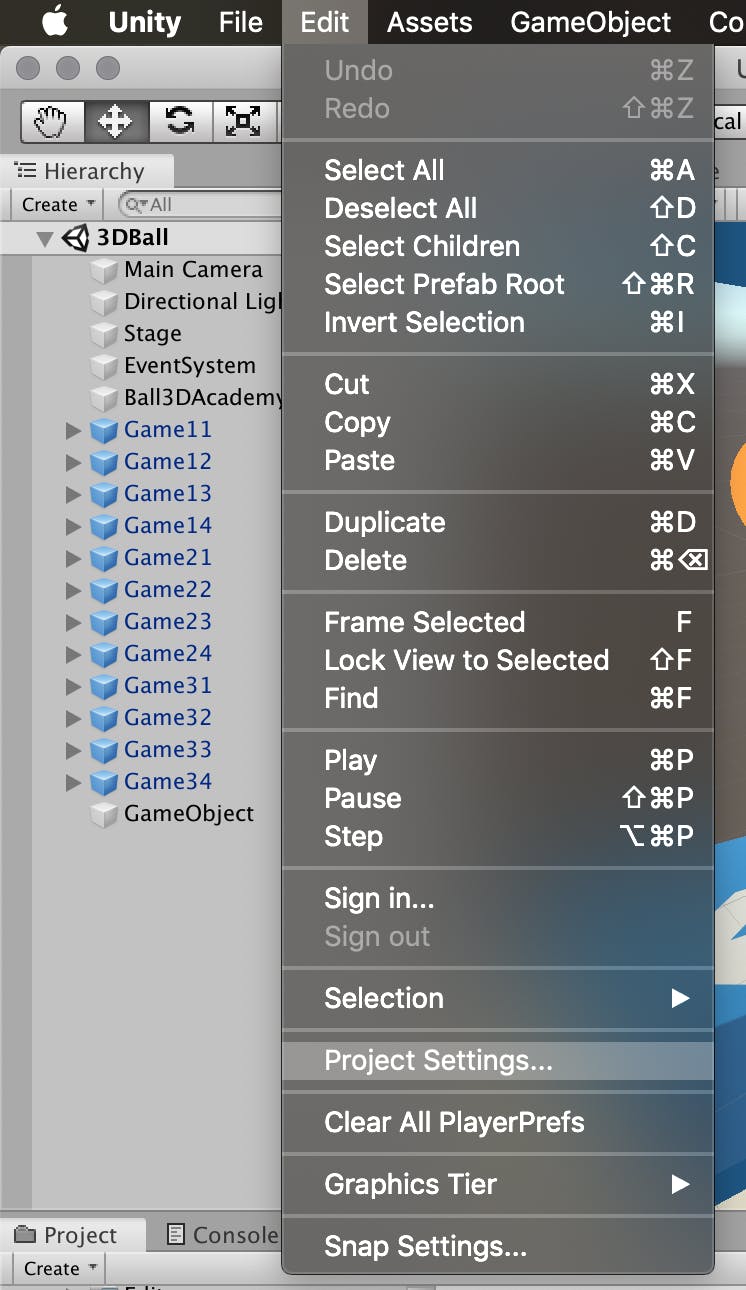
- [Inspector]パネルで以下の設定を確認する
- [Resolution and Presentation]の[Run In Background]がチェックされている
- [Display Resolution Dialog]がDisableになっている
学習させる
学習に必要な設定ができましたので、Unityアプリ上で学習させてみます。
コマンドの実行
コンソールに戻り、学習開始のコマンドを実行します。オプションは結構数がありますが、最低限を指定します。
> cd 適当なディレクトリ
> mlagents-learn ml-agents/config/trainer_config.yaml --train

WARNING:tensorflow:
The TensorFlow contrib module will not be included in TensorFlow 2.0.
For more information, please see:
  * https://github.com/tensorflow/community/blob/master/rfcs/20180907-contrib-sunset.md
  * https://github.com/tensorflow/addons
  * https://github.com/tensorflow/io (for I/O related ops)
If you depend on functionality not listed there, please file an issue.


                        ▄▄▄▓▓▓▓
                   ╓▓▓▓▓▓▓█▓▓▓▓▓
              ,▄▄▄m▀▀▀'  ,▓▓▓▀▓▓▄                           ▓▓▓  ▓▓▌
            ▄▓▓▓▀'      ▄▓▓▀  ▓▓▓      ▄▄     ▄▄ ,▄▄ ▄▄▄▄   ,▄▄ ▄▓▓▌▄ ▄▄▄    ,▄▄
          ▄▓▓▓▀        ▄▓▓▀   ▐▓▓▌     ▓▓▌   ▐▓▓ ▐▓▓▓▀▀▀▓▓▌ ▓▓▓ ▀▓▓▌▀ ^▓▓▌  ╒▓▓▌
        ▄▓▓▓▓▓▄▄▄▄▄▄▄▄▓▓▓      ▓▀      ▓▓▌   ▐▓▓ ▐▓▓    ▓▓▓ ▓▓▓  ▓▓▌   ▐▓▓▄ ▓▓▌
        ▀▓▓▓▓▀▀▀▀▀▀▀▀▀▀▓▓▄     ▓▓      ▓▓▌   ▐▓▓ ▐▓▓    ▓▓▓ ▓▓▓  ▓▓▌    ▐▓▓▐▓▓
          ^█▓▓▓        ▀▓▓▄   ▐▓▓▌     ▓▓▓▓▄▓▓▓▓ ▐▓▓    ▓▓▓ ▓▓▓  ▓▓▓▄    ▓▓▓▓`
            '▀▓▓▓▄      ^▓▓▓  ▓▓▓       └▀▀▀▀ ▀▀ ^▀▀    `▀▀ `▀▀   '▀▀    ▐▓▓▌
               ▀▀▀▀▓▄▄▄   ▓▓▓▓▓▓,                                      ▓▓▓▓▀
                   `▀█▓▓▓▓▓▓▓▓▓▌
                        ¬`▀▀▀█▓


INFO:mlagents.trainers:CommandLineOptions(debug=False, num_runs=1, seed=-1, env_path=None, run_id='ppo', load_model=False, train_model=True, save_freq=50000, keep_checkpoints=5, base_port=5005, num_envs=1, curriculum_folder=None, lesson=0, slow=False, no_graphics=False, multi_gpu=False, trainer_config_path='ml-agents/config/trainer_config.yaml', sampler_file_path=None, docker_target_name=None, env_args=None, cpu=False)
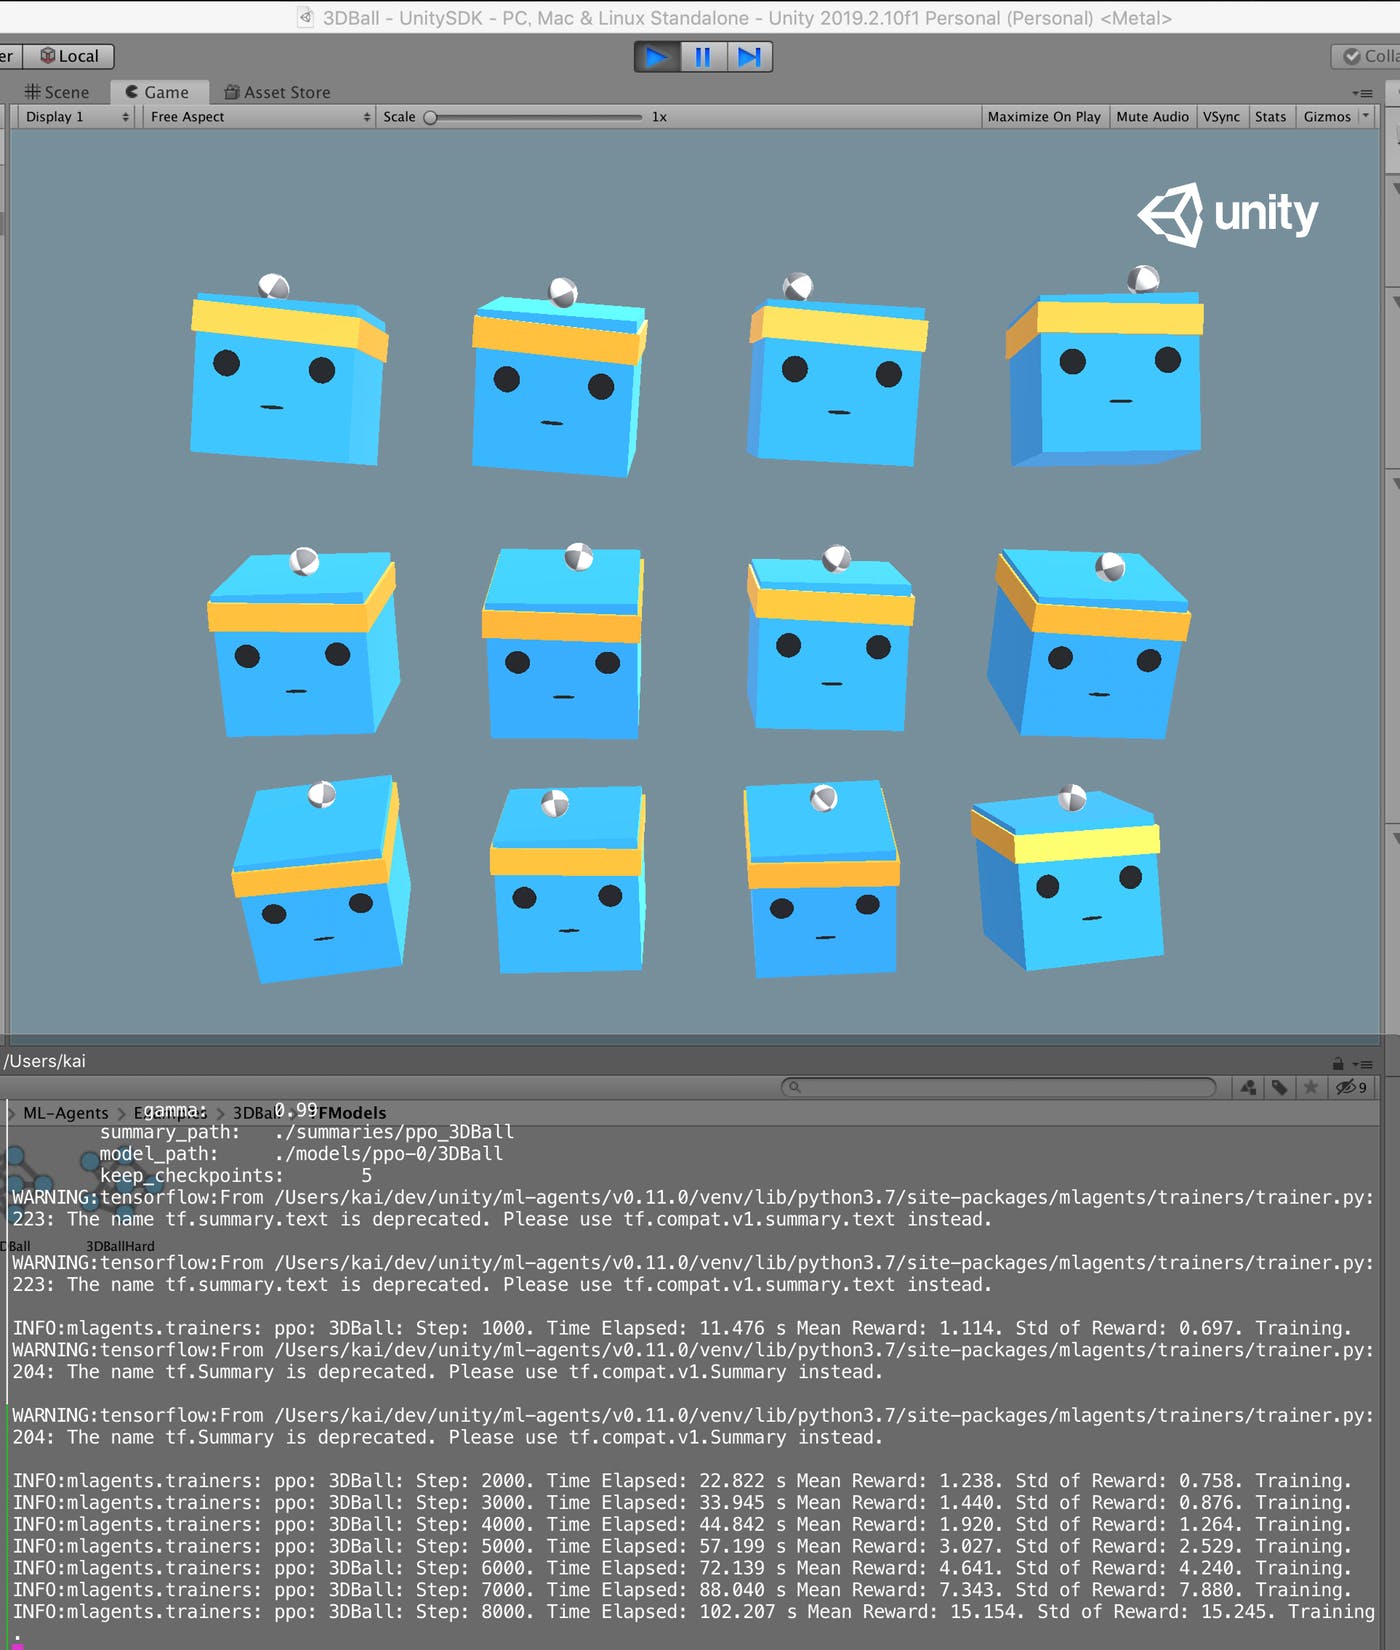
INFO:mlagents.envs:Start training by pressing the Play button in the Unity Editor.
INFO:mlagents.envs:Start training by pressing the Play button in the Unity Editor. と出力されたら、Unityアプリの上部にある[]ボタンをクリックします。初期設定だと50,000ステップ実行するので少々時間がかかります。
(略)
INFO:mlagents.trainers: ppo: 3DBall: Step: 2000. Time Elapsed: 22.201 s Mean Reward: 1.167. Std of Reward: 0.766. Training.
(略)
INFO:mlagents.trainers: ppo: 3DBall: Step: 10000. Time Elapsed: 113.151 s Mean Reward: 30.106. Std of Reward: 27.092. Training.
(略)
INFO:mlagents.trainers: ppo: 3DBall: Step: 49000. Time Elapsed: 542.744 s Mean Reward: 100.000. Std of Reward: 0.000. Training.
(略)
IGNORED: Cast unknown layer
IGNORED: StopGradient unknown layer
GLOBALS: 'is_continuous_control', 'version_number', 'memory_size', 'action_output_shape'
IN: 'vector_observation': [-1, 1, 1, 8] => 'sub_3'
IN: 'epsilon': [-1, 1, 1, 2] => 'mul_1'
OUT: 'action', 'action_probs'
DONE: wrote ./models/ppo-0/3DBall.nn file.
INFO:mlagents.trainers:Exported ./models/ppo-0/3DBall.nn file
Python 3.7.4で動作させているからか、TensorFlow 2.0だからなのか、WARNING が結構出力されますが、動作はしているので置いておきます。
学習結果をアプリに組み込む
学習が完了すると学習結果がmodels 配下に*.nnファイルとして保存されます。
それをUnityアプリに組み込むことで学習結果をUnityアプリに反映できます。
> tree models/
models/
└── ppo-0
    ├── 3DBall
    │   ├── checkpoint
    │   ├── frozen_graph_def.pb
    │   ├── model-50000.cptk.data-00000-of-00001
    │   ├── model-50000.cptk.index
    │   ├── model-50000.cptk.meta
    │   ├── model-50001.cptk.data-00000-of-00001
    │   ├── model-50001.cptk.index
    │   ├── model-50001.cptk.meta
    │   └── raw_graph_def.pb
    └── 3DBall.nn

2 directories, 10 files
Unityアプリの設定
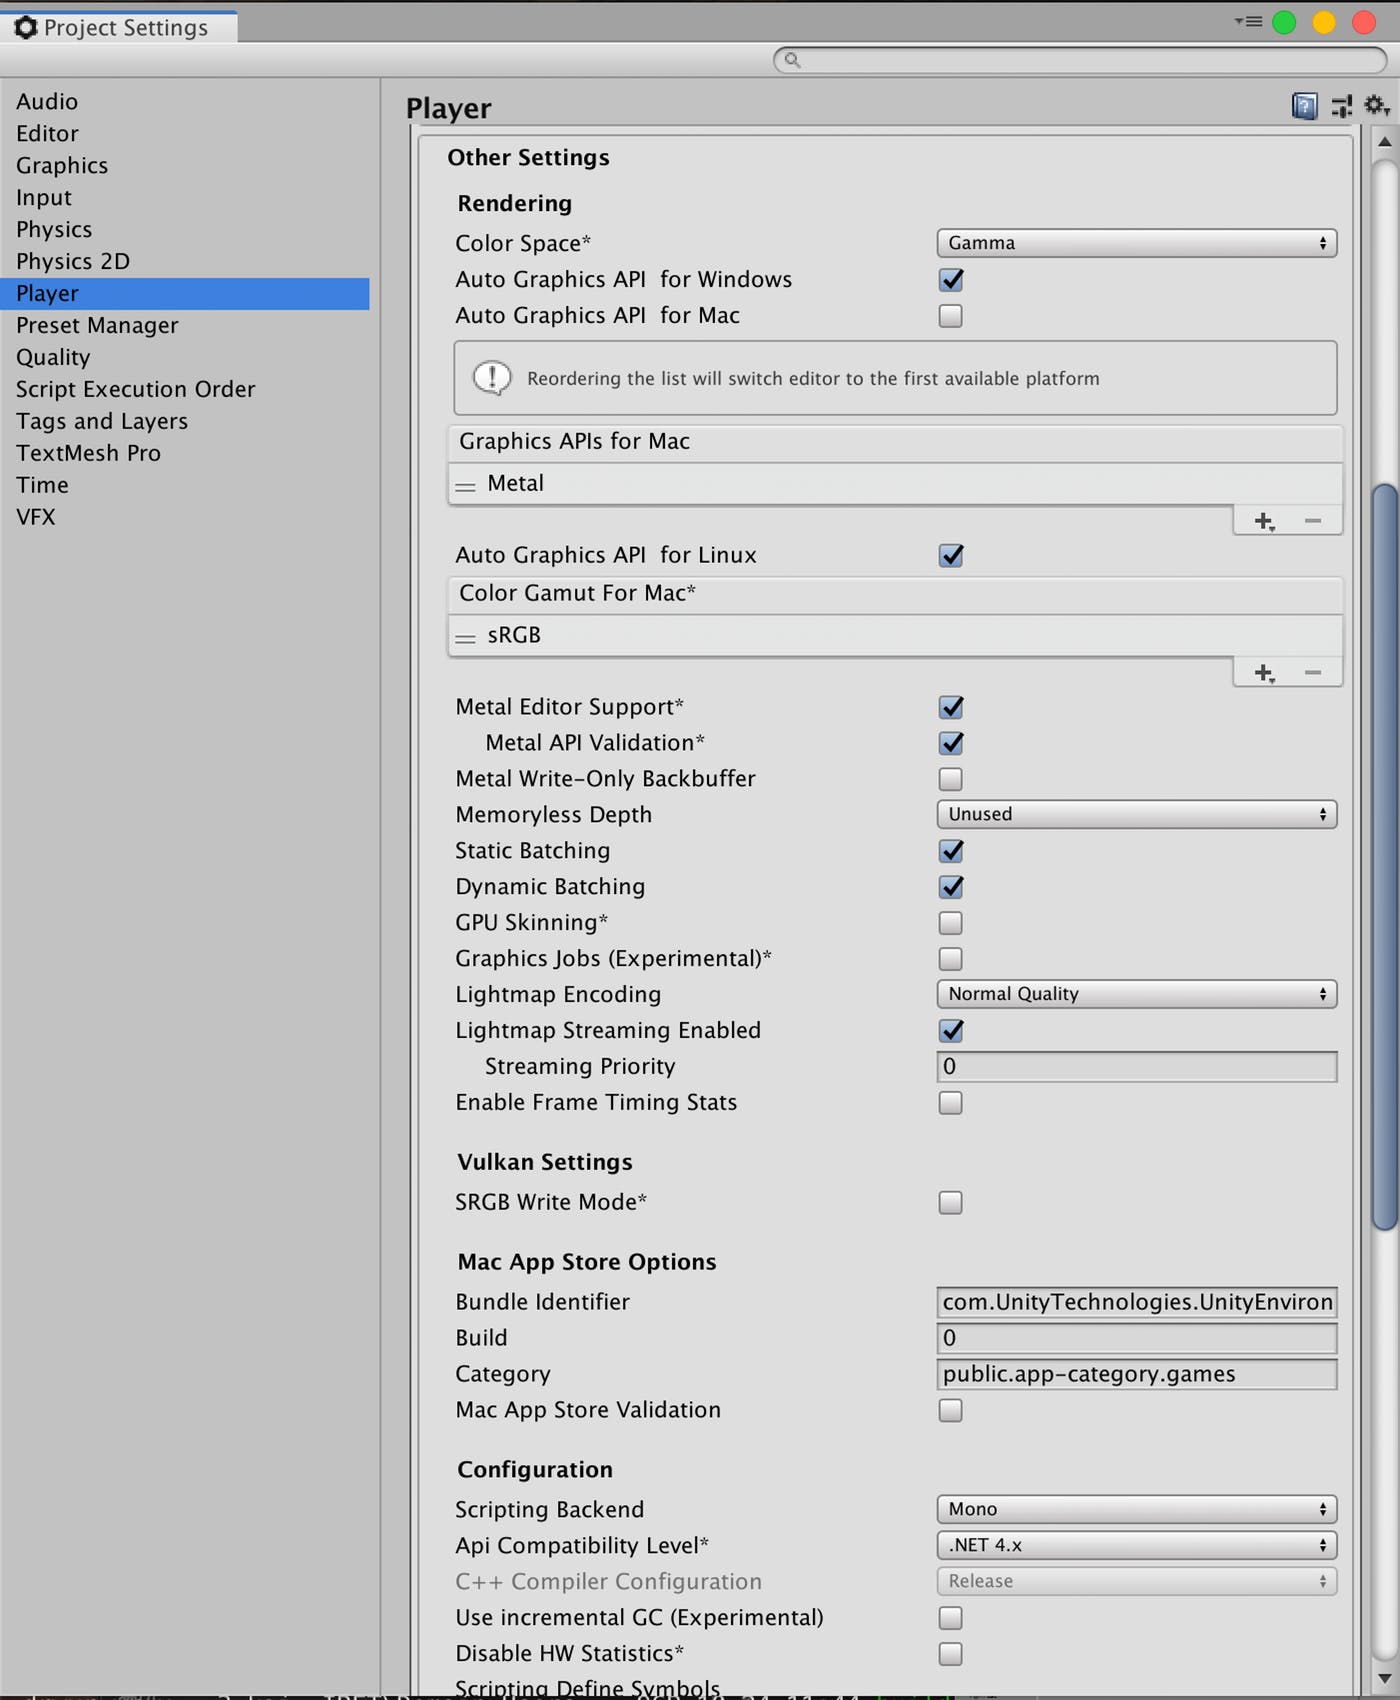
Playerの設定を行います。
- Unityアプリの[Edit]メニューから[Project Settings]を選択する
- [Inspector]ビューの[Other Settings]欄で以下を確認・設定する
- Scripting Backendが
Monoになっている - Api Conpatibility Levelが
.NET 4.xになっている
- Scripting Backendが
学習結果ファイルの取り込み
ターミナルかFinderで学習結果を以下フォルダにコピーします。
- 学習結果ファイル:
models/ppo-0/3DBall.nn - 保存先:
UnitySDK/Assets/ML-Agents/Examples/3DBall/TFModels/
※すでに保存先に3DBall.nnファイルが存在していますので、リネームします。
> cp models/ppo-0/3DBall.nn ml-agents/UnitySDK/Assets/ML-Agents/Examples/3DBall/TFModels/3DBall_new.nn
- Unityアプリの下パネルにある[Project]タブから以下のフォルダまで開く
- [Assets] > [ML-Agents] > [Examples] > [3DBall] > [Scenes]
- 開いたら、[3DBall]ファイルがあるので、ダブルクリックして開く
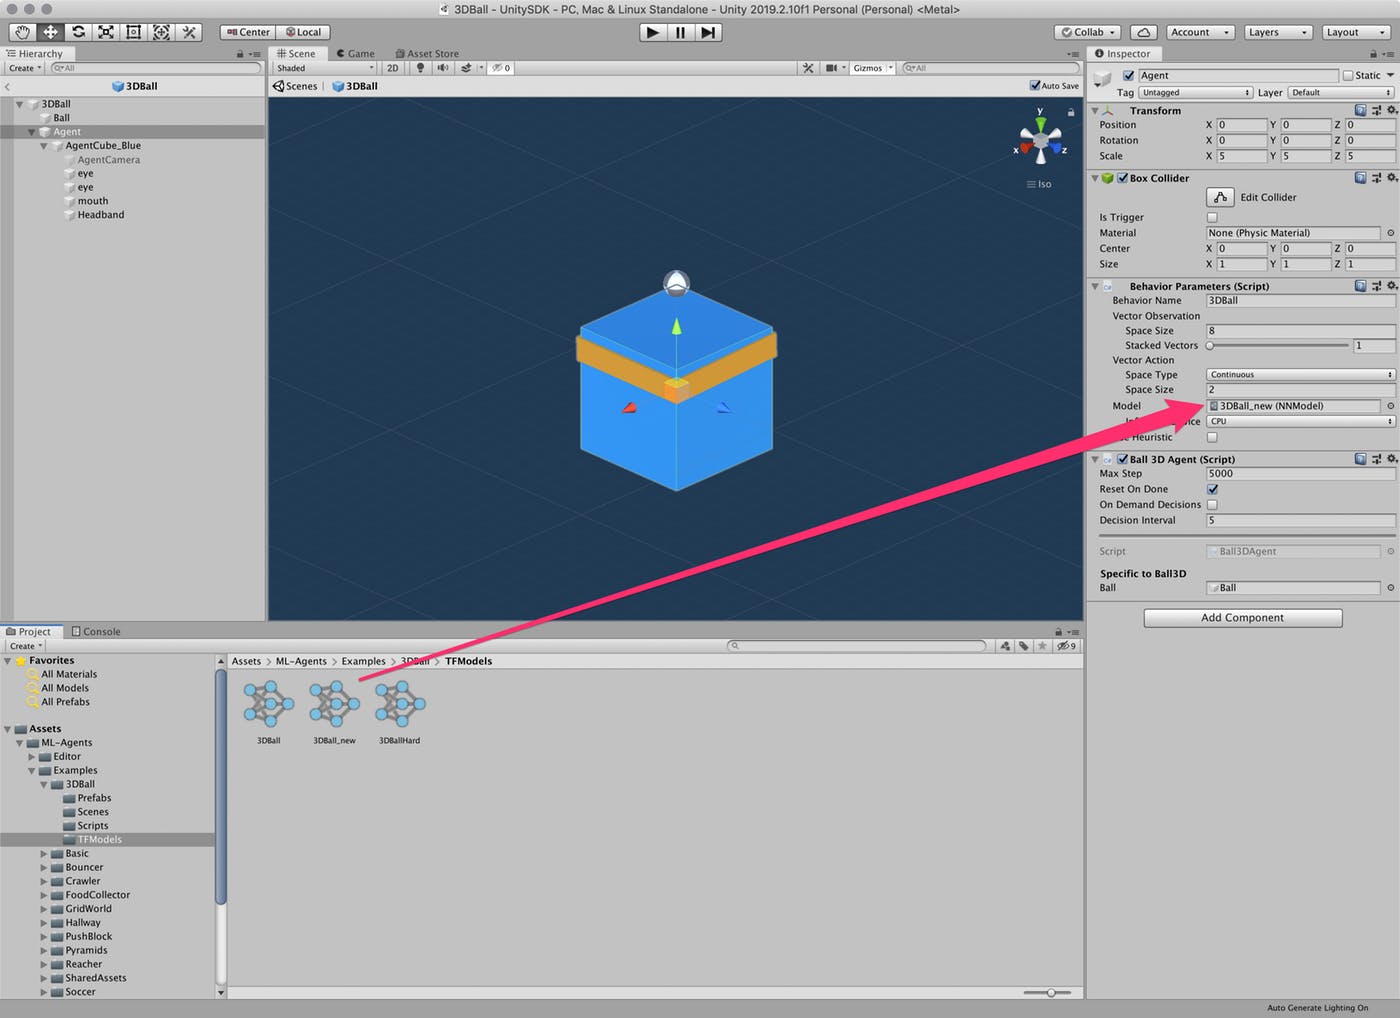
- [Hierarchy]パネルから[Agent]を選択する
- Unityアプリの[Project]パネルで以下フォルダを選択する
- [Assets] > [ML-Agents] > [Examples] > [3DBall] > [TFModels]
- Unityアプリの[Inspector]パネルにある[Model]という項目に[TFModels]フォルダ内の
3DBall_new.nnファイルをドラッグ&ドロップする
- Unity上部にある[▶]ボタンをクリックする
これで、学習結果が組み込まれた状態でアプリが起動します。
50,000ステップ学習すると動きが穏やかでもはやプロです。なんのプロかはわかりませんが^^
サンプルは他にもあるので、いろいろとお試しあれ。
ML-Agentsはv0.5.0くらいから触っていますがだいぶと利用方法がかんたんになってきていますが、v0.11.0ではさらに設定箇所が減っていて良い感じになっています。
参考
【Unity】Unityで機械学習する「ML-Agent」を色々と試して得た知見とか
http://tsubakit1.hateblo.jp/entry/2018/02/18/233000
Macでhomebrewを使ってUnityをインストールする(Unity Hub、日本語化対応)
https://cloudpack.media/42142
ml-agents/Installation.md at master · Unity-Technologies/ml-agents
https://github.com/Unity-Technologies/ml-agents/blob/master/docs/Installation.md
ml-agents/Basic-Guide.md at master · Unity-Technologies/ml-agents
https://github.com/Unity-Technologies/ml-agents/blob/master/docs/Basic-Guide.md#setting-up-ml-agents-within-unity
Release ML-Agents Beta 0.10.0 · Unity-Technologies/ml-agents
https://github.com/Unity-Technologies/ml-agents/releases/tag/0.10.0
MacでanyenvをつかってPython環境構築(bash、fish対応) – Qiita
https://cloudpack.media/42033
Macでhomebrewを使ってUnityをインストールする(Unity Hub、日本語化対応)
https://cloudpack.media/42142


