はじめに
こんにちは。cloudpack の インフラエンジニアレベル1の @f_prg (古渡) です。
zshとtmuxというツールを周りの方々が使っているので見習って使おうと思います。他の人からいただいたconfや、検索して調べてカスタマイズをしました。
tmuxのセットアップ
まずは、tmuxをセットアップします。
[f_prg@hexo-blog] $ brew install tmux
~/.tmux.confを用意します。
tmux.confファイルを、ホームフォルダの隠しファイルに保存します。
zshのセットアップ
brewによりインストールをします。
- zsh
- zsh-completion
- zsh-syntax-highlighting
[00:46:22][f_prg@mba:~]# brew install zsh
[01:12:21][f_prg@mba:~]# brew install zsh-completion
zsh-syntax-highlightingだけうまく入らなかったので、先にフォルダを作って対応しました。
後ほど記載してますが、~/.zshrcファイルでの指定方法があるのでインストールログを記載しておきます。
[01:24:59][f_prg@mba:~]# brew install zsh-completions
==> Downloading https://github.com/zsh-users/zsh-completions/archive/0.11.0.tar.
######################################################################## 100.0%
==> Caveats
To activate these completions, add the following to your .zshrc:
  fpath=(/usr/local/share/zsh-completions $fpath)
You may also need to force rebuild `zcompdump`:
  rm -f ~/.zcompdump; compinit
Additionally, if you receive "zsh compinit: insecure directories" warnings when attempting
to load these completions, you may need to run this:
  chmod go-w /usr/local/share
==> Summary
:beer:  /usr/local/Cellar/zsh-completions/0.11.0: 126 files, 1.1M, built in 4 seconds
[f_prg@/usr/local/share] $ brew install zsh-syntax-highlighting
==> Downloading https://github.com/zsh-users/zsh-syntax-highlighting/archive/0.2
Already downloaded: /Library/Caches/Homebrew/zsh-syntax-highlighting-0.2.0.tar.gz
==> Caveats
To activate the syntax highlighting, add the following at the end of your .zshrc:
  source /usr/local/share/zsh-syntax-highlighting/zsh-syntax-highlighting.zsh
You will also need to force reload of your .zshrc:
  source ~/.zshrc
Additionally, if your receive "highlighters directory not found" error message,
you may need to add the following to your .zshenv:
  export ZSH_HIGHLIGHT_HIGHLIGHTERS_DIR=/usr/local/share/zsh-syntax-highlighting/highlighters
==> Summary
:beer:  /usr/local/Cellar/zsh-syntax-highlighting/0.2.0: 33 files, 160K, built in 2 seconds
~/.zshrcを用意します。
zshrcファイルを、ホームフォルダの隠しファイルに保存します。
まとめ
インストールしたところ、こうなりました。今後の作業が楽になりそうです。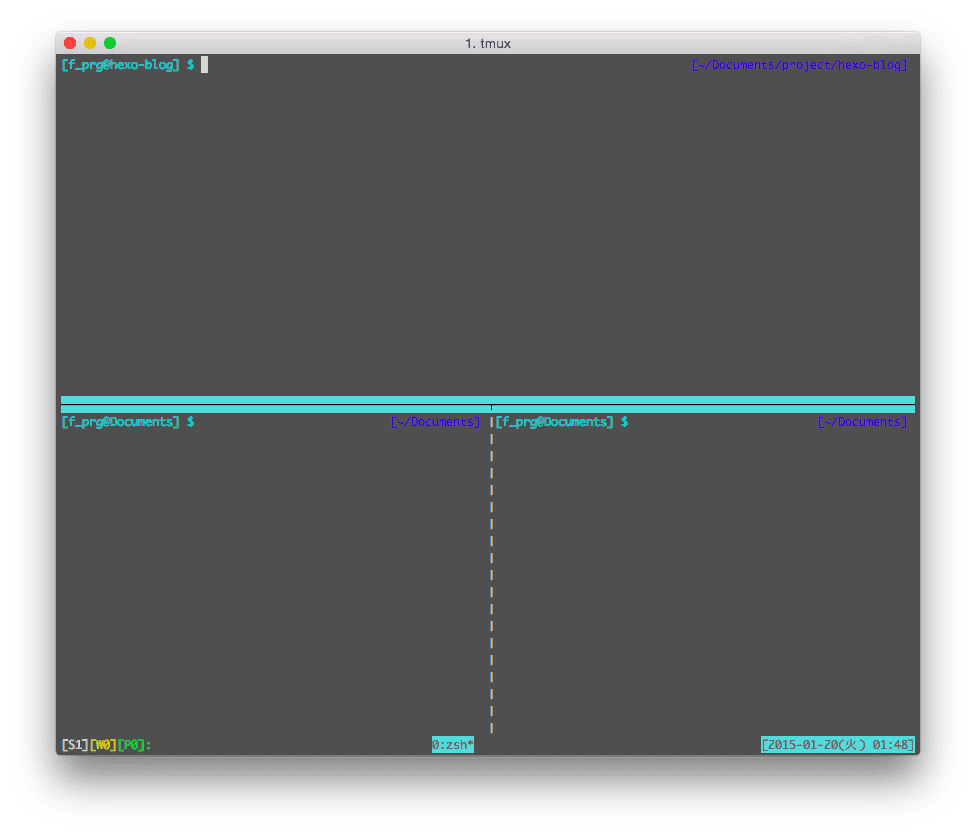
補足、おまけ
今回は、いろいろ集めて組み合わせているのでconfファイルは載せておりません。
参考資料・リンク
元記事はこちらです。
「zsh と tmuxを初めて触ってみました」