
これは「初老丸の独り Advent calendar 2015」の五日目の記事です。
tl;dr
昨日の続きAmazon Elasticsearch Service では自動でスナップショットを作成してくれるが、手動でスナップショットを取ったり、レストアしたりしてみる。
手動でスナップショットを取得する
参考
ざっくり手順
- S3 Bucket 作る
- IAM role 作る
- IAM role にポリシーアタッチ
- スナップショットレジストリの登録
- スナップショット作成
以下の教材を利用して進める。
terraform で作る S3 Bucket と IAM role
- 準備
$ git clone https://github.com/inokappa/oreno-soramame-amazon_es.git
$ cd oreno-soramame-amazon_es/snapshot/terraform
$ mv Makefile.sample Makefile
$ vim Makefile

# アクセスキーとシークレットアクセスキー、S3 バケットを環境に応じて設定する
PLAN         := terraform plan -var 'access_key=AKxxxxxxxxxxxxxxxxxxx' -var 'secret_key=xxxxxxxxxxxxxxxxxxxxxxxxxxxxxxxxxxxxxxxx' -var 's3_bucket_name=your-bucket-name'
APPLY        := terraform apply -var 'access_key=AKxxxxxxxxxxxxxxxxxx' -var 'secret_key=xxxxxxxxxxxxxxxxxxxxxxxxxxxxxxxxxxxxxxxx' -var 's3_bucket_name=your-bucket-name'
- 作成
$ make tf-plan
$ make tf-apply
以下のように出力される。
aws_s3_bucket.oreno_bucket: Refreshing state... (ID: oreno-es-index-backup)
aws_iam_role.oreno_es_role: Refreshing state... (ID: oreno_es_role)
aws_iam_role_policy.oreno_es_policy: Refreshing state... (ID: oreno_es_role:oreno_es_policy)
aws_iam_instance_profile.oreno_es_profile: Refreshing state... (ID: oreno_es_profile)

Apply complete! Resources: 0 added, 0 changed, 0 destroyed.

Outputs:

  IAM Role  = arn:aws:iam::xxxxxxxxxxxx:role/oreno_es_role
  S3 bucket = your-bucket-name
スナップショット用のレジストリを登録する
- コマンドを Docker build する
$ cd oreno-soramame-amazon_es/snapshot/
$ mv Makefile.sample Makefile
$ vim Makefile

#
# ES_HOST には Amazon ES のエンドポイント
# ES_SNAPSHOT にはスナップショットのレジストリ名
# ES_SNAPSHOT_NAME_PREFIX にはスナップショット名
#
DOCKER_BUILD        := docker build --no-cache=true -t oreno-es-index-snapshot .
DOCKER_RUN_REGIST   := docker run --rm --name oreno-es-index-snapshot --env "ES_HOST=search-xxxxxxxxxxxxxxxxxxxxxxxxxxxxxxxxxx.ap-northeast-1.es.amazonaws.com" --env "ES_SNAPSHOT=your-snapshot" -v `pwd`:/tmp -v /etc/localtime:/etc/localtime:ro oreno-es-index-snapshot regist
DOCKER_RUN_CREATE   := docker run --rm --name oreno-es-index-snapshot --env "ES_HOST=search-xxxxxxxxxxxxxxxxxxxxxxxxxxxxxxxxxx.ap-northeast-1.es.amazonaws.com" --env "ES_SNAPSHOT=your-snapshot" --env "ES_SNAPSHOT_NAME_PREFIX=your-snapshot" -v `pwd`:/tmp -v /etc/localtime:/etc/localtime:ro oreno-es-index-snapshot create
DOCKER_RUN_LIST     := docker run --rm --name oreno-es-index-snapshot --env "ES_HOST=search-xxxxxxxxxxxxxxxxxxxxxxxxxxxxxxxxxx.ap-northeast-1.es.amazonaws.com" --env "ES_SNAPSHOT=your-snapshot" -v `pwd`:/tmp -v /etc/localtime:/etc/localtime:ro oreno-es-index-snapshot list

# Makefile を修正後に build を実行する
$ make build
- スナップショットのレジストリを登録する
$ make snapshot-regist
正常に作成されれば以下のように出力される。
code => 200
msg  => OK
body => {"acknowledged":true}
スナップショット作成
$ make snapshot-create
正常に作成されると以下のように出力される。
code => 200
msg  => OK
body => {"accepted":true}
スナップショット名は oreno-es-snapshot_${UNIX_TIME} となる。
スナップショット一覧を確認
$ make snapshot-list
code => 200
msg  => OK
body => {
  "snapshots" : [ {
    "snapshot" : "oreno-snapshot",
    "indices" : [ "pm25_2015-12-04", ".kibana-4", "pm25_2015-12-03" ],
    "state" : "SUCCESS",
    "start_time" : "2015-12-05T01:05:14.218Z",
    "start_time_in_millis" : 1449277514218,
    "end_time" : "2015-12-05T01:05:26.567Z",
    "end_time_in_millis" : 1449277526567,
    "duration_in_millis" : 12349,
    "failures" : [ ],
    "shards" : {
      "total" : 11,
      "failed" : 0,
      "successful" : 11
    }

(snip)

    "snapshot" : "oreno-es-snapshot_1449300324",
    "indices" : [ "pm25_2015-12-04", ".kibana-4", "pm25_2015-12-03" ],
    "state" : "SUCCESS",
    "start_time" : "2015-12-05T07:25:24.341Z",
    "start_time_in_millis" : 1449300324341,
    "end_time" : "2015-12-05T07:25:28.326Z",
    "end_time_in_millis" : 1449300328326,
    "duration_in_millis" : 3985,
    "failures" : [ ],
    "shards" : {
      "total" : 11,
      "failed" : 0,
      "successful" : 11
    }
  } ]
}
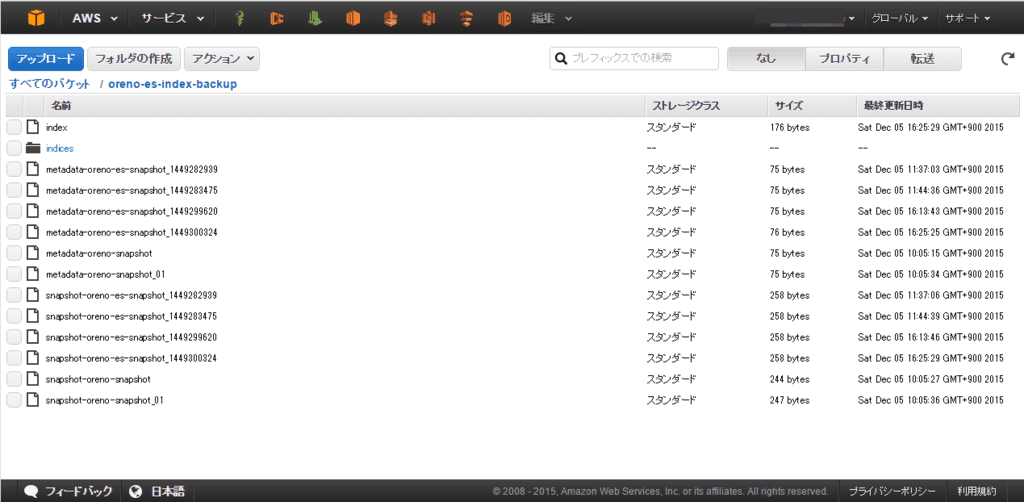
一応、S3 でも確認。
スナップショットからレストアする
新しいドメインでクラスタを構築する
こちらを参考に新しいクラスタを構築してエンドポイント名を控えておく。
https://search-oreno-es-restore-xxxxxxxxxxxxxxxxxxxxxxxxxx.ap-northeast-1.es.amazonaws.com
新しいドメインにもスナップショットレジストリを登録
$ docker run --rm
>   --name oreno-es-index-snapshot
>   --env "ES_HOST=search-oreno-es-restore-xxxxxxxxxxxxxxxxxxxxxxxxxx.ap-northeast-1.es.amazonaws.com"
>   --env "ES_SNAPSHOT=your-snapshot"
>   -v `pwd`:/tmp -v /etc/localtime:/etc/localtime:ro
>   oreno-es-index-snapshot regist
code => 200
msg  => OK
body => {"acknowledged":true}
ES_SNAPSHOT は先ほどスナップショットを作成した際に登録したスナップショット名に合わせておく。
レストア
元のインデックスを念のために確認。
$ curl -s -XGET https://search-oreno-es-xxxxxxxxxxxxxxxxxxxxxxxxxx.ap-northeast-1.es.amazonaws.com/_status | jq -r '.indices|keys[]'
.kibana-4
pm25_2015-12-03
pm25_2015-12-04
レストアする。
$ curl -XPOST 'https://search-oreno-es-restore-xxxxxxxxxxxxxxxxxxxxxxxxxx.ap-northeast-1.es.amazonaws.com/_snapshot/your-snapshot/oreno-es-snapshot_1449300324/_restore'
{"accepted":true}
レストアしたインデックスを確認する。
$ curl -s -XGET https://search-oreno-es-restore-xxxxxxxxxxxxxxxxxxxxxxxxxx.ap-northeast-1.es.amazonaws.com/_status | jq -r '.indices|keys[]'
.kibana-4
pm25_2015-12-03
pm25_2015-12-04
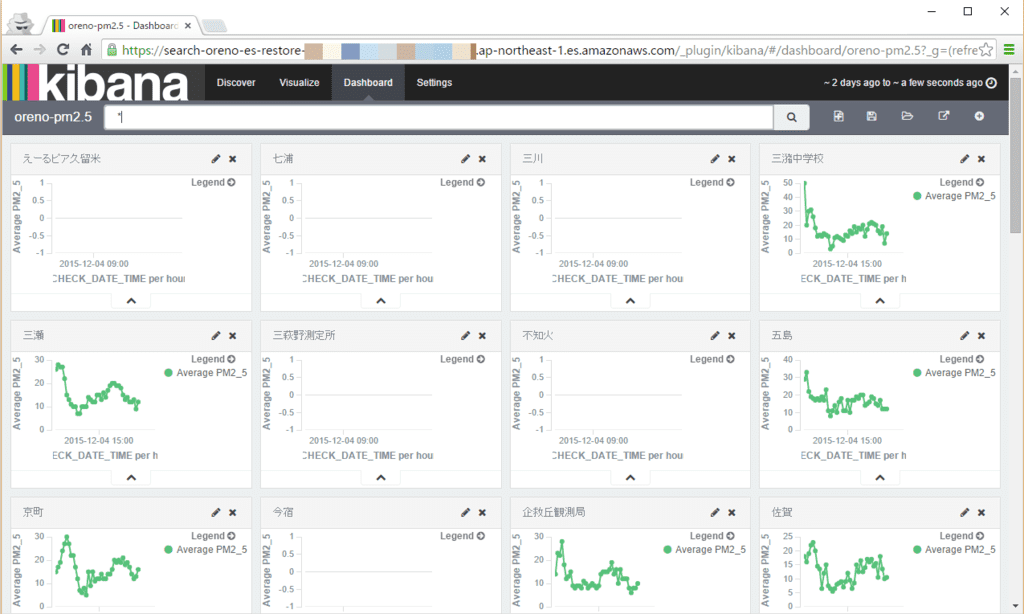
レストアできた。念のために Kibana でも確認してみる。
おまけ
ダメ元で試してみた elasticsarch-head が動かなかった
Elasticsearch を使う際には必ずと言っていいほどインストールしていた elasticsearch-head を Amazon ES でも使いたいと思っていたら眠れなくなったのでダメ元で手元の環境にインストール済みのelasticsearch-head に Amazon ES のエンドポイントを入れて試してみた。
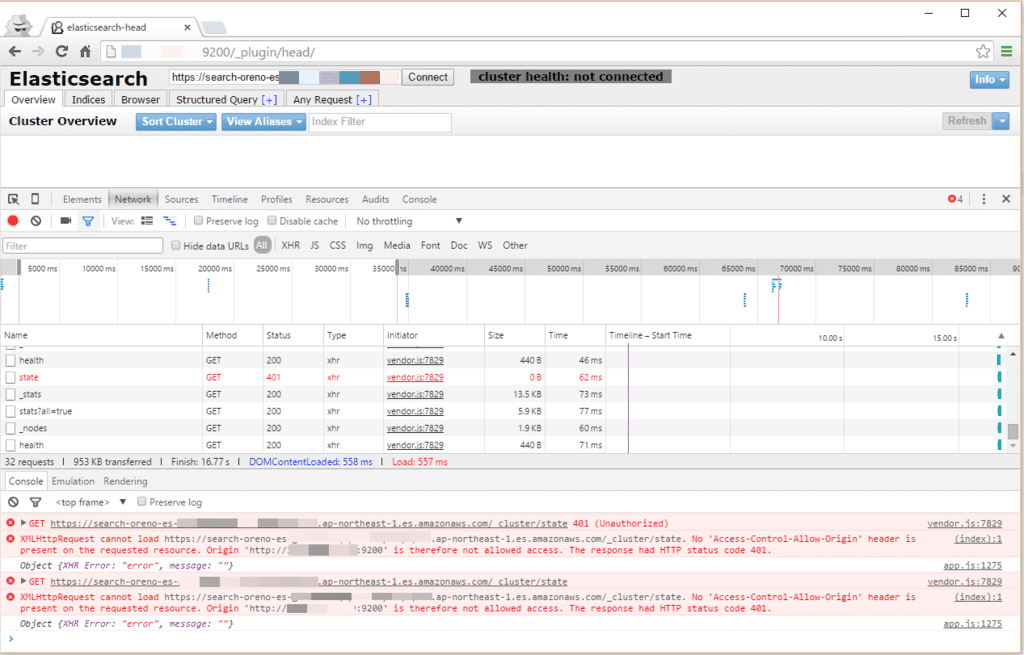
やっぱり駄目だった。
たぶん、理由は以下の通り。
- CORS になってしまう(No ‘Access-Control-Allow-Origin’ header is present on the requested resource. ってエラーが出る)
- よく見ると Cluster API の State が Amazon ES ではサポートされていない
Cluster API を叩いて違いを見てみる。
- 手元の Elasticsearch
$ curl -XGET 'http://localhost:9200/_cluster/state' | jq .
{
  "allocations": [],
  "cluster_name": "elasticsearch",
  "version": 34,
  "master_node": "iyzCUtV9R2yBr_0dniDSBg",
  "blocks": {},
  "nodes": {
    "iyzCUtV9R2yBr_0dniDSBg": {
      "attributes": {},

(snip)

        "unassigned_info": {
          "at": "2015-12-02T23:35:16.589Z",
          "reason": "CLUSTER_RECOVERED"
        },
        "index": "kibana-int",
        "shard": 2,
        "relocating_node": null,
        "node": null,
        "primary": false,
        "state": "UNASSIGNED"
      }
    ]
  }
}
- Amazon ES の場合
$ curl -s -XGET 'https://search-oreno-es-xxxxxxxxxxxxxxxxxxxxxxxxxxxxxx.ap-northeast-1.es.amazonaws.com/_cluster/state' | jq .
{
  "Message": "Your request: '/_cluster/state' is not allowed."
}
はい、残念。
ちなみに、同じ Cluster API でも stats はサポートしている。
$ curl -s -XGET 'https://search-oreno-es-xxxxxxxxxxxxxxxxxxxxxxxxxxxxxx.ap-northeast-1.es.amazonaws.com/_cluster/stats' | jq .
{
  "nodes": {
    "plugins": [
      {
        "site": false,
        "jvm": true,
        "description": "Cloud AWS Plugin",
        "version": "${project.version}",
        "name": "cloud-aws"
      },

(snip)

  "status": "yellow",
  "cluster_name": "251150836600:oreno-es",
  "timestamp": 1449267842610
}
以上
引き続き、Amazon ES を触っていきたい。
元記事はこちら
「(ショロカレ 5 日目)2015 年のうちにやっておきたい Amazon Elasticsearch Service 入門(2)~スナップショットとレストア~」