
簡単におもちゃの写真のようなCG画像の作り方 「Ubuntu / Linux」・Photo realistic rendering with LeoCAD & Blender
写真かCG?
はじめに
こんにちは streampack チームのメディです。
https://cloudpack.jp/service/option/streampack.html
Copyrights
Sintel
© copyright Blender Foundation | www.sintel.org
Big Buck Bunny
© copyright 2008, Blender Foundation | www.bigbuckbunny.org
LEGO® is a trademark of the LEGO Group of companies which does not sponsor, authorize or endorse the following softwares.
目的
LeoCADとBlenderの簡単な例を学ぶこと。
All those softwares are compatible with Linux, Windows & MacOS. As I didn’t find a lot of documentation for Linux I decided to focus this tutorial on Linux.
これらのソフトウェアはすべて、Linux、Windows、MacOSと互換性があります。 Linuxインストールのドキュメントが見つからなかったので、このチュートリアルをLinuxに焦点を合わせることにしました。
Tools・ ツール
- LeoCAD
- ldraw-parts
- Blender & ImportLDraw plugin
LeoCAD
LeoCAD is a free & open sources CAD software , you will be able to create scene easily with block parts using drag&drop. LeoCAD supports the ldraw file format.
LeoCADは無料でオープンソースのCADソフトウェアです。ドラッグ&ドロップを使用してブロックパーツで簡単にシーンを作成できます。 LeoCADはldrawファイル形式をサポートしています。
Blender
Blender is a free & open sources 3D modeler & renderer.
Movies like Sintel or Big Buck Bunny have been entirely made with Blender.
Blenderは、無料のオープンソースの3Dモデラーおよびレンダラーです。
SintelやBig Buck Bunnyなどの映画はすべてBlenderで作成されています。
Blender plugin
Blender will use this plugin to import .ldr files and to setup the rendering options.
Blenderはこのプラグインを使用して.ldrファイルをインポートし、レンダリングオプションを設定します。
Versions ・バージョン
In this tutorial I am using the following versions :
このチュートリアルでは、次のバージョンを使用しています。
| Software | Version |
|---|---|
| Ubuntu | 18.04 LTS |
| LeoCAD | 18.01 |
| Blender | 2.82 |
| ImportLDraw plugin | 1.1.11 for blender 2.81 |
Installation and common use cases ・ インストールと一般的な使用例
LeoCAD
sudo apt-get install leocad
By default, LeoCAD is provided with a limited number of block parts. We will install more parts in the next step.
デフォルトでは、LeoCADには限られた数のブロックパーツが用意されています。 次のステップでさらに部品をインストールします。
More block Parts ! より多くのパーツ!
The following command will install more blocks for LeoCAD.
次のコマンドは、LeoCADのブロックをさらにインストールします。
sudo apt-get install ldraw-parts
Checking the ldraw-parts install path :
ldraw-partsインストールパスの確認:
dpkg -L ldraw-parts
When you install this package with apt-get, the default block parts location will be /usr/share/ldraw
The ImportLDraw plugin is looking for parts in ~/mldraw
このパッケージをapt-getでインストールすると、デフォルトのブロックパーツの場所は/usr/share/ldrawになります。
ImportLDrawプラグインは、〜/mldraw内のパーツを探しています。
As the paths are different we need to create a symlink.
パスが異なるので、シンボリックリンクを作成する必要があります。
ln -s /usr/share/ldraw ~/ldraw
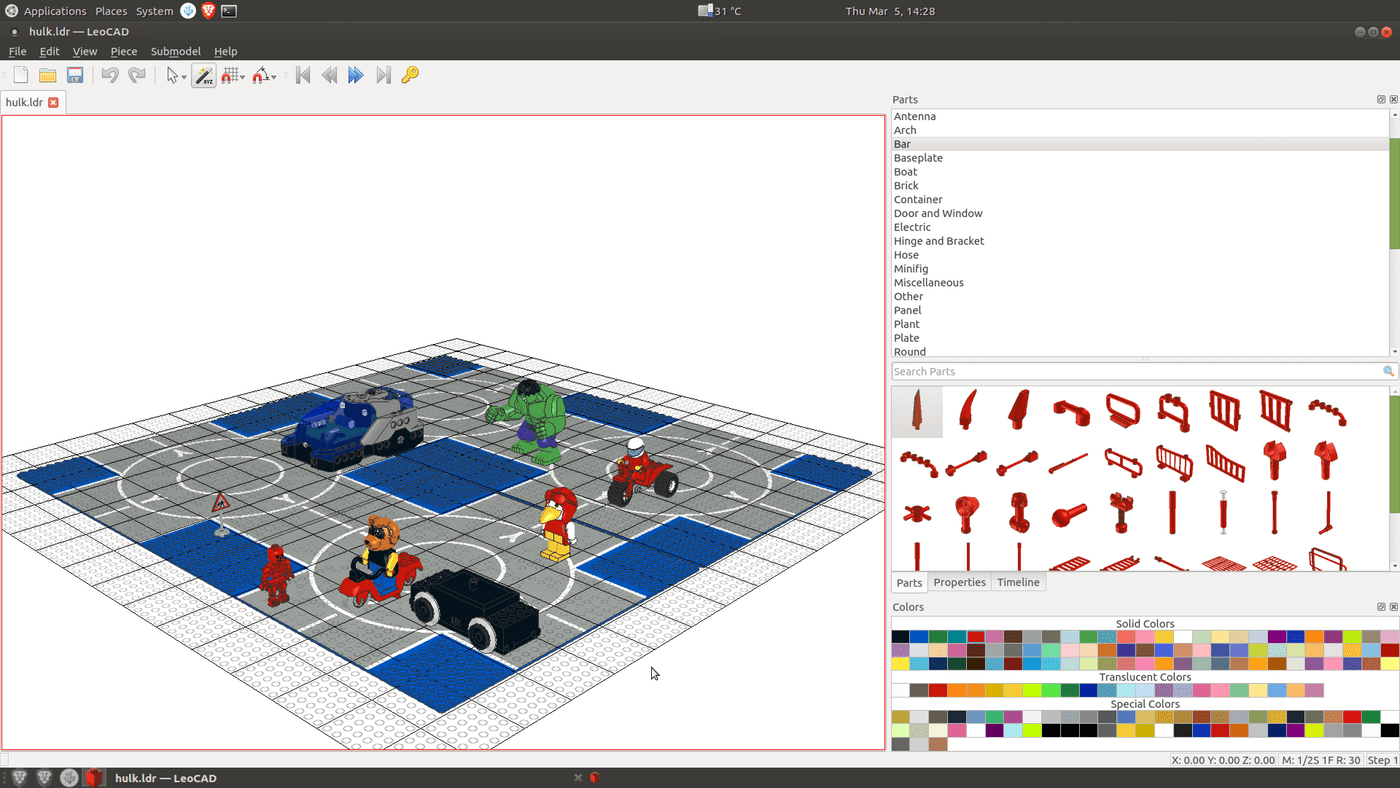
LeoCAD is very easy to use and intuitive. You can easily drag & drop parts to create your scene.
Your saved scene will use the .ldr format.
LeoCADは非常に使いやすく、直感的です。 パーツを簡単にドラッグアンドドロップしてシーンを作成できます。
保存したシーンは.ldr形式を使用します。
Blender
In this tutorial I am using Blender v2.82.
Blender「v2.82」の静的ビルドを使用しています。
Download it from here
こちらからダウンロード
Blender plugin
Download it from here.
こちらからダウンロードしてください。
ステップ1・ STEP 1
Please choose
選んでください:
Edit > Preferences
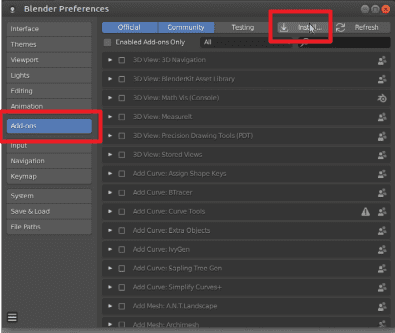
ステップ2・ STEP 2
Click Add-ons, then Install
Add-ons、Installの順にクリックします
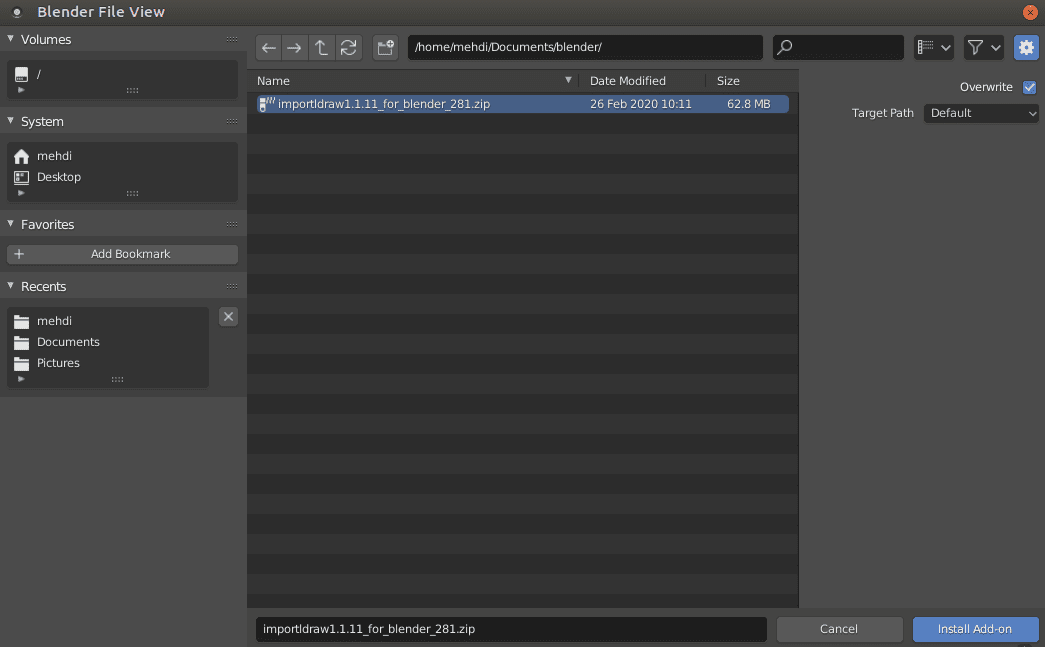
ステップ3・ STEP 3
Please select & install the plugin as shown in the screen capture.
画面キャプチャに示されているように、プラグインを選択してインストールしてください。
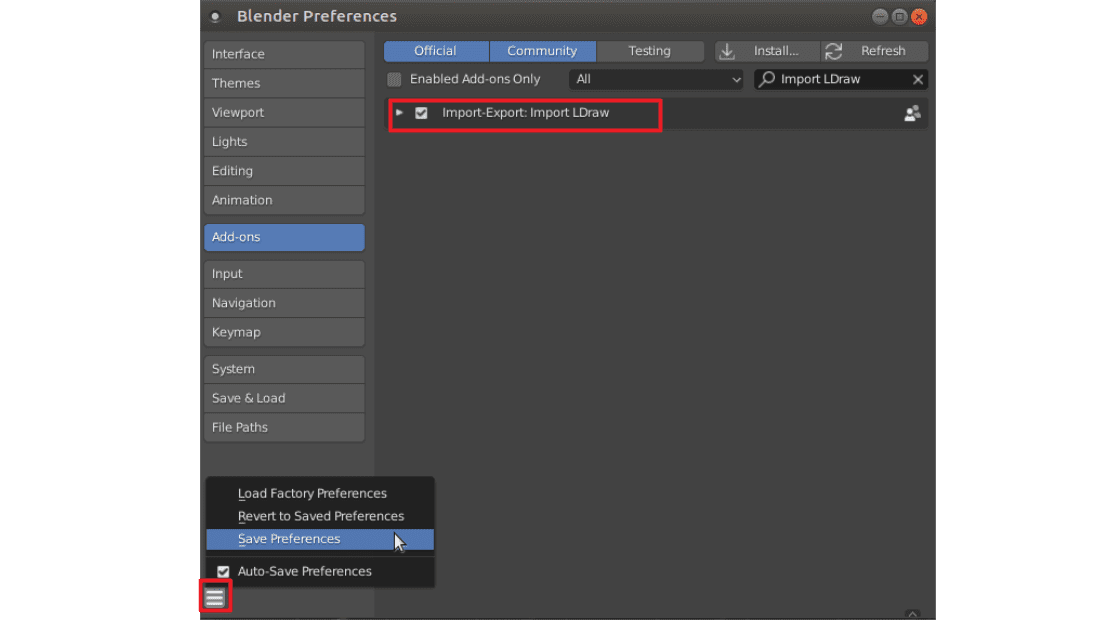
ステップ4・ STEP 4
Please activate the plugin & save the settings.
プラグインを有効にして設定を保存してください。
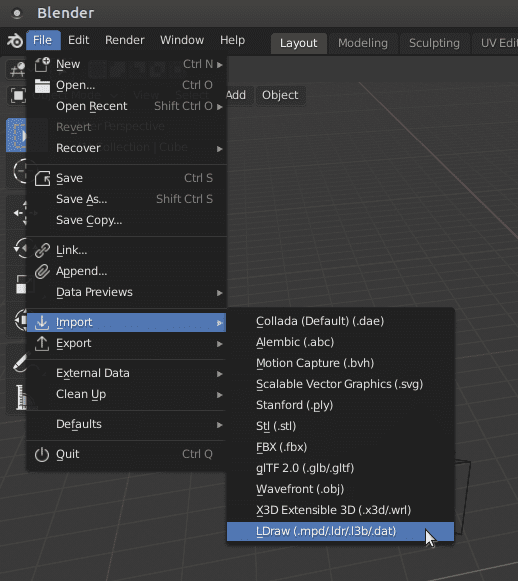
ステップ5・ STEP 5
You should now be able to import LeoCAD files.
これで、LeoCADファイルをインポートできるはずです。
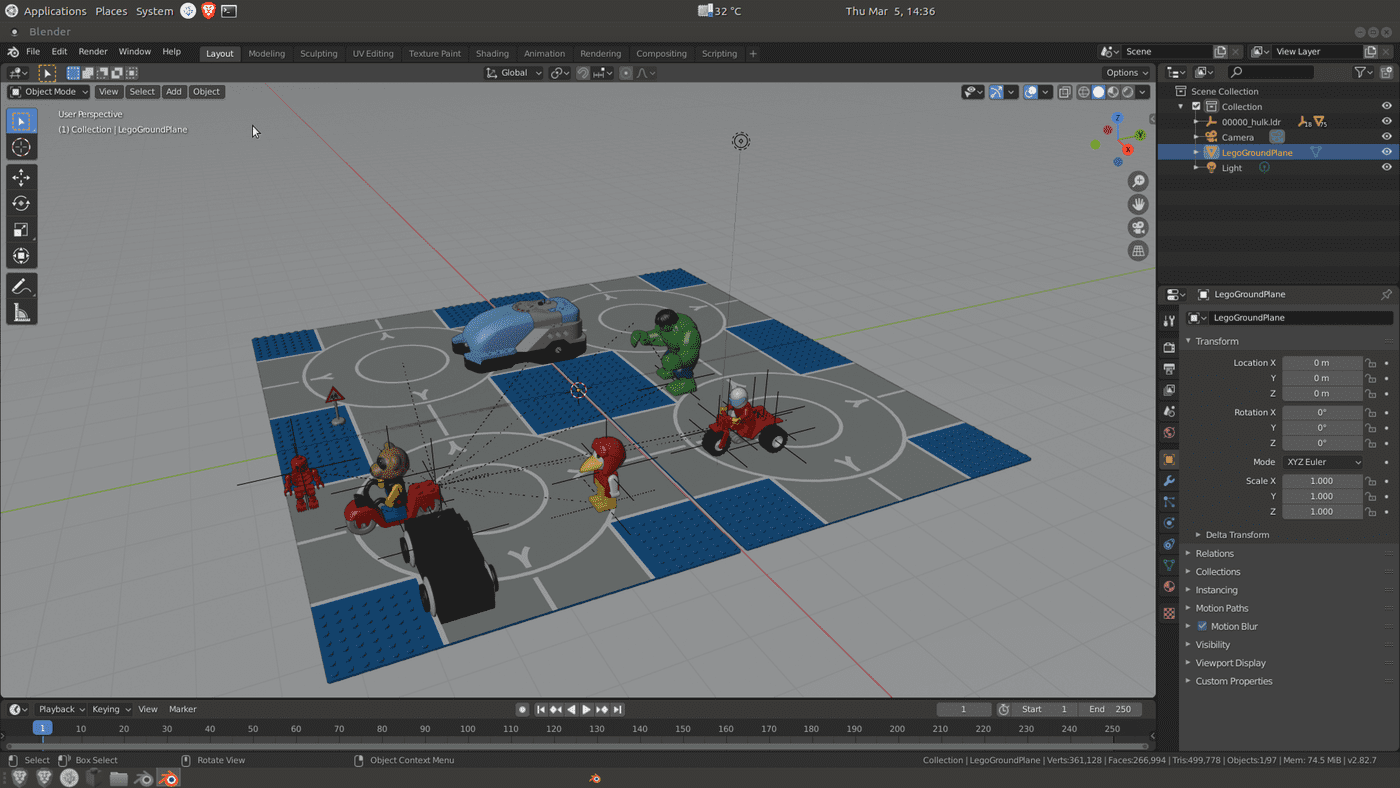
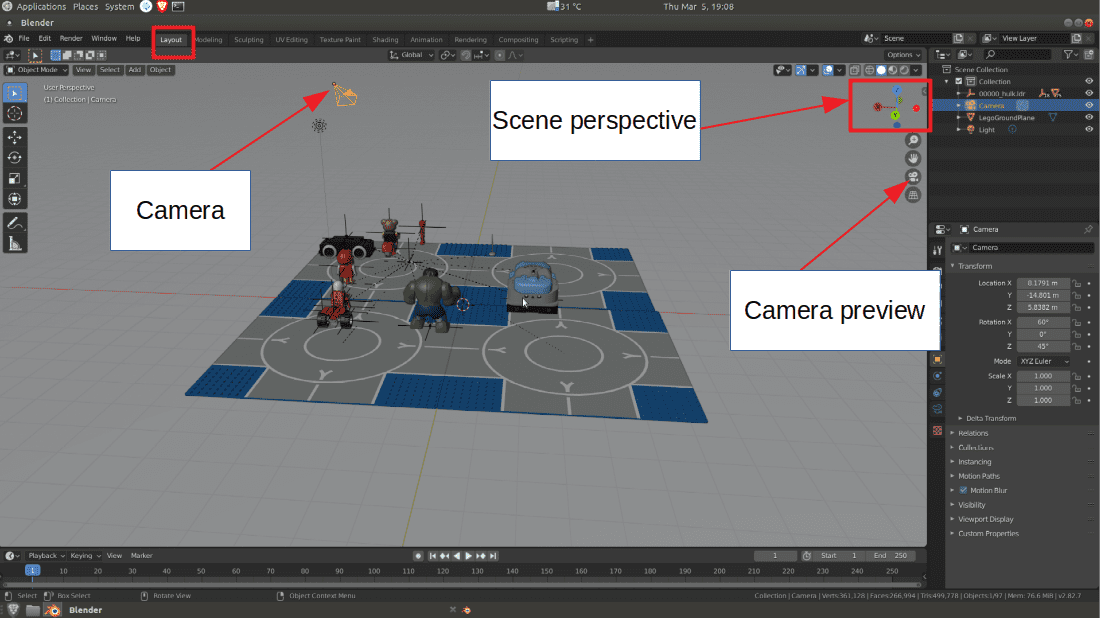
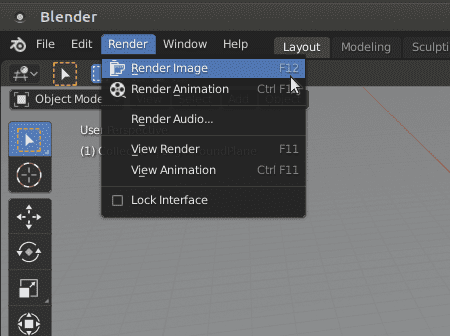
ステップ 6・ STEP 6
Checking the imported scene.
You can use the mouse wheel to zoom in and out on your scene.
You can hold the middle button of your mouse to move around your scene.
インポートされたシーンを確認します。
マウスホイールを使用して、シーンをズームインおよびズームアウトできます。
マウスの中央ボタンを押したままにすると、シーン内を移動できます。
ステップ 7 ・ STEP 7
Moving the camera & changing the perspective.
In order to move the camera you need to select it by clicking it, then press the G key and move it with your mouse.
カメラを移動し、視点を変更します。
カメラを移動するには、カメラをクリックして選択し、Gキーを押してマウスで移動する必要があります。
Some Blender keyborad shortcuts ・ Blenderのキーボードショートカット
From the Blender documentation
Blender doc から
Roll
Press R to enter object rotation mode. The default will be to rotate the camera in its local Z axis (the axis orthogonal to the camera view), which is the definition of a camera “roll”
Roll
Rを押してオブジェクトの回転モードに入ります。デフォルトでは、カメラのローカル Z 軸 (Camera View に直交する軸) で回転します。この動きをカメラの “Roll” と呼びます。
Horizontal Pan or Yaw
This corresponds to a rotation around the camera’s local Y axis. Press R, and then Y twice.
Horizontal Pan または Yaw
これは、カメラのローカル Y 軸を中心とした回転に対応します。R の後に Y を 2 回押します。
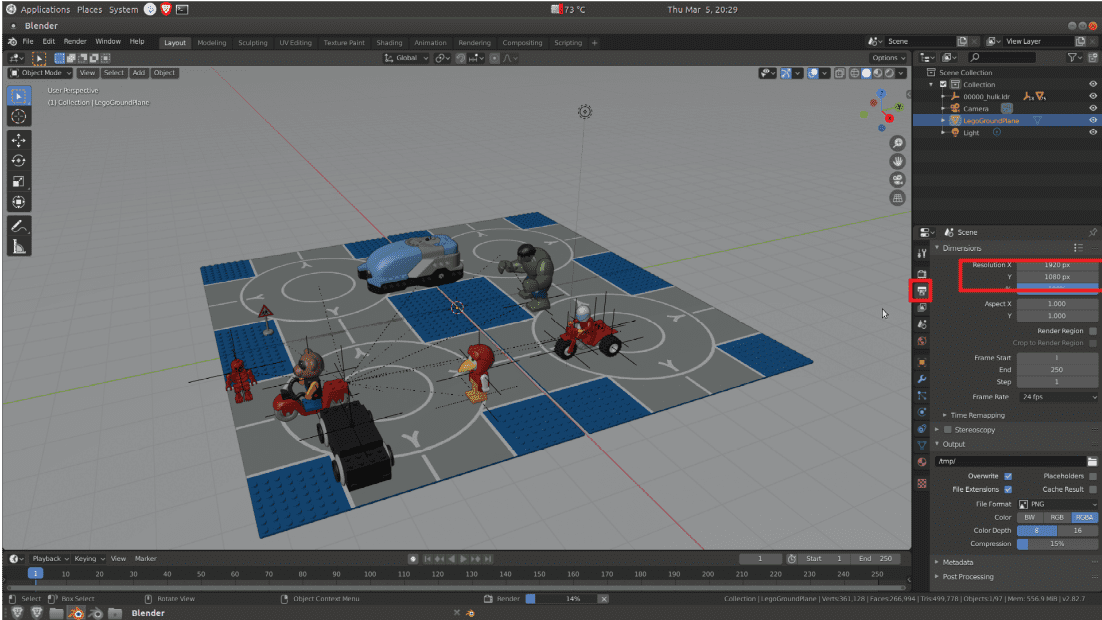
ステップ 8 ・ STEP 8
Settings the image size.
画像サイズを選択してください。
ステップ 9 ・ STEP 9
CPU Rendering・CPU レンダリング

Render faster with a GPU・GPUでより速くレンダリングする
If you have a supported GPU you can render pictures faster.
サポートされているGPUがある場合は、画像をより速くレンダリングできます。
Go to :
クリックしてください :
Edit > Preferences > System
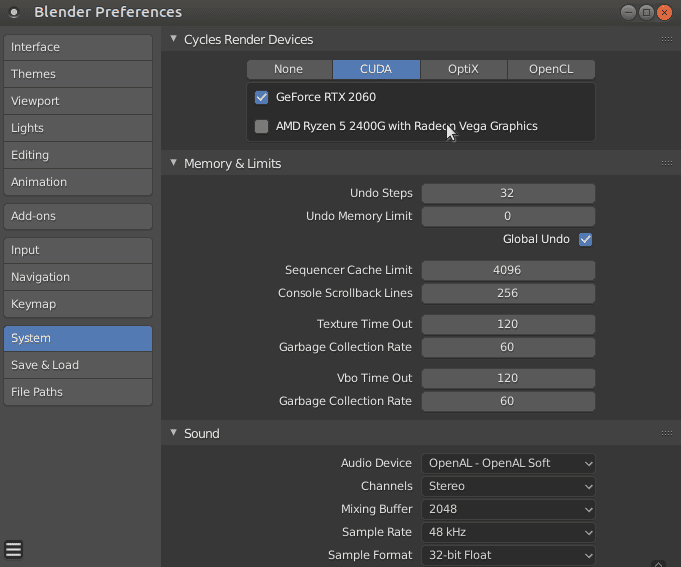
Once you selected your GPU, you need to enable it for rendering.
GPUを選択したら、レンダリングを有効にする必要があります。
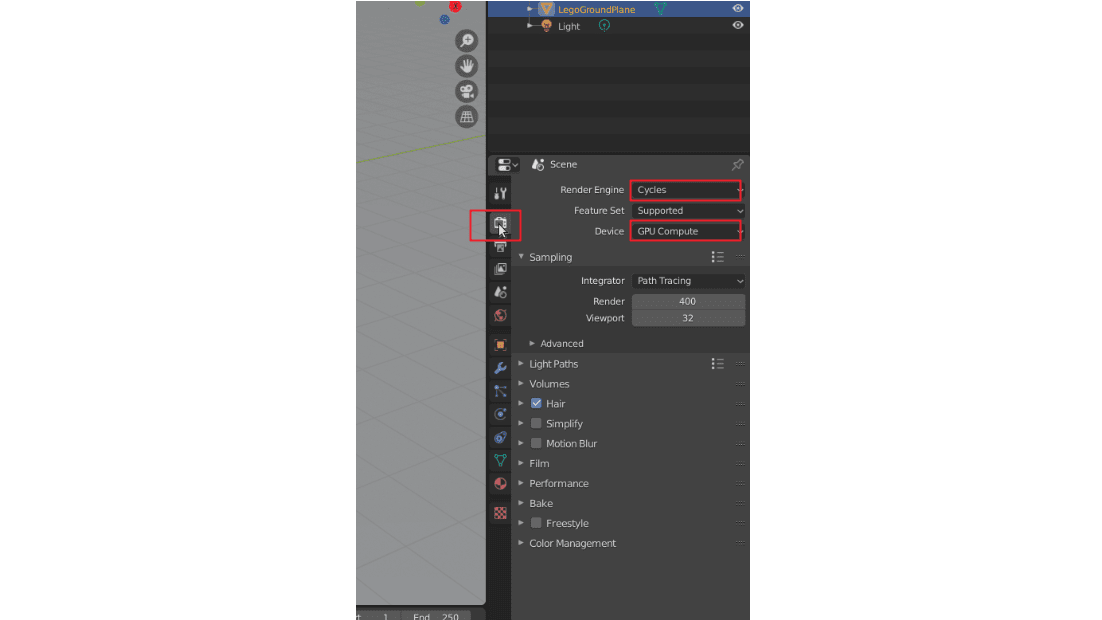
You can now start GPU rendering.
これでGPUレンダリングを開始できます。
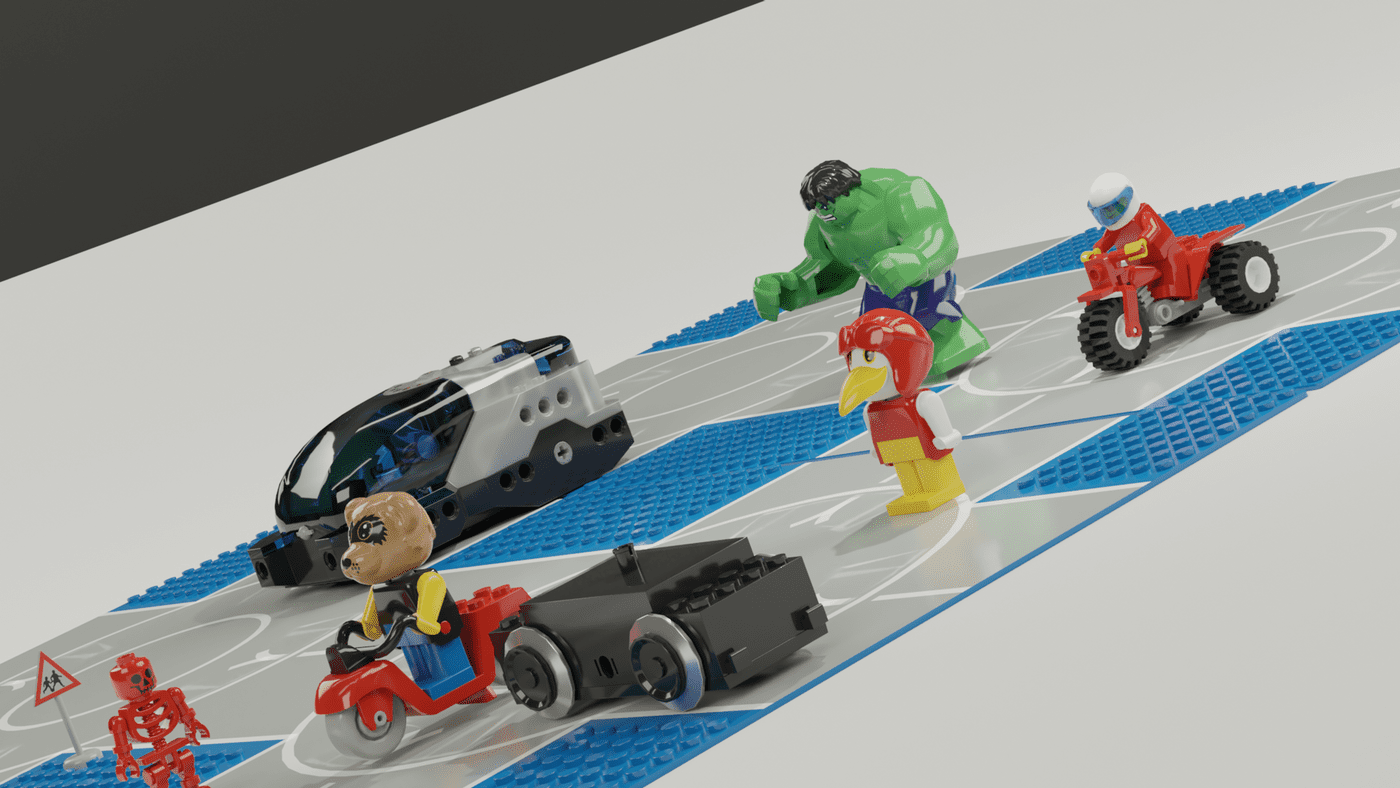
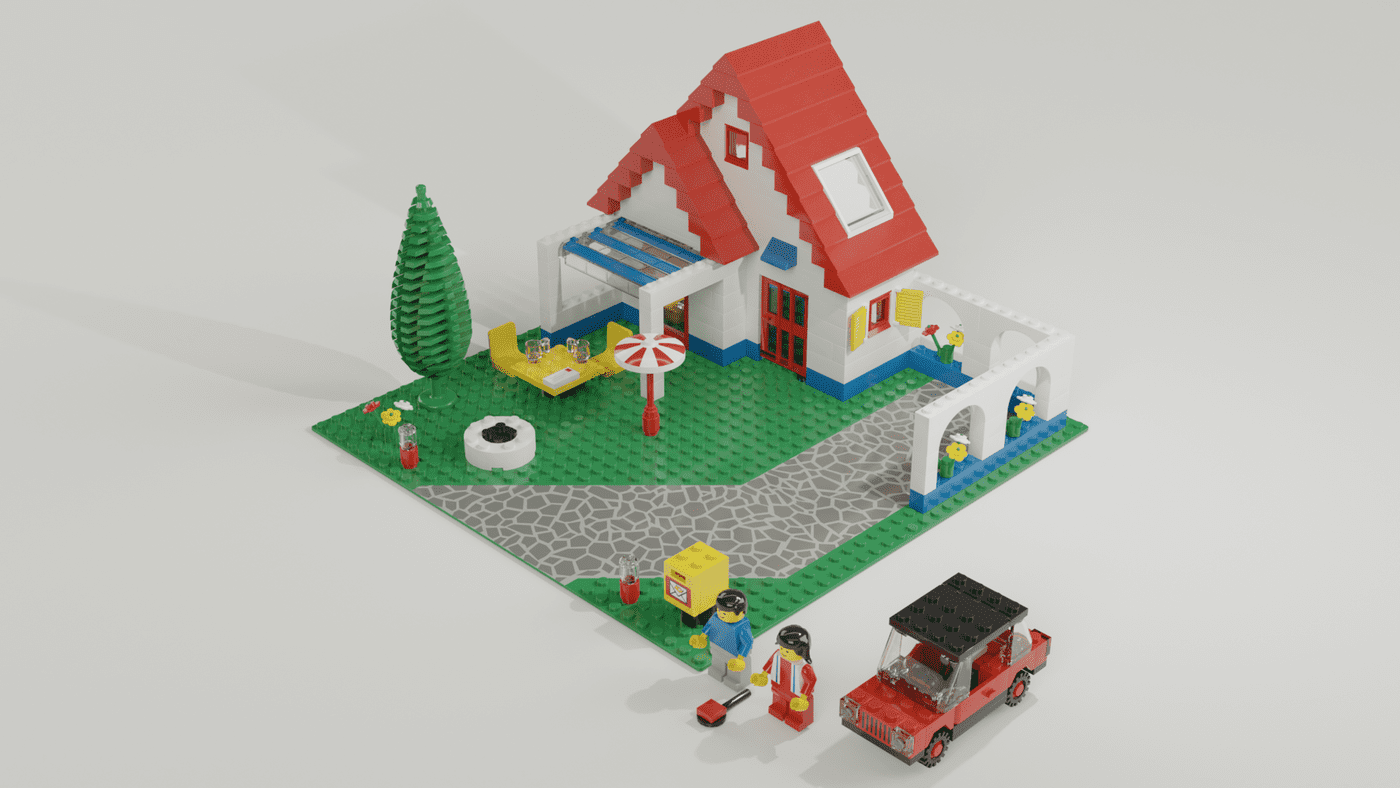
Rendered pics examples ・レンダリングの例
Holiday house model can be found here.
ホリデーハウスのモデルはこちらにあります。
This picture has been rendered in 02 min 40 sec with a nvidia GPU.
この画像をnvidia GPUでレンダリングするのに2分40秒かかりました。
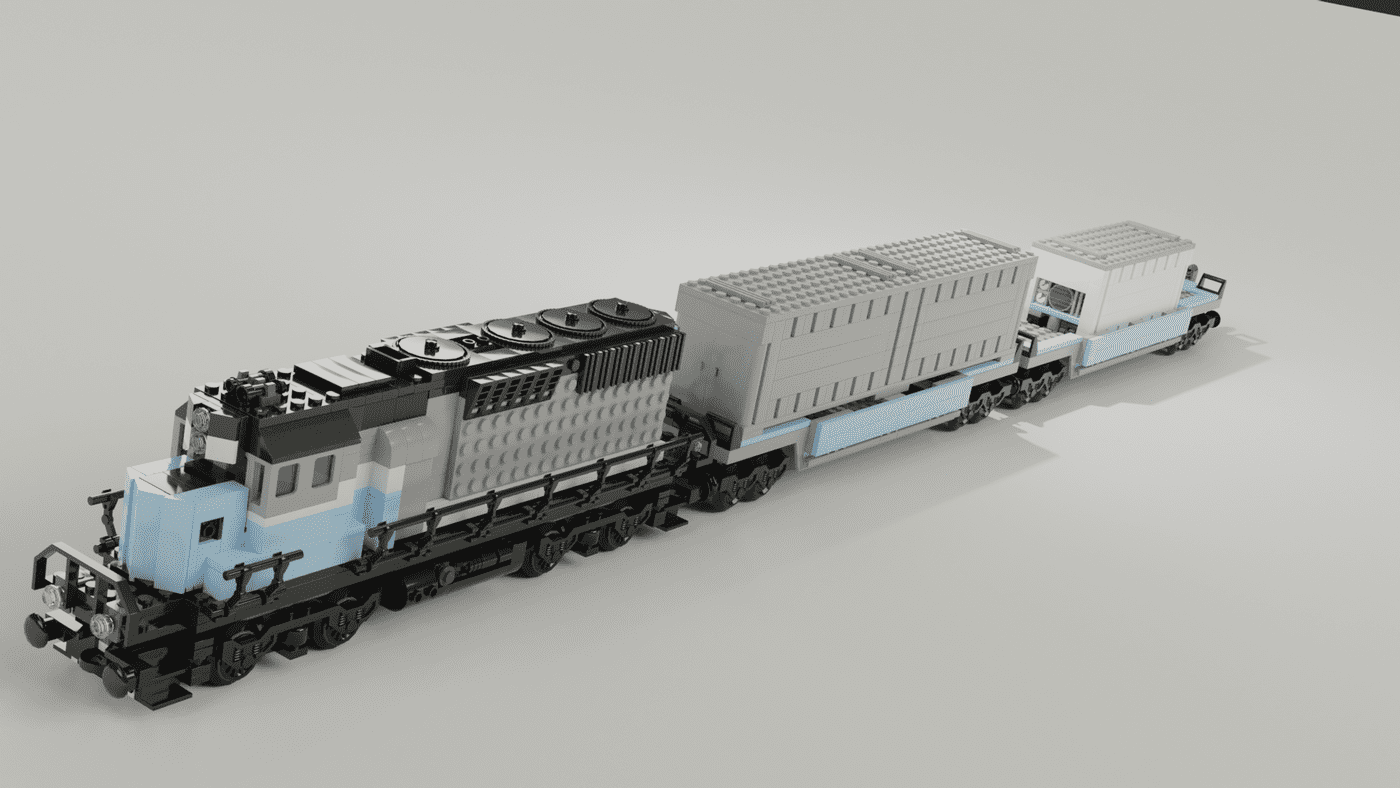
Train model can be found here.
列車のモデルはこちらにあります。
This picture has been rendered in 02 min 11 sec with a nvidia GPU.
この画像をnvidia gpuでレンダリングするのに2分11秒かかりました。
情報源 ・ Information sources
https://www.leocad.org/
https://www.blender.org/
https://github.com/TobyLobster/ImportLDraw
https://en.wikipedia.org/wiki/LDraw
https://www.eurobricks.com
https://docs.blender.org/manual/ja/latest/editors/3dview/navigate/camera_view.html
元記事はこちら
「簡単におもちゃの写真のようなCG画像の作り方 「Ubuntu / Linux」・Photo realistic rendering with LeoCAD & Blender」