
こんにちは、ひろかずです。
2015年11月27日にGithubにDeep Security ~ AWS WAF連携ツールが公開されました。
当初、なかなかうまく行かなかったのですが、ようやく評価できるところまで漕ぎ着けたので一筆書きます。
参考
Githubリポジトリ deep-security/aws-waf
機能概要
Deep Security上のIPリストをAWS WAFのconditionsに連携させます。
実体はpyhtonで書かれたスクリプト群です。
動作環境
ツール実行側
phthon 2.7系
boto3 1.3.1
awscli 1.9.1
その他用意するもの
DSaaS
AWS WAF
工程
- 動作環境の用意
- ツールの準備
- 実行と評価
1. 動作環境の用意
今回は、 Amazon Linux AMI 2015.09.1 (HVM), SSD Volume Type - ami-383c1956 を使用します。
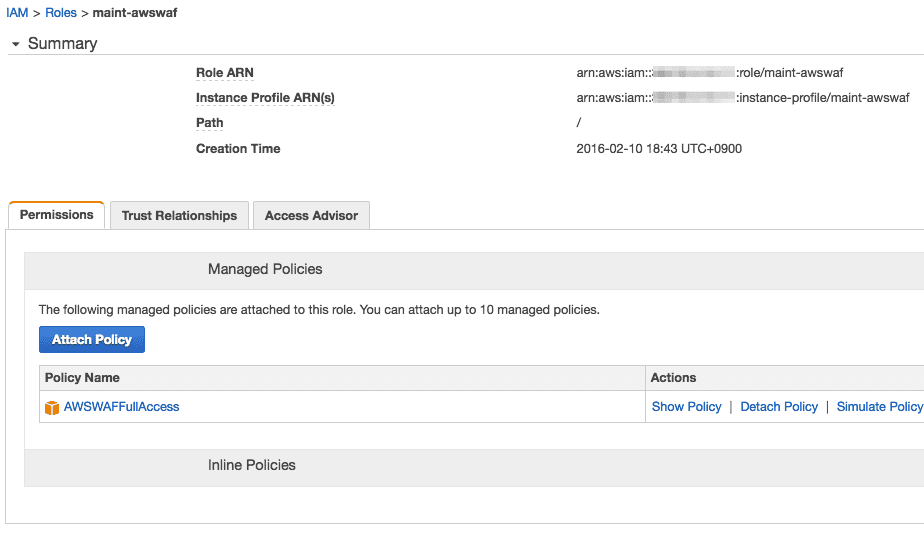
起動に先立って、AWS WAFに対するアクセス権のあるIAMロールを作成します。
今回はこんな感じで設定しました。
作成したIAMロールを指定して、t2.nanoで起動します。
Pythonのバージョン確認
ツールは、python 2.6系では対応していない記述が含まれています。
2.7系の環境を用意してください。
$ python
Python 2.7.10 (default, Aug 11 2015, 23:39:10)
[GCC 4.8.3 20140911 (Red Hat 4.8.3-9)] on linux2
Type "help", "copyright", "credits" or "license" for more information.
awscliとboto3のバージョン確認
$ aws --version
aws-cli/1.9.1 Python/2.7.10 Linux/4.1.10-17.31.amzn1.x86_64 botocore/1.3.1
gitをインストールします。
$ sudo yum -y install git
:
$ git --version
git version 2.4.3
リポジトリをクローンします。
$ git clone https://github.com/deep-security/aws-waf.git
Cloning into 'aws-waf'...
remote: Counting objects: 205, done.
remote: Total 205 (delta 0), reused 0 (delta 0), pack-reused 205
Receiving objects: 100% (205/205), 604.94 KiB | 157.00 KiB/s, done.
Resolving deltas: 100% (42/42), done.
Checking connectivity... done.
できましたね
$ ll
合計 4
drwxrwxr-x 4 ec2-user ec2-user 4096  2月 10 10:08 aws-waf

$ cd aws-waf/
$ ll
合計 20
-rw-rw-r-- 1 ec2-user ec2-user 1081  2月 10 10:08 LICENSE
-rw-rw-r-- 1 ec2-user ec2-user 4762  2月 10 10:08 README.md
drwxrwxr-x 5 ec2-user ec2-user 4096  2月 10 10:08 dsawswaf
-rw-rw-r-- 1 ec2-user ec2-user   33  2月 10 10:08 requirements.txt
動作可能なバージョン(a877db1)にロールバックします。
※ 現在の最新バージョンでは動作しないようです。
$ git checkout a877db1adb53b790f470065ed71df96f6ead82fb Note: checking out 'a877db1adb53b790f470065ed71df96f6ead82fb'. You are in 'detached HEAD' state. You can look around, make experimental changes and commit them, and you can discard any commits you make in this state without impacting any branches by performing another checkout. If you want to create a new branch to retain commits you create, you may do so (now or later) by using -b with the checkout command again. Example: git checkout -bHEAD is now at a877db1... Fixed typo in boto3 version
確認。変更されていますね。
$ ll
合計 20
-rw-rw-r-- 1 ec2-user ec2-user 1081  2月 10 10:08 LICENSE
-rw-rw-r-- 1 ec2-user ec2-user 4586  2月 10 10:12 README.md ★
drwxrwxr-x 5 ec2-user ec2-user 4096  2月 10 10:12 dsawswaf ★
-rw-rw-r-- 1 ec2-user ec2-user   33  2月 10 10:08 requirements.txt
readme.mdにある通り、必要なものをインストールします。
$ sudo pip install -r requirements.txt
You are using pip version 6.1.1, however version 8.0.2 is available.
You should consider upgrading via the 'pip install --upgrade pip' command.
Collecting netaddr>=0.7.18 (from -r requirements.txt (line 1))
  Downloading netaddr-0.7.18-py2.py3-none-any.whl (1.5MB)
    100% |████████████████████████████████| 1.5MB 308kB/s
Collecting boto3>=1.2.1 (from -r requirements.txt (line 2))
  Downloading boto3-1.2.3-py2.py3-none-any.whl (108kB)
    100% |████████████████████████████████| 110kB 4.0MB/s
Requirement already satisfied (use --upgrade to upgrade): jmespath<1.0.0,>=0.7.1 in /usr/lib/python2.7/dist-packages (from boto3>=1.2.1->-r requirements.txt (line 2))
Collecting futures<4.0.0,>=2.2.0 (from boto3>=1.2.1->-r requirements.txt (line 2))
  Downloading futures-3.0.4-py2-none-any.whl
Requirement already satisfied (use --upgrade to upgrade): botocore<1.4.0,>=1.3.0 in /usr/lib/python2.7/dist-packages (from boto3>=1.2.1->-r requirements.txt (line 2))
Requirement already satisfied (use --upgrade to upgrade): python-dateutil<3.0.0,>=2.1 in /usr/lib/python2.7/dist-packages (from botocore<1.4.0,>=1.3.0->boto3>=1.2.1->-r requirements.txt (line 2))
Requirement already satisfied (use --upgrade to upgrade): docutils>=0.10 in /usr/lib/python2.7/dist-packages (from botocore<1.4.0,>=1.3.0->boto3>=1.2.1->-r requirements.txt (line 2))
Requirement already satisfied (use --upgrade to upgrade): six in /usr/lib/python2.7/dist-packages (from python-dateutil<3.0.0,>=2.1->botocore<1.4.0,>=1.3.0->boto3>=1.2.1->-r requirements.txt (line 2))
Installing collected packages: netaddr, futures, boto3
Successfully installed boto3-1.2.3 futures-3.0.4 netaddr-0.7.18
動作確認。大丈夫そうですね。
$ python ip_list_to_set.py -h
usage: ip_list_to_set.py [-h] [-d IP_LIST] [-l] [-m DSM] -u USERNAME -p
                         PASSWORD [-t TENANT] [--dryrun] [--verbose]
:
2. DSaaSの準備
このツールは、ロールバックした時点では、DSaaSのみ対応していて、サーバにインストールしたDSMには対応していないようです。
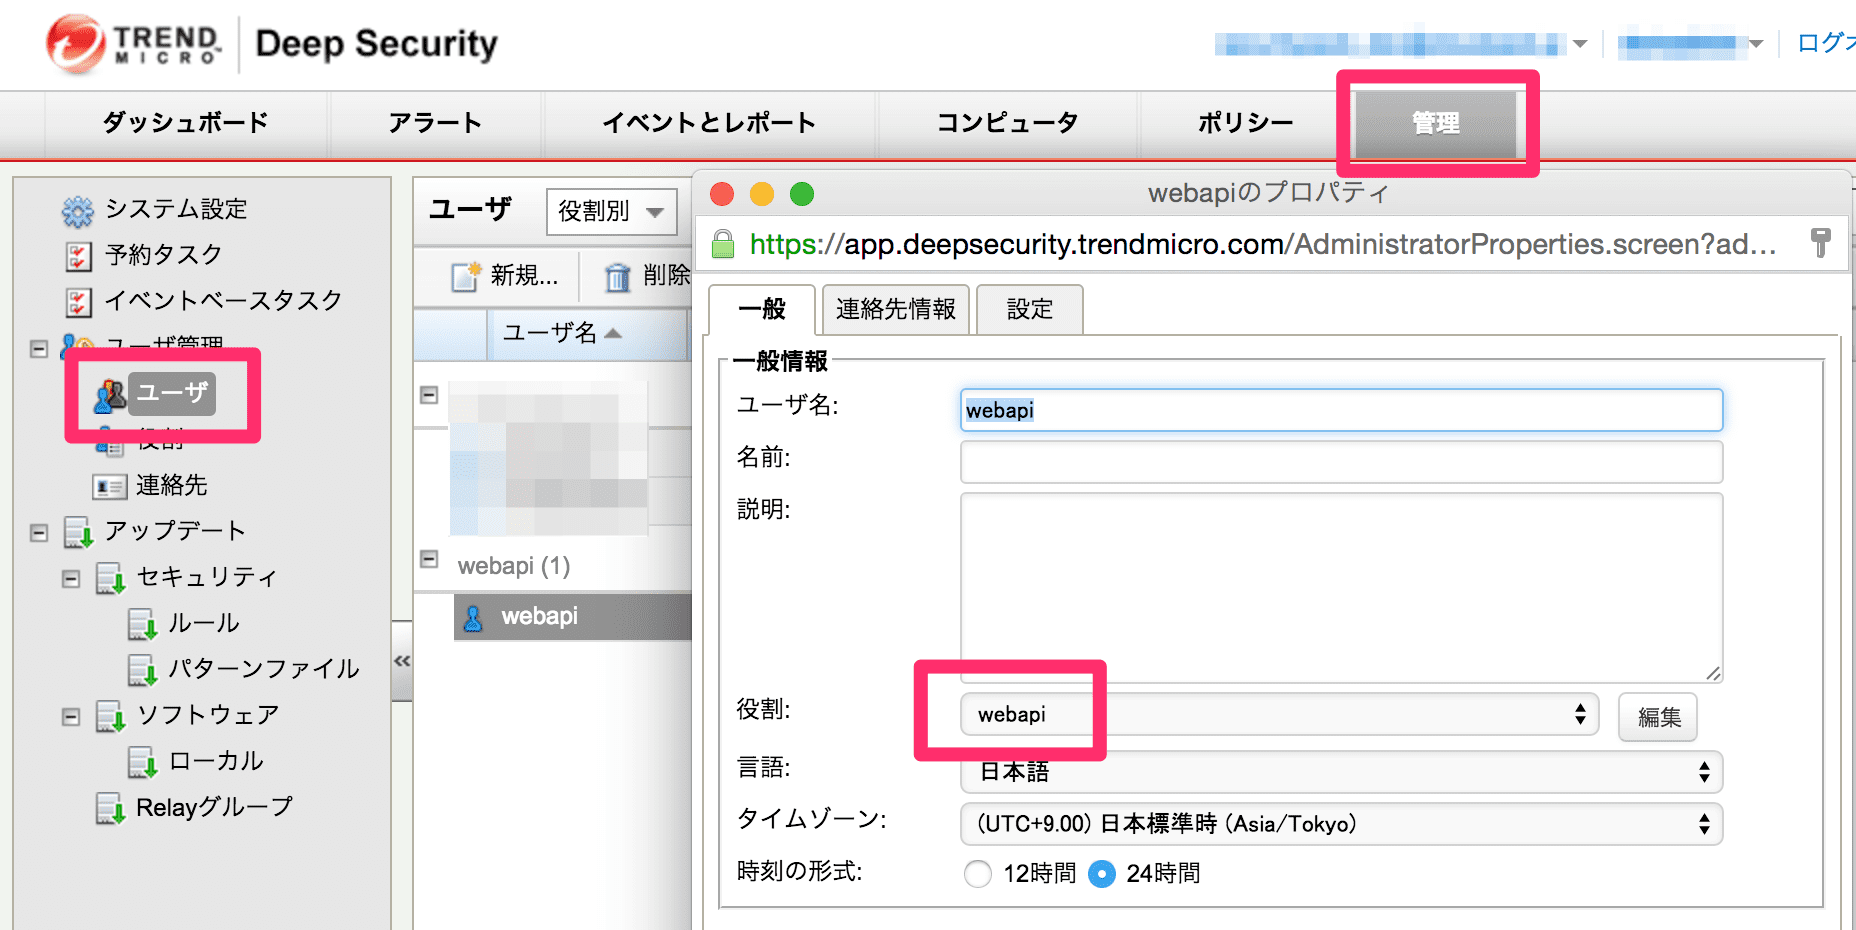
DSaaSアカウントを用意して、API用ユーザを作成します。
設定はこんな感じです。
まず、役割を作成します。

次にユーザを作成して、役割を付与します。
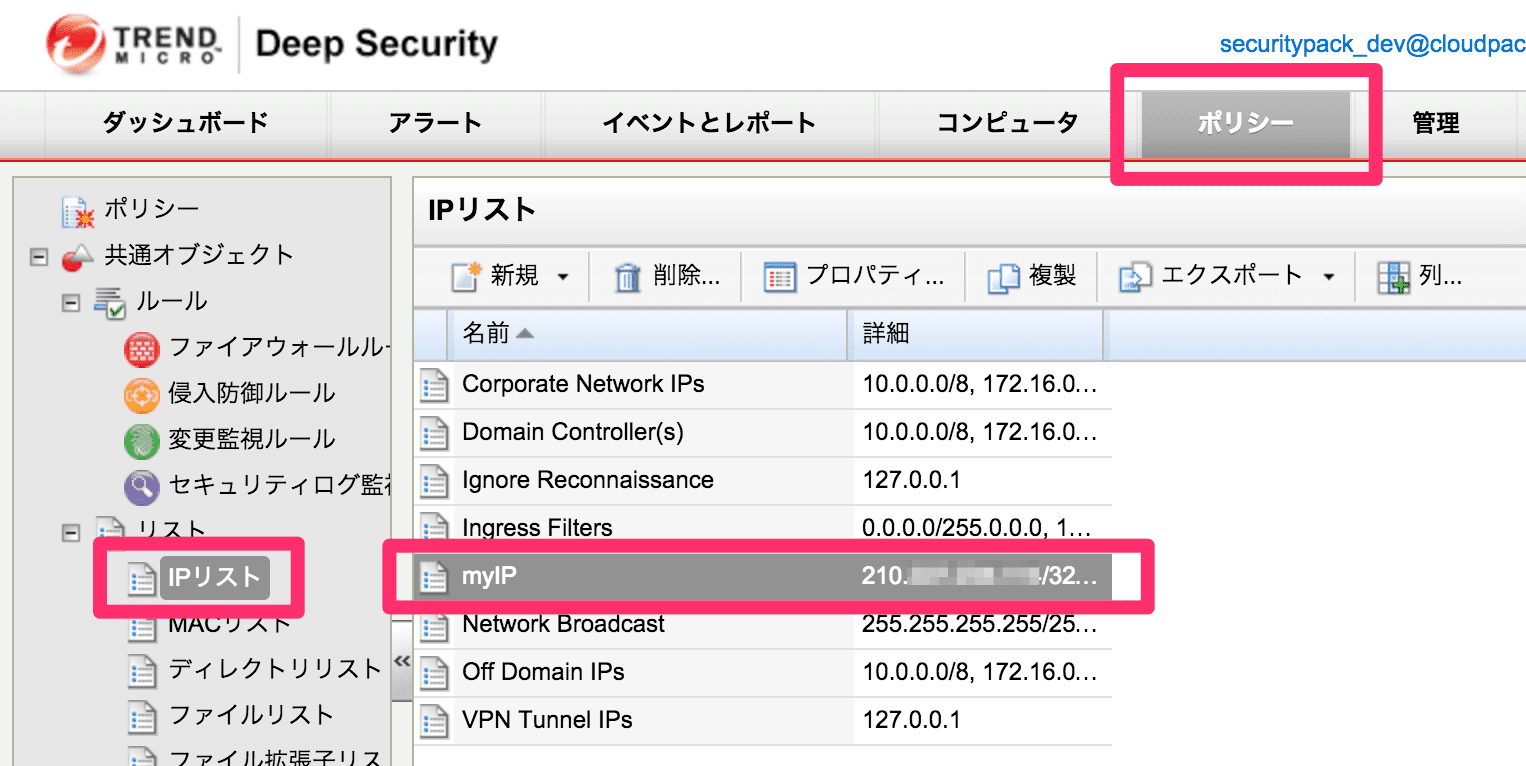
IPリストを作っておきます。
本来は、運用で成熟したIPリストを使用するところですね。
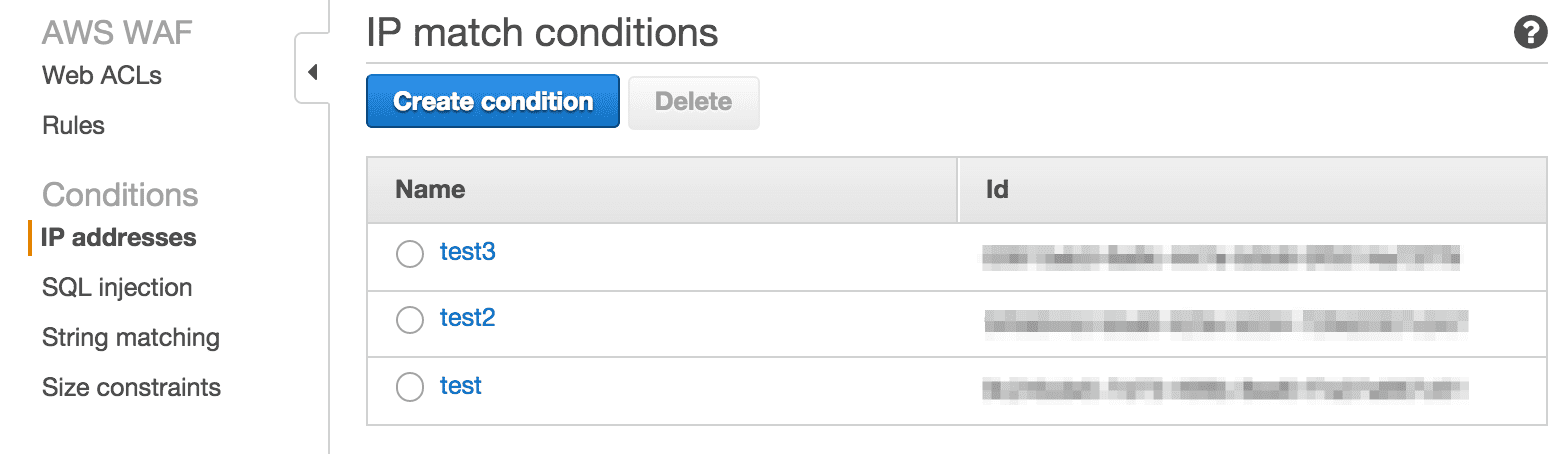
3. AWS WAFの準備
特にありませんが、conditionsの状況はこんな感じです。
4. 実行と評価
4-1. まずは実行
それでは、実行しましょう。
まずはリストの取得です。
ユーザーは、先ほど作成したものを指定します。
テナント名は、DSaaSアカウント名を指定します。
作成したIPリスト myIP のIDが 21 であることが判りますね。
同時に AWS WAF のconditions (IP Sets)が表示されました。
$ python ip_list_to_set.py -l -u webapi -p xxxxxxxx -t tenant_name

Available Deep Security IP Lists
================================
1   Ignore Reconnaissance
2   Network Broadcast
3   Ingress Filters
4   Domain Controller(s)
5   Off Domain IPs
6   Corporate Network IPs
7   VPN Tunnel IPs
21  myIP

Available AWS WAF IP Sets
=========================
xxxxxxxx-xxxx-xxxx-xxxx-xxxxxxxxxxxx    test3
xxxxxxxx-xxxx-xxxx-xxxx-xxxxxxxxxxxx    test2
xxxxxxxx-xxxx-xxxx-xxxx-xxxxxxxxxxxx    test
では、IPリスト myIP を AWS WAF のconditions (IP Sets)に連携させてみましょう。
IPリスト myIP のID 21 を指定します。
まずは --dryrun オプションを付けて実行しますと、 Will request the creation of [myIP] と出ますね。
$ python ip_list_to_set.py -d 21 -u webapi -p xxxxxxxx -t tenant_name --dryrun
***********************************************************************
* DRY RUN ENABLED. NO CHANGES WILL BE MADE
***********************************************************************
Will request the creation of [myIP]
--dryrun オプションを外すと実際に連携されます。Created IP Set [myIP] と出力されました。
$ python ip_list_to_set.py -d 21 -u webapi -p xxxxxxxx -t tenant_name
Converted 1 IP List entries to 1 IP Set entries
Created IP Set [myIP] with ID [xxxxxxxx-xxxx-xxxx-xxxx-xxxxxxxxxxxx]
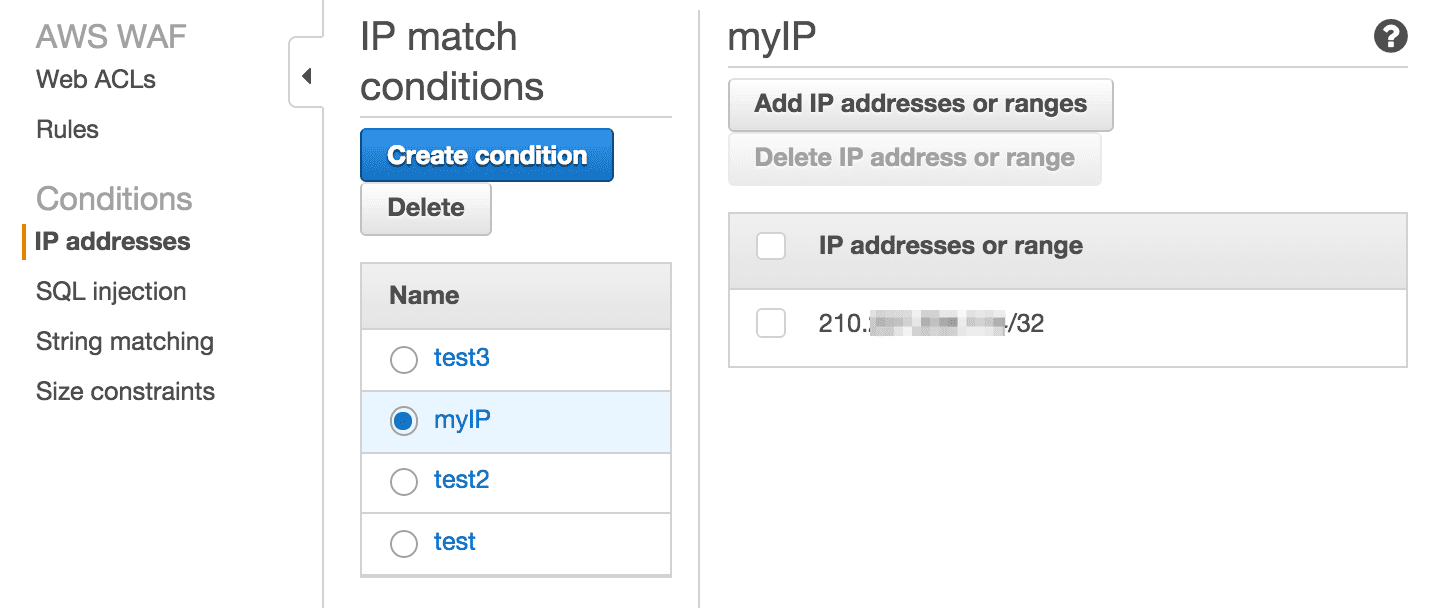
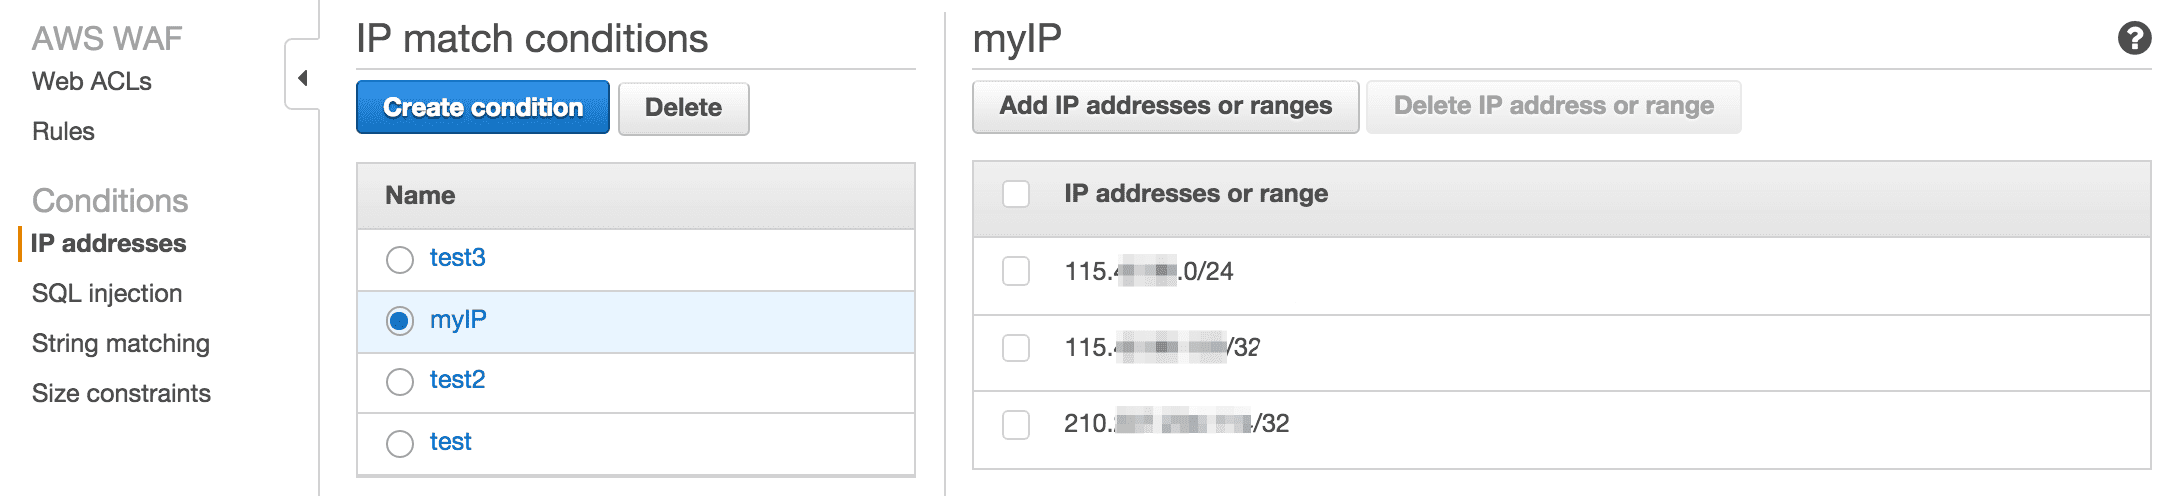
AWS WAFのconditionsを見ると、 myIP が追加されています。
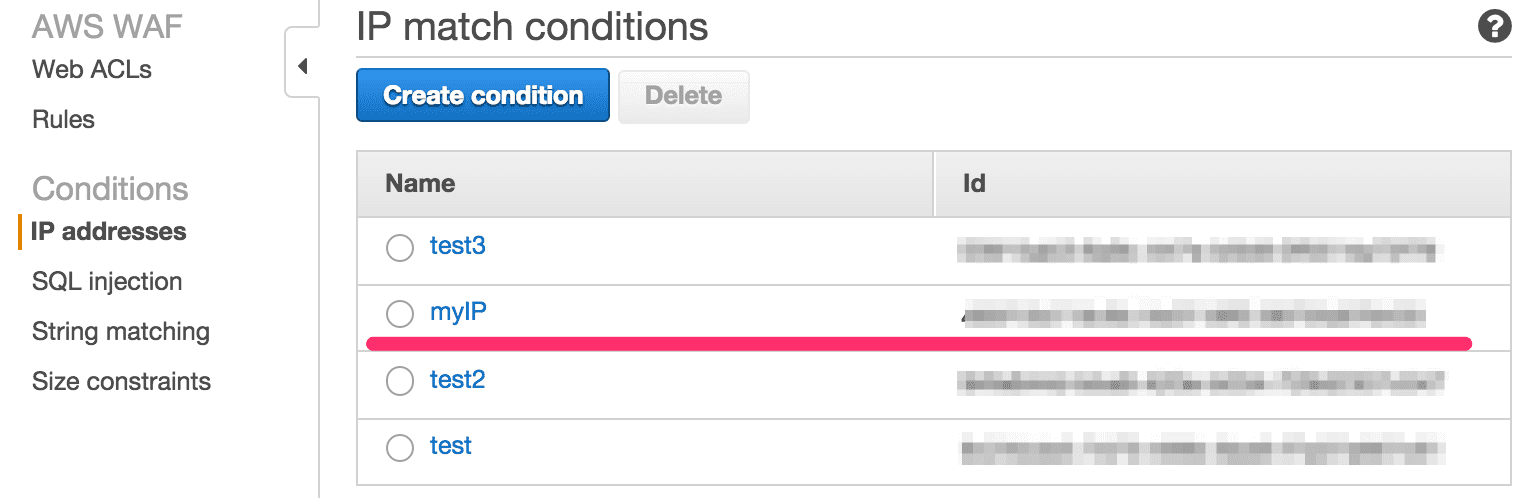
内容はこんな感じです。
4-2. 評価
追加1
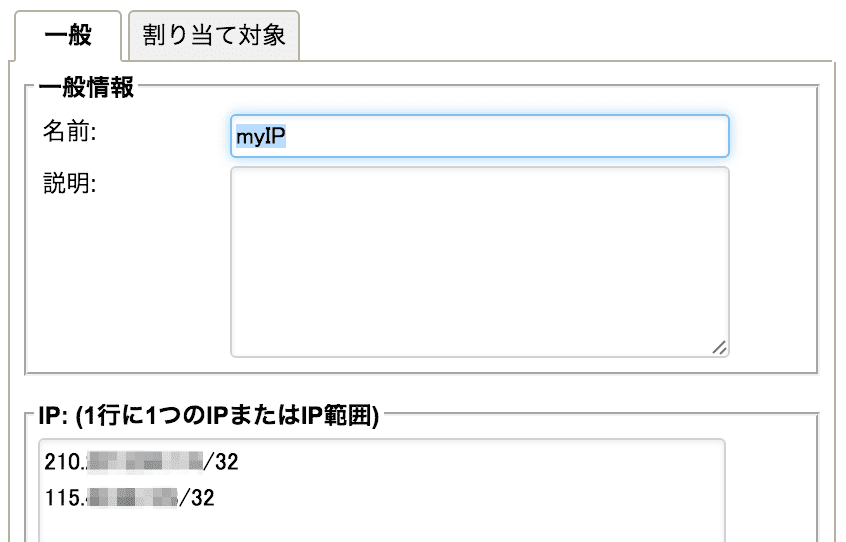
IPListに情報を追加してもう一度連携します。
$ python ip_list_to_set.py -d 21 -u webapi -p xxxxxxxx -t tenant_name --dryrun
***********************************************************************
* DRY RUN ENABLED. NO CHANGES WILL BE MADE
***********************************************************************
Converted 2 IP List entries to 2 IP Set entries
Will request the addition of 2 entries in IP Set xxxxxxxx-xxxx-xxxx-xxxx-xxxxxxxxxxxx
Will update IP Set [myIP] with ID [xxxxxxxx-xxxx-xxxx-xxxx-xxxxxxxxxxxx]
実行すると、 Converted 2 IP List entries to 2 IP Set entries と出ますね。
1つ追加なのですが、2つのIP List entriesと言っています。
$ python ip_list_to_set.py -d 21 -u webapi -p xxxxxxxx -t tenant_name
Converted 2 IP List entries to 2 IP Set entries
Updated IP Set [myIP] with ID [xxxxxxxx-xxxx-xxxx-xxxx-xxxxxxxxxxxx]
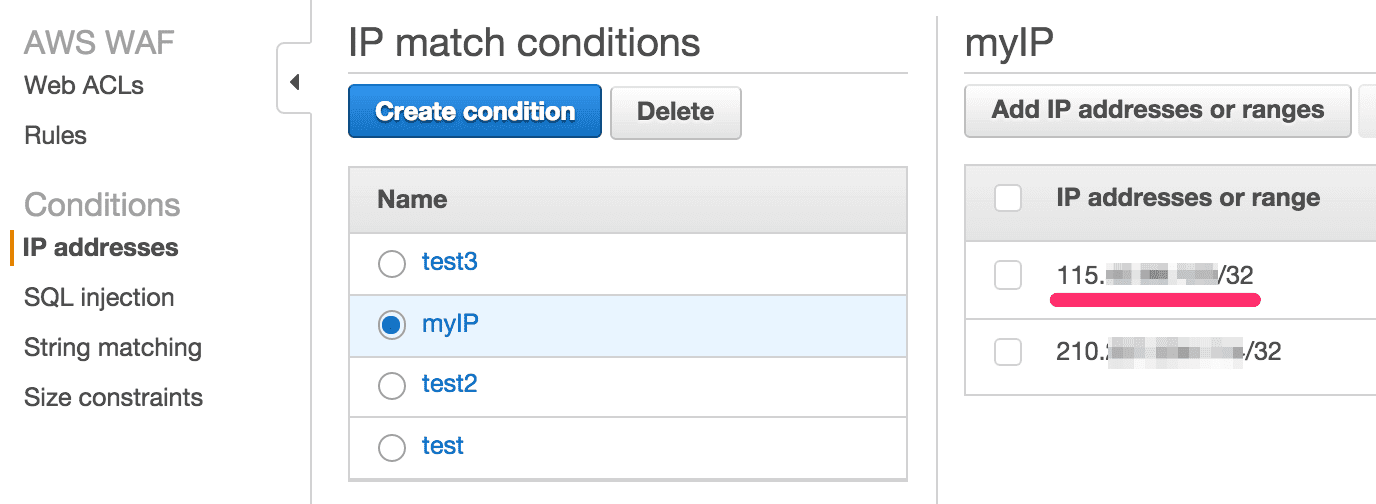
結果はこちら。
追加分が反映されています。
変更1
先ほど追加した 115.xxx.xxx.xxx/32 を変更します。
次はちょっと変化球で Deep Securityでサポートしているが、AWSではサポートしない表示形式にしてみます。
Deep Securityでサポートしている表示形式は以下です。
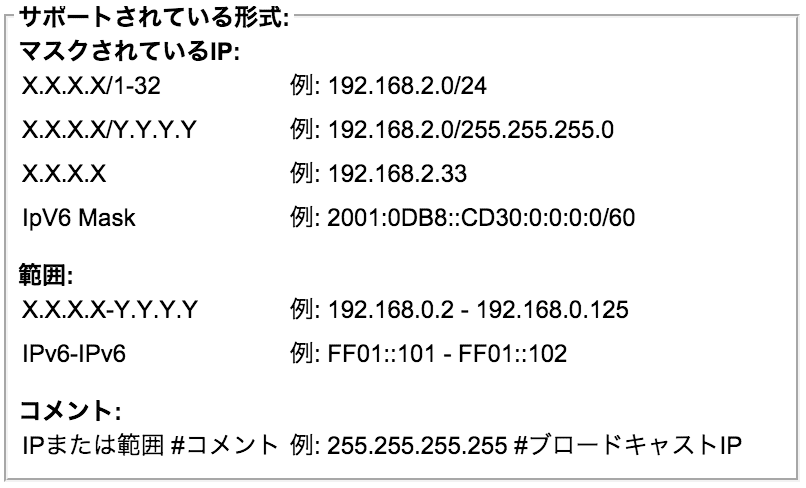
まずは、 115.xxx.xxx.xxx/32 を 115.xxx.xxx.0/255.255.255.0 に変更します。
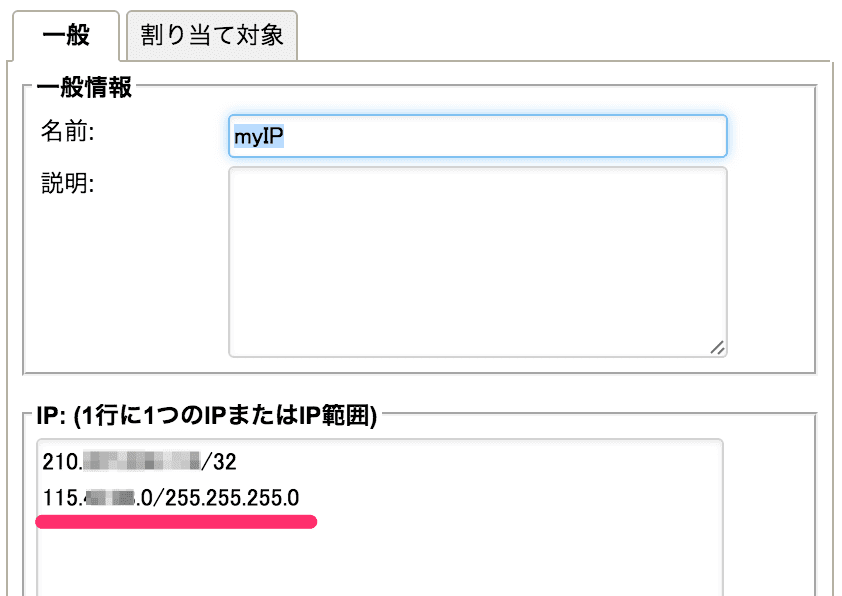
実行コマンドは省略します。(表示が同じだったので)
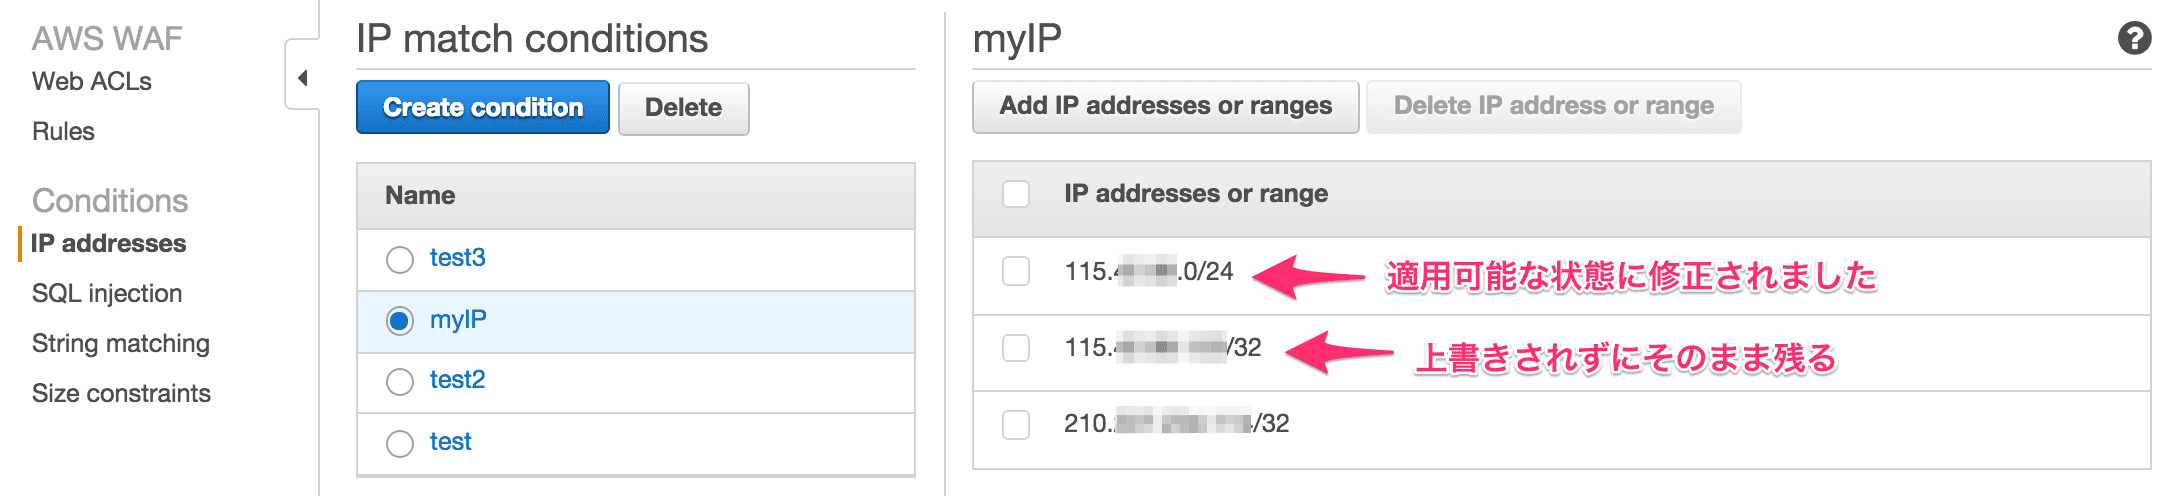
なんと、115.xxx.xxx.xxx/32 は変更されずにそのまま残り、115.xxx.xxx.0/24として追加登録されました。
なかなかに賢いですね。
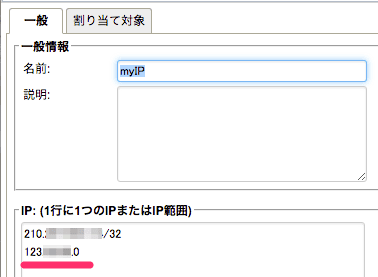
変更2
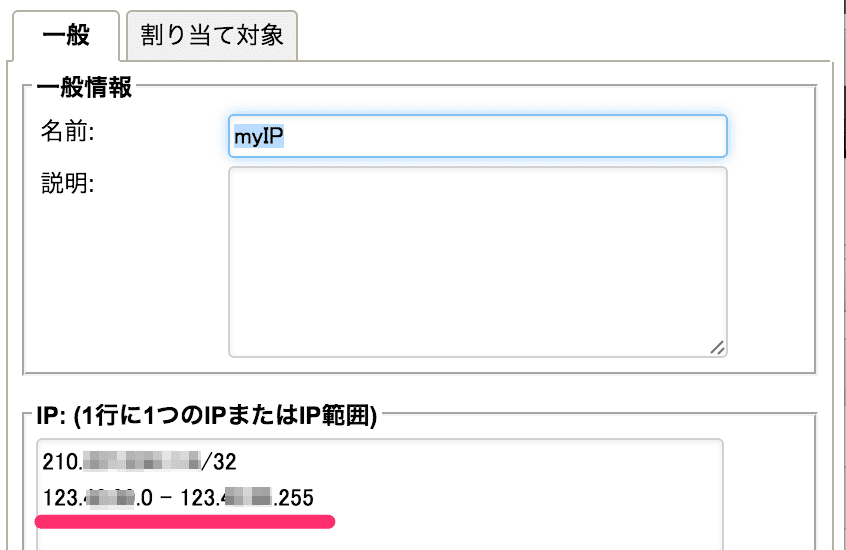
次は、115.xxx.xxx.0/255.255.255.0 を 123.xxx.xxx.0 - 123.xxx.xxx.255 にします。
期待値は、123.xxx.xxx.0/24 が追加される です。
$ python ip_list_to_set.py -d 21 -u webapi -p nPxwcrV3 -t securitypack_dev@cloudpack.jp --dryrun
***********************************************************************
* DRY RUN ENABLED. NO CHANGES WILL BE MADE
***********************************************************************
Converted 2 IP List entries to 1 IP Set entries
Will request the addition of 1 entries in IP Set xxxxxxxx-xxxx-xxxx-xxxx-xxxxxxxxxxxx
Will update IP Set [myIP] with ID [xxxxxxxx-xxxx-xxxx-xxxx-xxxxxxxxxxxx]
出力が変わりましたね。Converted 2 IP List entries to 1 IP Set entriesと出てます。
$ python ip_list_to_set.py -d 21 -u webapi -p nPxwcrV3 -t securitypack_dev@cloudpack.jp
Converted 2 IP List entries to 1 IP Set entries
Updated IP Set [myIP] with ID [xxxxxxxx-xxxx-xxxx-xxxx-xxxxxxxxxxxx]
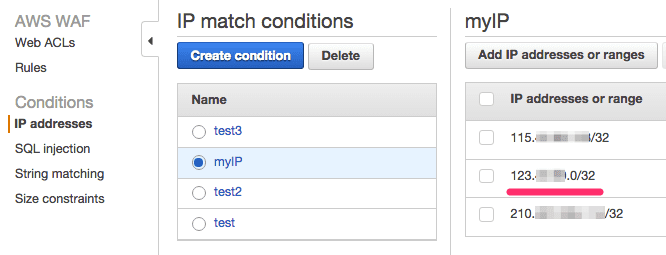
123.xxx.xxx.0/24 は追加されませんね。
レンジ表記には対応していないようです。
追加2(2016/2/12追補)
ひょっとしたら、CIDERやマスクがない表記が問題かもしれないので、切り分けます。123.xxx.xxx.0 を追加して、連携してみます。
実行コマンドは省略しますが、結果は123.xxx.xxx.0/32とCIDER形式に変換してくれました。
なかなかに(略
追加3(2016/2/12追補)
実際に運用中のIPリストには、コメントが多数入っていることが想定されるので、コメントアウトしてみます。
今回は、123.42.99.1/32 #hogehogeを追加します。
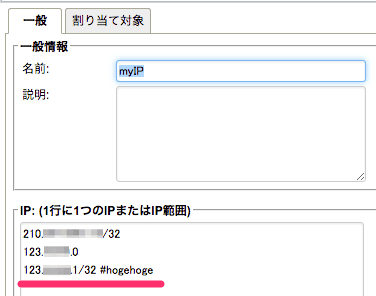
おっと、エラーが出てしまいましたね。# が上手く処理できないようです。
運用上、ちょっと困りますね。
$ python ip_list_to_set.py -d 21 -u webapi -p xxxxxxxx -t tenant_name --dryrun *********************************************************************** * DRY RUN ENABLED. NO CHANGES WILL BE MADE *********************************************************************** Traceback (most recent call last): File "ip_list_to_set.py", line 385, inif __name__ == '__main__': main() File "ip_list_to_set.py", line 381, in main context.create_ip_set(ip_list) File "ip_list_to_set.py", line 321, in create_ip_set updates = self._convert_ds_addresses_to_waf(ds_list) File "ip_list_to_set.py", line 274, in _convert_ds_addresses_to_waf addresses = self._parse_ds_addresses(ds_list) File "ip_list_to_set.py", line 239, in _parse_ds_addresses if "#" in address: address = split('#').strip() # remove any comments NameError: global name 'split' is not defined
まとめ
Deep Security~AWS WAF連携ツールの評価をまとめると以下のようになります。
- バージョン(a877db1)が動作可能な最新バージョン
- DSaaSのIPリストを指定して、AWS WAFのconditions(IP Lists)に追加する機能
- 同名のconditions(IP Lists)がなければ作成する
- 同名のconditions(IP Lists)があれば、差分を追加する。(削除しない)
- IPリストでマスク表記されるものはCIDER形式に変換される。
- IPリストでレンジ表記されるものは登録されない。
- コメント
#がうまく処理できないので、IPリストからコメントを削除したものを用意する必要がある(2016/2/12追加)
上記特性を理解して、活用したいですね。
活用のユースケースについては、別途書きたいと思います。
Githubに登録されたツールなので、問い合わせやバグの指摘はGithubにすると良いでしょう。
開発者と直接やり取りできるのが魅力ですね。
今日はここまでです。
お疲れ様でした。