tl;dr
aws.typepad.com
Docker 1.9.1 から Logging Driver として CloudWatch Logs はサポートされていたが、ECS の Task Definition に定義して利用は出来なかった(と記憶している)ので、今回から Task Definition に定義して利用出来るようになったとのことで、ecs-cli でチュートリアルしてみたのでメモ。
チュートリアル
要件
ECS で Amazon CloudWatch Logs にログ出力する為には以下のような要件を満たす必要がある。(上記のブログ記事より抜粋)
- ECS Agent のバージョンを 1.9.0 以上にする
- ECS optimized AMI 2016.03.b 以上(ap-northeast-1 の場合には
ami-a98d97c7) - ECS optimized AMI 2016.03.b 以前の AMI を利用する場合には、以下のように
ECS_AVAILABLE_LOGGING_DRIVERSを/etc/ecs/ecs.config以下に定義する(ECS optimized AMI 以外の AMI を利用している場合には環境変数で同じ内容を渡して Agent を起動する)
1 | ECS_AVAILABLE_LOGGING_DRIVERS=["json-file","awslogs"] |
また、コンテナインスタンスに適切な IAM Role を割り当てておく必要があるが、マネージドポリシーの AmazonEC2ContainerServiceforEC2Role を割り当てておくと以下のようなポリシーがアタッチされるので、特に意識することなく CloudWatch Logs にログを転送することが出来るようになる。
01 02 03 04 05 06 07 08 09 10 11 12 13 14 15 16 17 18 19 20 21 22 23 24 | { "Version": "2012-10-17", "Statement": [ { "Effect": "Allow", "Action": [ "ecs:CreateCluster", "ecs:DeregisterContainerInstance", "ecs:DiscoverPollEndpoint", "ecs:Poll", "ecs:RegisterContainerInstance", "ecs:StartTelemetrySession", "ecs:Submit*", "ecr:GetAuthorizationToken", "ecr:BatchCheckLayerAvailability", "ecr:GetDownloadUrlForLayer", "ecr:BatchGetImage", "logs:CreateLogStream", "logs:PutLogEvents" ], "Resource": "*" } ]} |
チュートリアル環境
1 2 3 4 5 6 7 | % sw_versProductName: Mac OS XProductVersion: 10.11.5BuildVersion: 15F24b% ecs-cli --versionecs-cli version 0.3.0 (2297ef0) |
ECS クラスタの作成とコンテナインスタンスの起動
01 02 03 04 05 06 07 08 09 10 | % ecs-cli configure --cluster ecs-demo --region ap-northeast-1% ecs-cli up --keypair key_name --image-id ami-a98d97c7 --capability-iam --size 1 --vpc vpc-xxxxxxx --instance-type t2.micro --subnets subnet-xxxxxxxx subnet-xxxxxxx --azs ap-northeast-1a ap-northeast-1c |
log_gorup の作成
1 | % aws logs create-log-group --log-group-name ecs-logs --region ap-northeast-1 |
hello world
ecs-cli compose を利用するので以下のような YAML ファイルを用意する。(今回は ecs-helloworld/task.yml というファイル名で保存する)
1 2 3 4 5 6 7 8 | hello_world: cpu_shares: 135 mem_limit: 131072000 image: hello-world log_driver: awslogs log_opt: awslogs-group: "ecs-logs" awslogs-region: "ap-northeast-1" |
以下のように ECS Task を起動する。
1 | % ecs-cli compose --file ecs-helloworld/task.yml up |
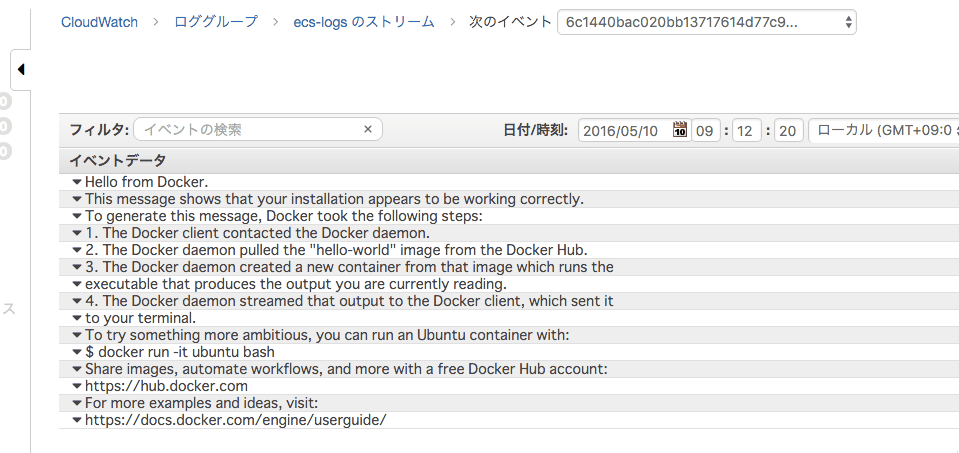
以下のようにログが CloudWatch Logs に記録されている。

おお。
簡単なアプリケーション
Sinatra + Unicorn で簡単なアプリケーションを作って更にチュートリアル。
- app.rb
01 02 03 04 05 06 07 08 09 10 11 12 13 14 15 16 17 18 | require "sinatra"require "unicorn"require 'socket'require 'logger'class App < Sinatra::Base # unicorn 経由で起動した際に標準出力にログを出力させる logger = Logger.new($stdout) get "/hostname" do logger.info Socket.gethostname end get "/foo" do logger.info "bar" endend |
- config.ru
1 2 | require './app.rb'run App |
- unicorn.rb
01 02 03 04 05 06 07 08 09 10 | @path = "/myapp"worker_processes 1working_directory @pathtimeout 300listen 4567pid "#{@path}/tmp/pids/unicorn.pid"# unicorn のログを標準出力に出力させる為の苦肉の策# stderr_path "#{@path}/log/unicorn.stderr.log"# stdout_path "#{@path}/log/unicorn.stdout.log"preload_app true |
以下のように YAML ファイルを用意。(今回は ecs-app/task.yml というファイル名で保存する)
01 02 03 04 05 06 07 08 09 10 | app: cpu_shares: 135 mem_limit: 131072000 image: xxxxxxxxxxxxxx.dkr.ecr.us-east-1.amazonaws.com/ecs-app:1462837568 ports: - 80:4567 log_driver: awslogs log_opt: awslogs-group: "ecs-logs" awslogs-region: "ap-northeast-1" |
尚、コンテナイメージは ECR に push しておく。
以下のように ECS Service を起動する。
1 | % ecs-cli compose -f ecs-app/task.yml service up |
ECS Service 内で Task が起動したら適当にアクセスしてログを吐かせる。
1 2 3 4 5 6 | % curl http://xxx.xxx.xxx.xxx/foo% curl http://xxx.xxx.xxx.xxx/foo% curl http://xxx.xxx.xxx.xxx/foo% curl http://xxx.xxx.xxx.xxx/hostname% curl http://xxx.xxx.xxx.xxx/hostname% curl http://xxx.xxx.xxx.xxx/hostname |
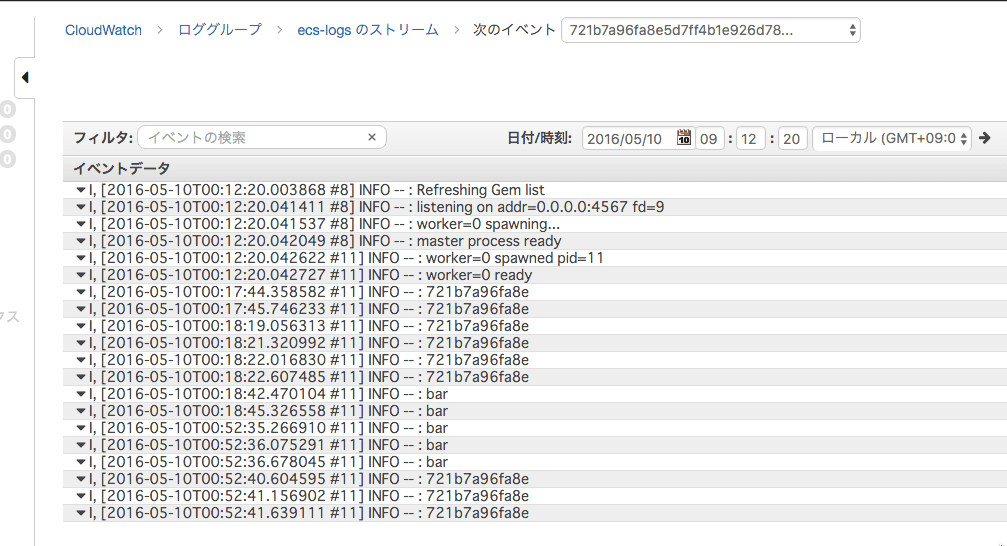
以下のようにログが CloudWatch Logs に記録されている。

おお。
以上
チュートリアルでした。 ECS 上で動くコンテナのログをどうしようかと悩んでいる方には検討の価値有りだと思います!


