はじめに
こんにちは streampack チームのメディです。
https://cloudpack.jp/service/option/streampack.html
Copyrights
Big Buck Bunny
© copyright 2008, Blender Foundation | www.bigbuckbunny.org
Objective ・ 目的
Learn how to use OpenCV python with FFMPEG & VP8.
FFMPEGとVP8でOpenCV pythonを使う方法を学びましょう。
Requirements
FFMPEG must be installed on your system.
FFMPEGがシステムにインストールされている必要があります。
On mac, you can run :
たとえば、macでは:
brew install ffmpeg
OpenCV python installation ・OpenCV pythonのインストール
pip3 install opencv-python
About OpenCV & codecs ・ OpenCVとコーデックについて
By default OpenCV is shipped with royalty free codecs only.
For using non free codecs, you can compile OpenCV yourself (which takes time) or you can pipe OpenCV with FFMPEG.
デフォルトでは、OpenCVにはロイヤリティフリーのコーデックしかありません。
フリーではないコーデックを使用するには、OpenCVを自分でコンパイルするか(時間がかかります)、またはOpenCVをFFMPEGでパイプ処理することができます。
Royalty free codecs ・ ロイヤリティフリーコーデック

In this example we will use the VP8 codec.
この例ではVP8コーデックを使用します。
NB : OpenCV uses BGR color format.
注意 : OpenCVは BGR カラーフォーマットを使います。
Implementation ・ 実装
import cv2
import os
import time
import sys
# Don't forget to check the framerate of your input file !! You can check with : ffprobe yourFile.mp4
out = cv2.VideoWriter(
"output.mkv", cv2.VideoWriter_fourcc(*'VP80'), 25.0,
(720,400))
# The input file is located in the current working directory.
cap = cv2.VideoCapture(os.getcwd()+"/"+'Big_Buck_Bunny_Trailer_400p.ogv')
if (cap.isOpened()== False):
print("Error opening video stream or file")
while(cap.isOpened()):
ret, frame = cap.read()
if ret == True:
# Do something with the frame...
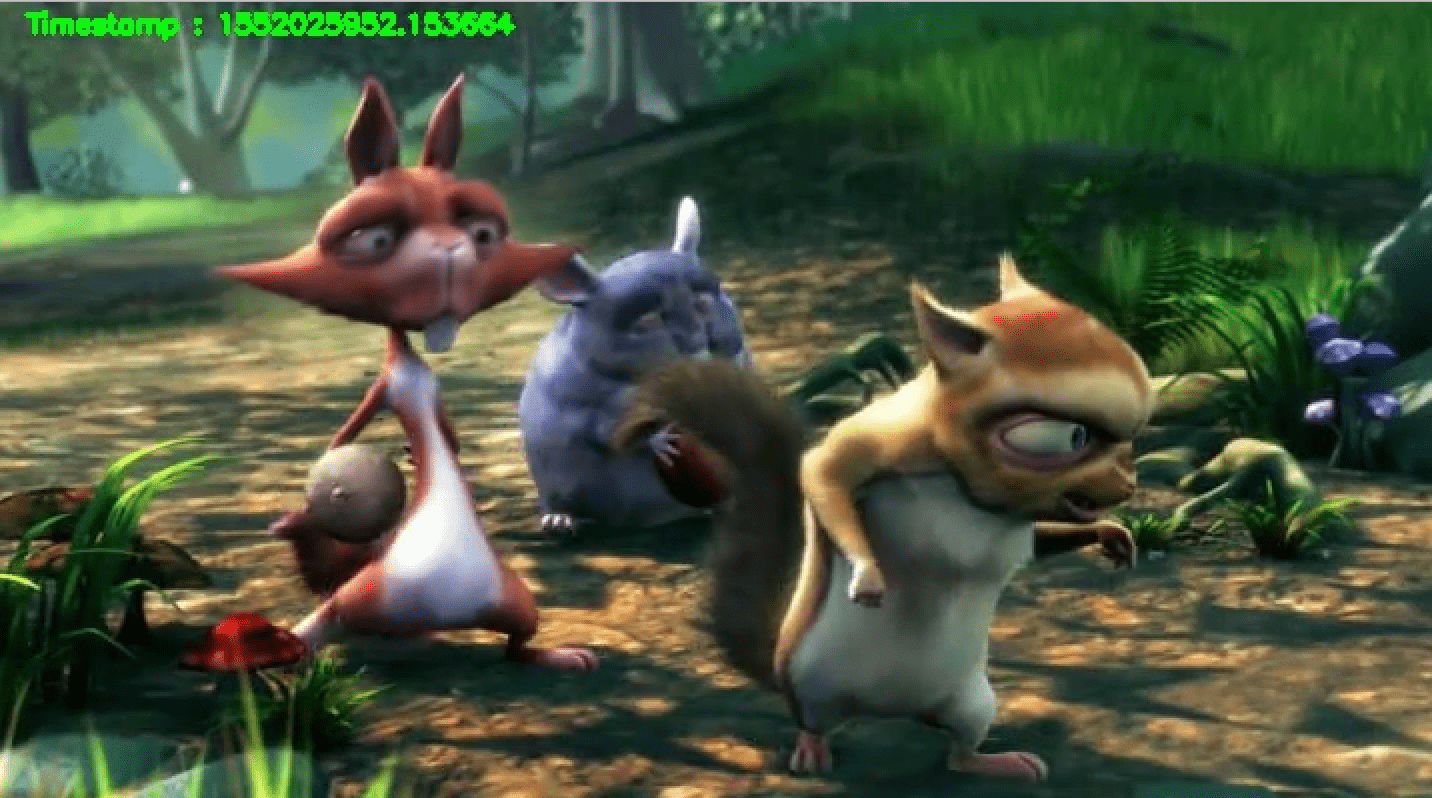
ts = time.time()
cv2.putText(frame ,"Timestamp : " + str(ts), (15, 15),
cv2.FONT_HERSHEY_SIMPLEX, 0.45, (0, 255, 0), 2)
out.write(frame)
# Press Q on keyboard to exit
if cv2.waitKey(25) & 0xFF == ord('q'):
break
else:
break
# Cleaning
out.release()
cap.release()
cv2.destroyAllWindows()
Standard Output (stdout) piped to FFMPEG & FFPLAY
NB : OpenCV uses BGR color format.
注意 : OpenCVは BGR カラーフォーマットを使います。
Data from OpenCV to FFPLAY ・ OpenCVからFFPLAYへのデータ
python3 simple.py | ffplay -f rawvideo -pix_fmt bgr24 -s 720x400 -framerate 25 -i -
Data from OpenCV to FFMPEG ・ OpenCVからFFMPEGへのデータ
In this example we will use the libx264 encoder.
この例では libx264 エンコーダを使用します。
python3 simple.py | ffmpeg -f rawvideo -pix_fmt bgr24 -s 720x400 -framerate 25 -i - -c:v libx264 output.mp4
Implementation ・ 実装
import cv2
import os
import time
import sys

# Don't forget to check resolution & framerate !! You can check with : ffprobe yourFile.mp4

# Simple playback
# python3 simple.py | ffplay -f rawvideo -pix_fmt bgr24 -s 720x400 -framerate 25 -i -

# Encoding
# python3 simple.py | ffmpeg  -f rawvideo -pix_fmt bgr24 -s 720x400 -framerate 25 -i - -c:v libx264 output.mp4

# The input file is located in the current working directory.
cap = cv2.VideoCapture(os.getcwd()+"/"+'Big_Buck_Bunny_Trailer_400p.ogv')

if (cap.isOpened()== False):
  print("Error opening video stream or file")


while(cap.isOpened()):
  ret, frame = cap.read()
  if ret == True:

    # Do something  with the frame...
    ts = time.time()
    cv2.putText(frame ,"Timestamp : " + str(ts), (15, 15),
                cv2.FONT_HERSHEY_SIMPLEX, 0.45, (0, 255, 0), 2)

    # We send the frame to the standard output, then FFMPEG will catch it and process it
    sys.stdout.buffer.write(frame.tobytes())

    # Press Q on keyboard to  exit
    if cv2.waitKey(25) & 0xFF == ord('q'):
      break

  else:
    break

 # Cleaning
cap.release()
cv2.destroyAllWindows()
Information sources ・ 情報源
https://pypi.org/project/opencv-python/
https://www.ffmpeg.org/
https://commons.wikimedia.org/wiki/File:Big_Buck_Bunny_Trailer_400p.ogv