スズキです。
下記のWindowsに続いて、今度はLinuxです。
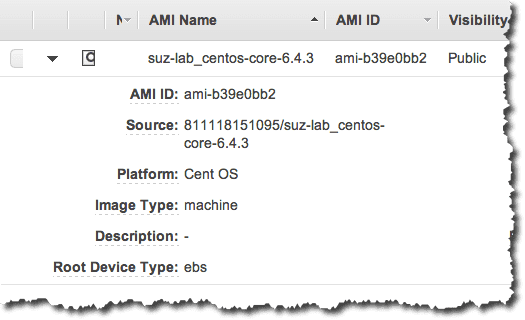
AMIは次のものを利用しました。
事前に下記をインストールしておく必要があります。
# yum -y install
glibc.i686
zlib.i686
compat-libstdc++-296.i686
libuuid.i686
nss-softokn-freebl.i686
libgcc.i686
...
ServerProtectはこちらからダウンロードできます。
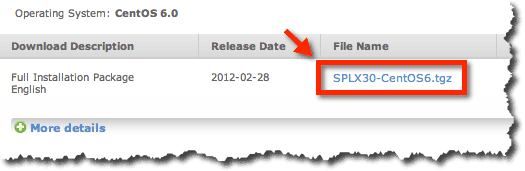
ダウンロードしたら下記のようにインストールします。
(Activationコード(SP-XXXXX…)も予め取得しておきます)
# curl -OL http://files.trendmicro.com/products/splx/SPLX30_CentOS6.tgz
...
# tar xvzf SPLX30_CentOS6.tgz
SProtectLinux-3.0.bin
# ./SProtectLinux-3.0.bin -f RedHat x86_64 -n -s -S SP-XXXX-XXXXX-XXXXX-XXXXX-XXXXX-XXXXX -w no
Installing ServerProtect for Linux:
Unpacking...
Installing rpm file...
準備中...                ########################################### [100%]
1:SProtectLinux          ########################################### [100%]
Activation successful.

Warning!!!
ServerProtect services will not be added into system initial services!
Please use "/sbin/chkconfig --level 345 splx on" to add splx into system initial services.
Instead of commands, you can execute "/opt/TrendMicro/SProtectLinux/SPLX.util/add_splx_service".

ServerProtect for Linux installation completed.
リアルタイムスキャンができるようにカーネルフックモジュール(KHM)も導入します。
カーネルのバージョンが必要なので確認しておきます。
# uname -a
Linux ip-10-120-24-215 2.6.32-358.11.1.el6.x86_64 #1 SMP Wed Jun 12 03:34:52 UTC 2013 x86_64 x86_64 x86_64 GNU/Linux
カーネルフックモジュール(KHM)はこちらからダウンロードできます。
導入は下記の通りです。
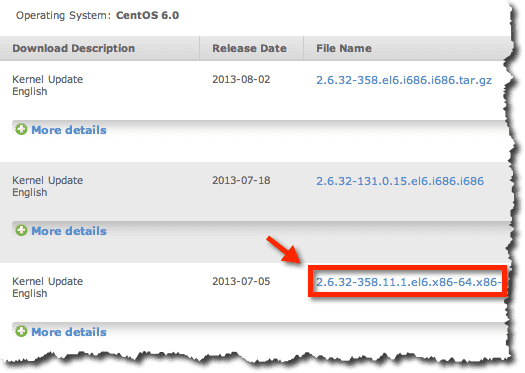
導入は下記の通りです。
# cd /opt/TrendMicro/SProtectLinux/SPLX.module/
# curl -OL http://files.trendmicro.com/products/kernel/splx_kernel_module-3.0.1.0010.CentOS6_2.6.32-358.11.1.el6.x86_64.x86_64.tar.gz
...
# tar xvzf splx_kernel_module-3.0.1.0010.CentOS6_2.6.32-358.11.1.el6.x86_64.x86_64.tar.gz
splxmod-2.6.32-358.11.1.el6.x86_64.x86_64.o
splxmod-2.6.32-358.11.1.el6.x86_64.x86_64.o.md5
すべてが準備出来たら、実際にServerProtectを(自動)起動します。
# chkconfig splx on
# /etc/init.d/splx start
Starting ServerProtect for Linux:
Checking configuration file:                               [  OK  ]
Starting splxcore:
Starting Entity:                                           [  OK  ]
Loading splx kernel module:                                [  OK  ]
Starting vsapiapp:                                         [  OK  ]
ServerProtect for Linux core started.
[  OK  ]
Starting splxhttpd:
Starting splxhttpd:                                        [  OK  ]
ServerProtect for Linux httpd started.
[  OK  ]
ServerProtect for Linux started.
※カーネルフックモジュール(KHM)も有効なことが確認できます。
すると下記よりServerProtectの管理画面にアクセスできます。
(デフォルトはパスワード無しで”Log On”できます)
http://xxx.xxx.xxx.xxx:14942/
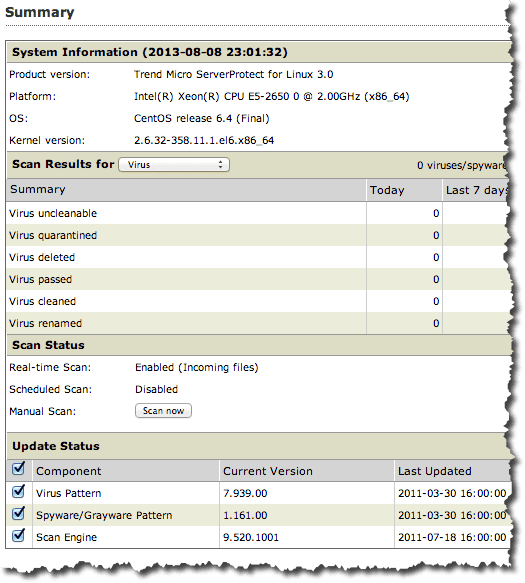
ログインすると下記のように概要を確認することができます。
(リアルタイムスキャンが有効になっていることも確認できます)
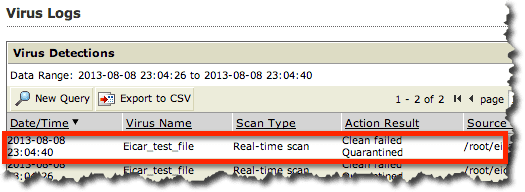
最後に下記で紹介した方法でテストしてみます。
実際には下記のようにダウンロードしてもファイルが配置されません。
# ls
SPLX30_CentOS6.tgz  SProtectLinux-3.0.bin
# curl -OL http://www.eicar.org/download/eicar.com.txt
...
# ls
SPLX30_CentOS6.tgz  SProtectLinux-3.0.bin
そしてコンソールのログには次のように記録されています。