


こんにちは!
ビジネスアクセラレーション事業部の大瀧優杏です🎀
前回の記事で少し触れさせていただきましたが、
AIを使わないでバックエンドとフロントエンドをそれぞれ作成して繋ぎ込みまで行い、
簡易的なじゃんけんアプリ(ローカル)が完成しました!!🥳
真剣に頑張りましたので、
最後まで見ていただけたら嬉しいです。
Next.jsのセットアップ
https://nextjs-ja-translation-docs.vercel.app/docs/getting-started
上記の記事を参考にNext.jsをセットアップします。
yarn create next-app
Next.jsを自動的にセットアップするためのコマンド
yarn create next-app --typescript
Typescriptのプロジェクトで始めたいので、--typescriptフラグを使用する
上記のコマンドで新たにプロジェクト用のフォルダが作成されるので、そのフォルダに移動し、
yarn dev
を実行すれば、
開発サーバーが立ち上がります。
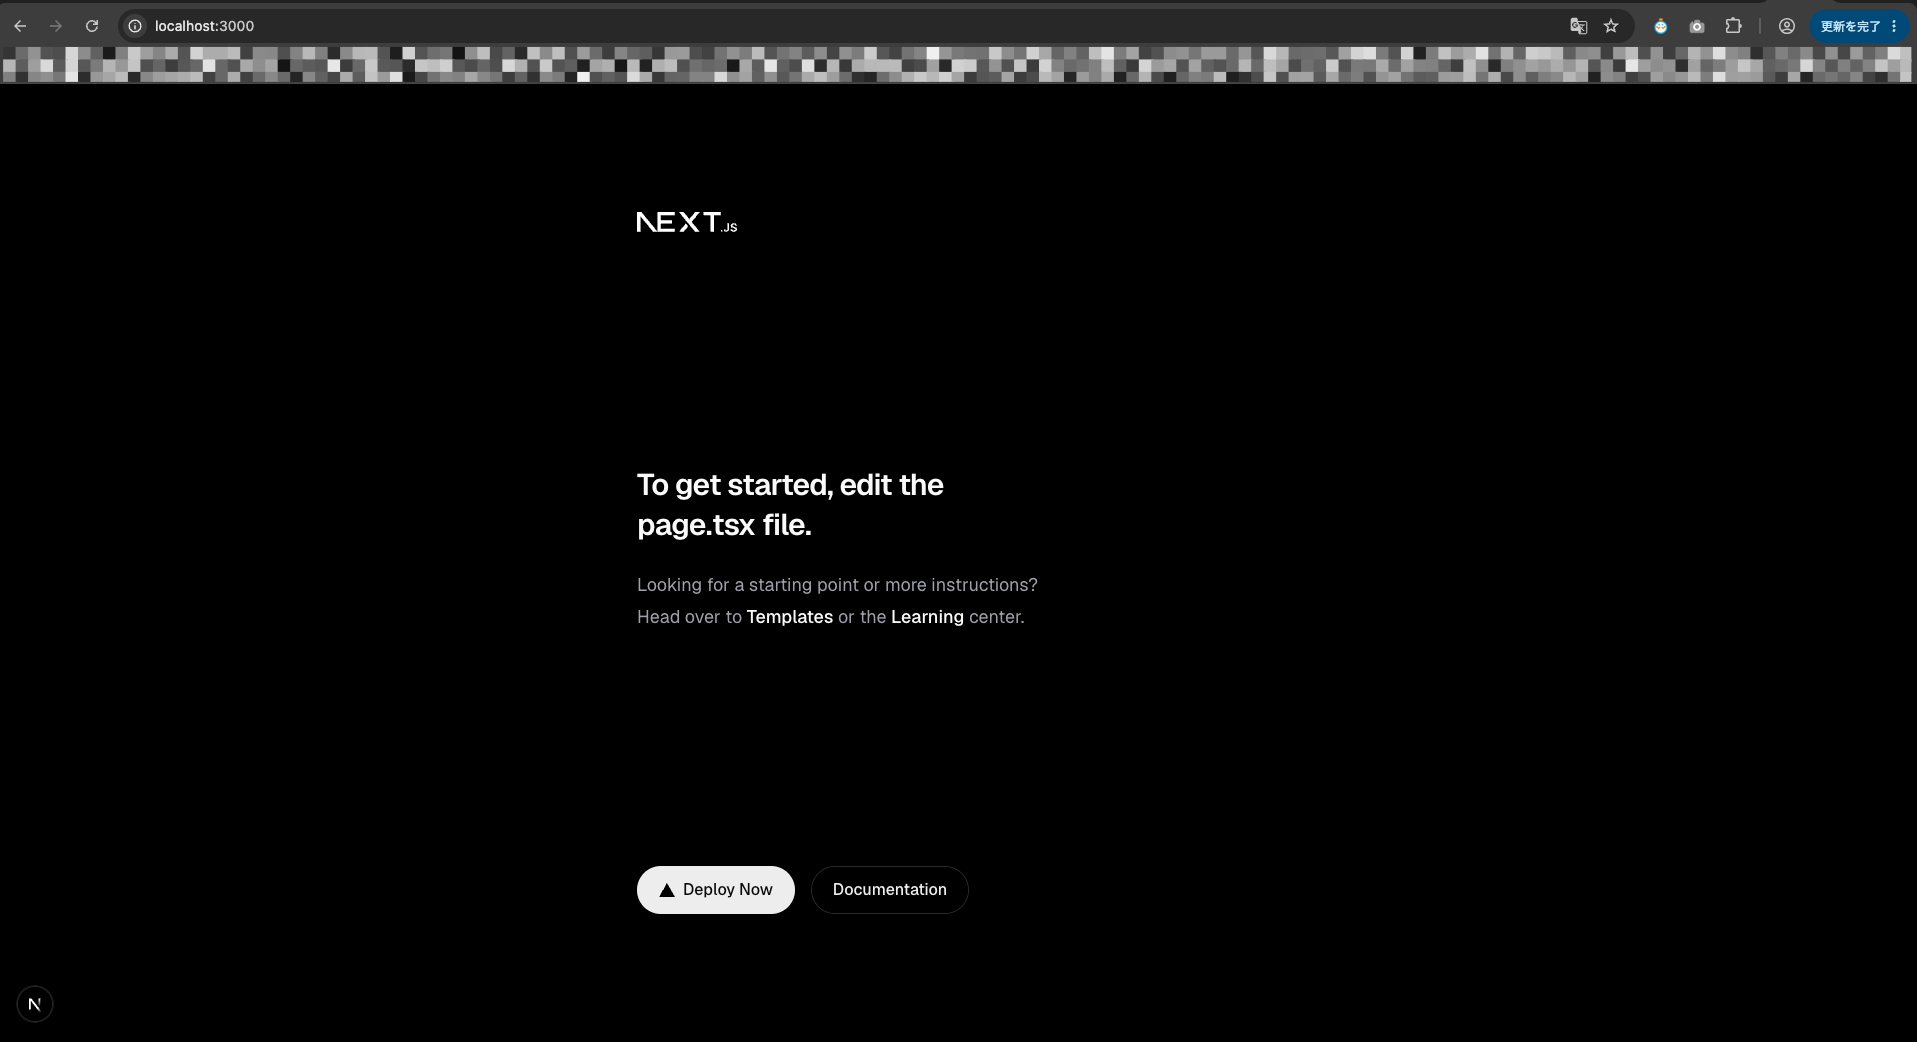
無事に立ち上がりました!
フロントエンド
'use client';

export default function Home() {
  const play = (hand: string) => {
    console.log(`${hand}が押されました!`);
  };
  return (
    <div className="flex flex-col items-center justify-center h-screen gap-8">
      <h1 className="text-5xl font-bold mb-10">じゃんけんゲーム</h1>
      <button onClick={() => play('グー')} className="bg-pink-400 hover:bg-pink-500 text-white font-bold text-2xl py-4 px-8 rounded-xl shadow-lg transition"
        >グー</button>
        <button onClick={() => play('チョキ')} className="bg-pink-400 hover:bg-pink-500 text-white font-bold text-2xl py-4 px-8 rounded-xl shadow-lg transition">チョキ</button>
        <button onClick={() => play('パー')} className="bg-pink-400 hover:bg-pink-500 text-white font-bold text-2xl py-4 px-8 rounded-xl shadow-lg transition">パー</button>
    </div>
  );
}
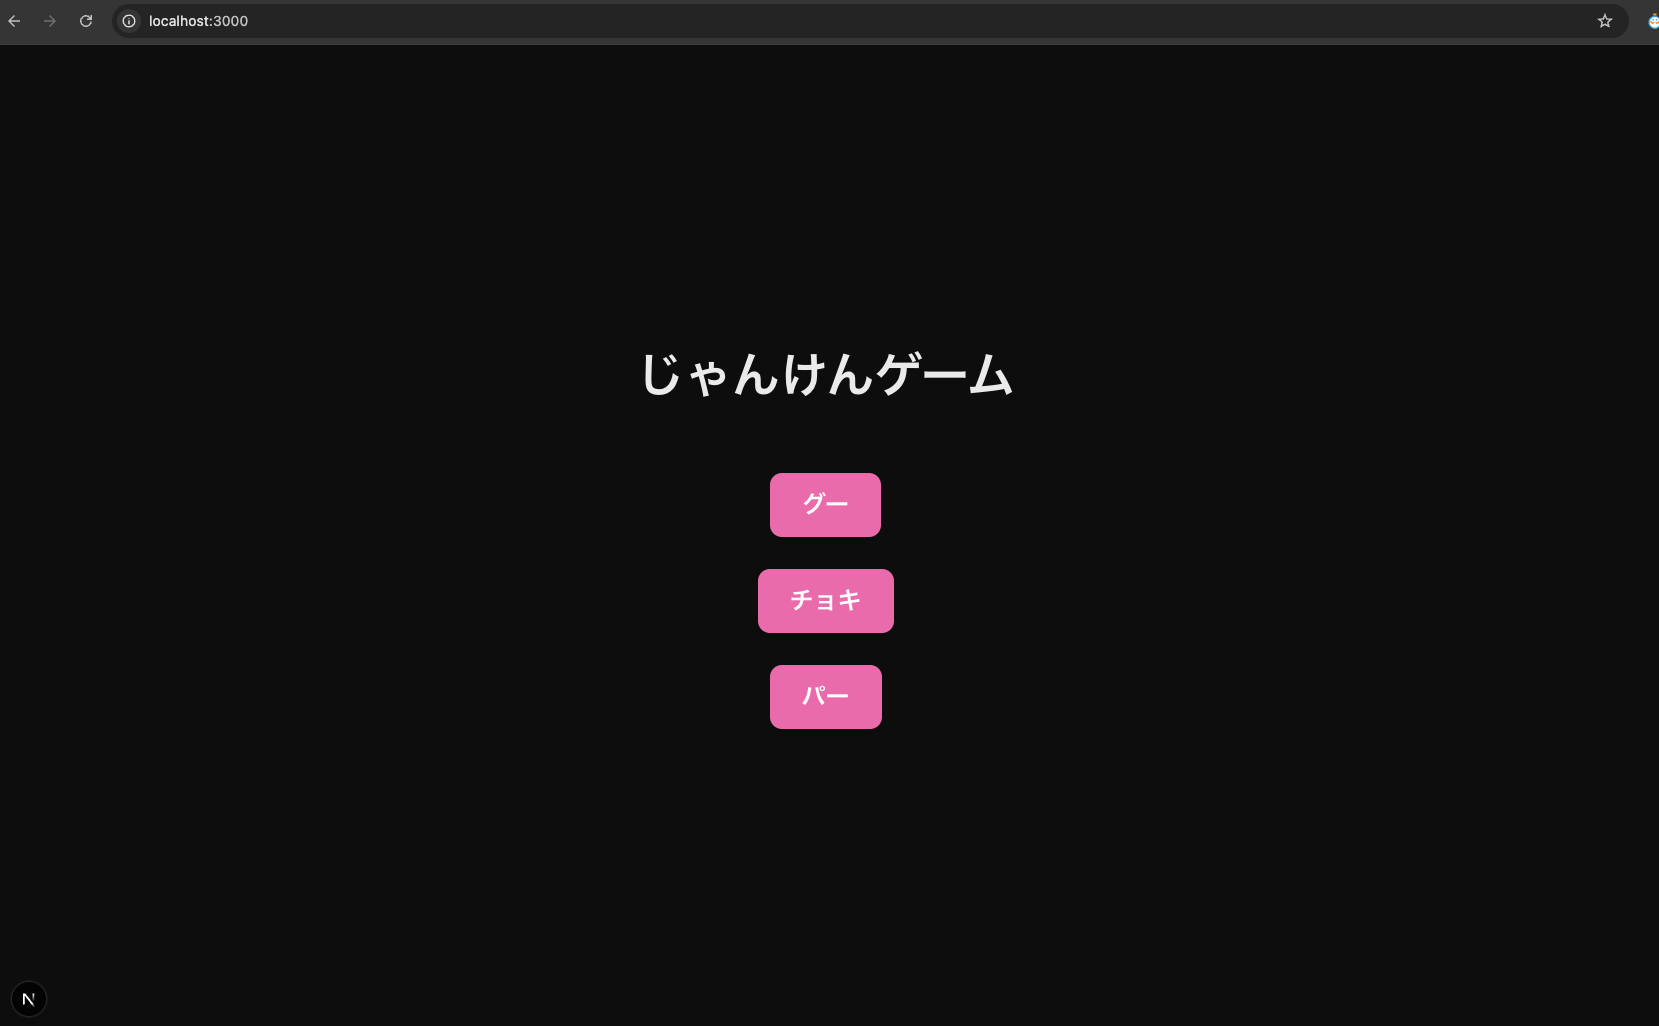
Next.js のトップページ(app/page.tsx)で、じゃんけんの3つのボタンをそれぞれ出し、押したらコンソールにログを出すだけのシンプルなクライアントコンポーネントです。
'use client';
Next.js ではファイル先頭にこれを書くと Client Component になります。
Client Component で、onClick などのブラウザイベントが使えるようになりました。
「じゃんけんゲーム」と、「グー」「チョキ」「パー」に最小限のCSSをつけて、文字を大きく、水平方向、垂直方向ともに中央に揃え、ボタンをピンクにしました。
バックエンド
import random

janken = ["グー", "チョキ", "パー"]

print(f"じゃんけんをします!「グー」「チョキ」「パー」を入力してください><")
# ランダムにコンピューターが選択
computer_hand = random.choice(janken)
# ユーザーが手を入力
user_hand = input("あなたの手を入力してください:")

print(f"あなたの手:{user_hand}、コンピュータの手:{computer_hand}")

if user_hand == computer_hand:
    print("あいこです")
elif user_hand == "グー" and computer_hand == "チョキ":
    print("あなたの勝ちです")
elif user_hand == "チョキ" and computer_hand == "パー":
    print("あなたの勝ちです")
elif user_hand == "パー" and computer_hand == "グー":
    print("あなたの勝ちです")
elif user_hand == "チョキ" and computer_hand == "グー":
    print("あなたの負けです")
elif user_hand == "パー" and computer_hand == "チョキ":
    print("あなたの負けです")
elif user_hand == "グー" and computer_hand == "パー":
    print("あなたの負けです")
ターミナルで動く じゃんけんCLI です。
ユーザーが自分の手を入力し、コンピュータと勝敗を判定して表示します。
処理の流れ
1. コンピュータがランダムに手を選ぶ
1. 自分の手を入力
1. 両方の手を表示
1. if / elif で勝敗を判定して表示
FastAPIをインストール
python3 -m pip install fastapi uvicorn
FastAPIとuvicornをインストール
python3 -m uvicorn app:app --reload
仮想環境でバックエンドを起動
上記のコードだと、
APIとして繋がらない問題発生
何事 ><:sweat_drops:
「じゃんけんCLI」のままだと、
「FastAPIのインポート」・「リクエストボディ・レスポンスボディの設定」・「CORSの設定」がないため、
APIとしてフロントエンドと繋げることができないみたいです汗
リクエストボディ:フロントからバックエンドへ送信するデータ
レスポンスボディ:バックエンドからフロントへ送信するデータ
FastAPIのインポート
FastAPIをインポート
from fastapi import FastAPI
インスタンス化
app = FastAPI()
参照:https://fastapi.tiangolo.com/ja/#installation
リクエストボディとレスポンスボディの設定
リクエストボディを宣言するには、Pydantic モデルを使用し、その強力な機能とメリットをすべて利用します。
引用:https://fastapi.tiangolo.com/ja/tutorial/body/
らしいので、、👇🏻
pydantic から BaseModel をインポート
from pydantic import BaseModel
BaseModel を継承するクラスとしてデータモデルを宣言
class jyanken_request (BaseModel):
    user_hand: str
引数に BaseModelで作ったクラス を指定すると、FastAPIがリクエストボディを自動で受け取るようになる
パスオペレーションを定義
@app.post("/")
「/ 」というパスに POST メソッドでアクセスされたら動く処理を定義
パスオペレーションに 「リクエストボディ」を宣言・追加
def jyanken(request: jyanken_request):
    user_hand = request.user_hand
これにより、
フロントエンドから届いた{ "user_hand": "..." }というJSONが、自動的に request という変数に入ります。
参照:https://fastapi.tiangolo.com/ja/tutorial/body/#create-your-data-model
CORSの設定
CORSMiddlewareをインポート
from fastapi.middleware.cors import CORSMiddleware
CORSを設定する
app.add_middleware(
    CORSMiddleware,
    allow_origins=["http://localhost:3000"],
    allow_credentials=True,
    allow_methods=["*"],
    allow_headers=["*"],
)
allow_origins
アクセスを許可するURLのリスト
allow_credentials
クレデンシャル情報 を一緒に送信することを許可。
allow_methods
特定のHTTPメソッド (GET, POST, PUT, DELETE) を、ワイルドカード "*"を使用してすべて許可。
allow_headers
特定のHTTPヘッダー制限。
ワイルドカード"*"を使用してすべて許可。
参照:https://fastapi.tiangolo.com/ja/tutorial/cors/#use-corsmiddleware
上記を踏まえて完成したコード
バックエンド
from fastapi import FastAPI
from pydantic import BaseModel
from fastapi.middleware.cors import CORSMiddleware
import random

class jyanken_request (BaseModel):
    user_hand: str

app = FastAPI()

app.add_middleware(
    CORSMiddleware,
    allow_origins=["http://localhost:3000"],
    allow_credentials=True,
    allow_methods=["*"],
    allow_headers=["*"],
)

@app.post("/")
def jyanken(request: jyanken_request):
    user_hand = request.user_hand

    hand = ["グー", "チョキ", "パー"]
    computer_hand = random.choice(hand)

    if user_hand == computer_hand:
        result_message = "あいこです"
    elif user_hand == "グー" and computer_hand == "チョキ":
        result_message = "あなたの勝ちです"
    elif user_hand == "チョキ" and computer_hand == "パー":
        result_message = "あなたの勝ちです"
    elif user_hand == "パー" and computer_hand == "グー":
        result_message = "あなたの勝ちです"
    else:
        result_message = "あなたの負けです"

    return {
            "user_hand": user_hand,
            "computer_hand": computer_hand,
            "result_message": result_message
            }
フロントエンド
'use client';

export default function Home() {
  const play = async (hand: string) => {
    console.log(`${hand}が押されました!`);

const res = await fetch('http://localhost:8000', {
   method: 'POST',
   headers: {
     'Content-Type': 'application/json',
   },
   body: JSON.stringify({ user_hand: hand }),
   });

  const data = await res.json();
  console.log(data.result_message);
  };


  return (
    <div className="flex flex-col items-center justify-center h-screen gap-8">
      <h1 className="text-5xl font-bold mb-10">じゃんけんゲーム</h1>
      <button onClick={() => play('グー')} className="bg-pink-400 hover:bg-pink-500 text-white font-bold text-2xl py-4 px-8 rounded-xl shadow-lg transition"
        >グー</button>
        <button onClick={() => play('チョキ')} className="bg-pink-400 hover:bg-pink-500 text-white font-bold text-2xl py-4 px-8 rounded-xl shadow-lg transition">チョキ</button>
        <button onClick={() => play('パー')} className="bg-pink-400 hover:bg-pink-500 text-white font-bold text-2xl py-4 px-8 rounded-xl shadow-lg transition">パー</button>
    </div>
  );
}
バックエンドとの通信部分
 const res = await fetch('http://localhost:8000', {
    method: 'POST',
    headers: {
      'Content-Type': 'application/json',
    },
    body: JSON.stringify({ user_hand: hand }),
  });
上記の部分でリクエストボディを作成し、バックエンドに送信しています。
具体的には、
fetchの第一引数にバックエンドのURLを入れてHTTPリクエストを送信
第二引数で、メソッド、ヘッダー、ボディを設定
しています。
すると、、、
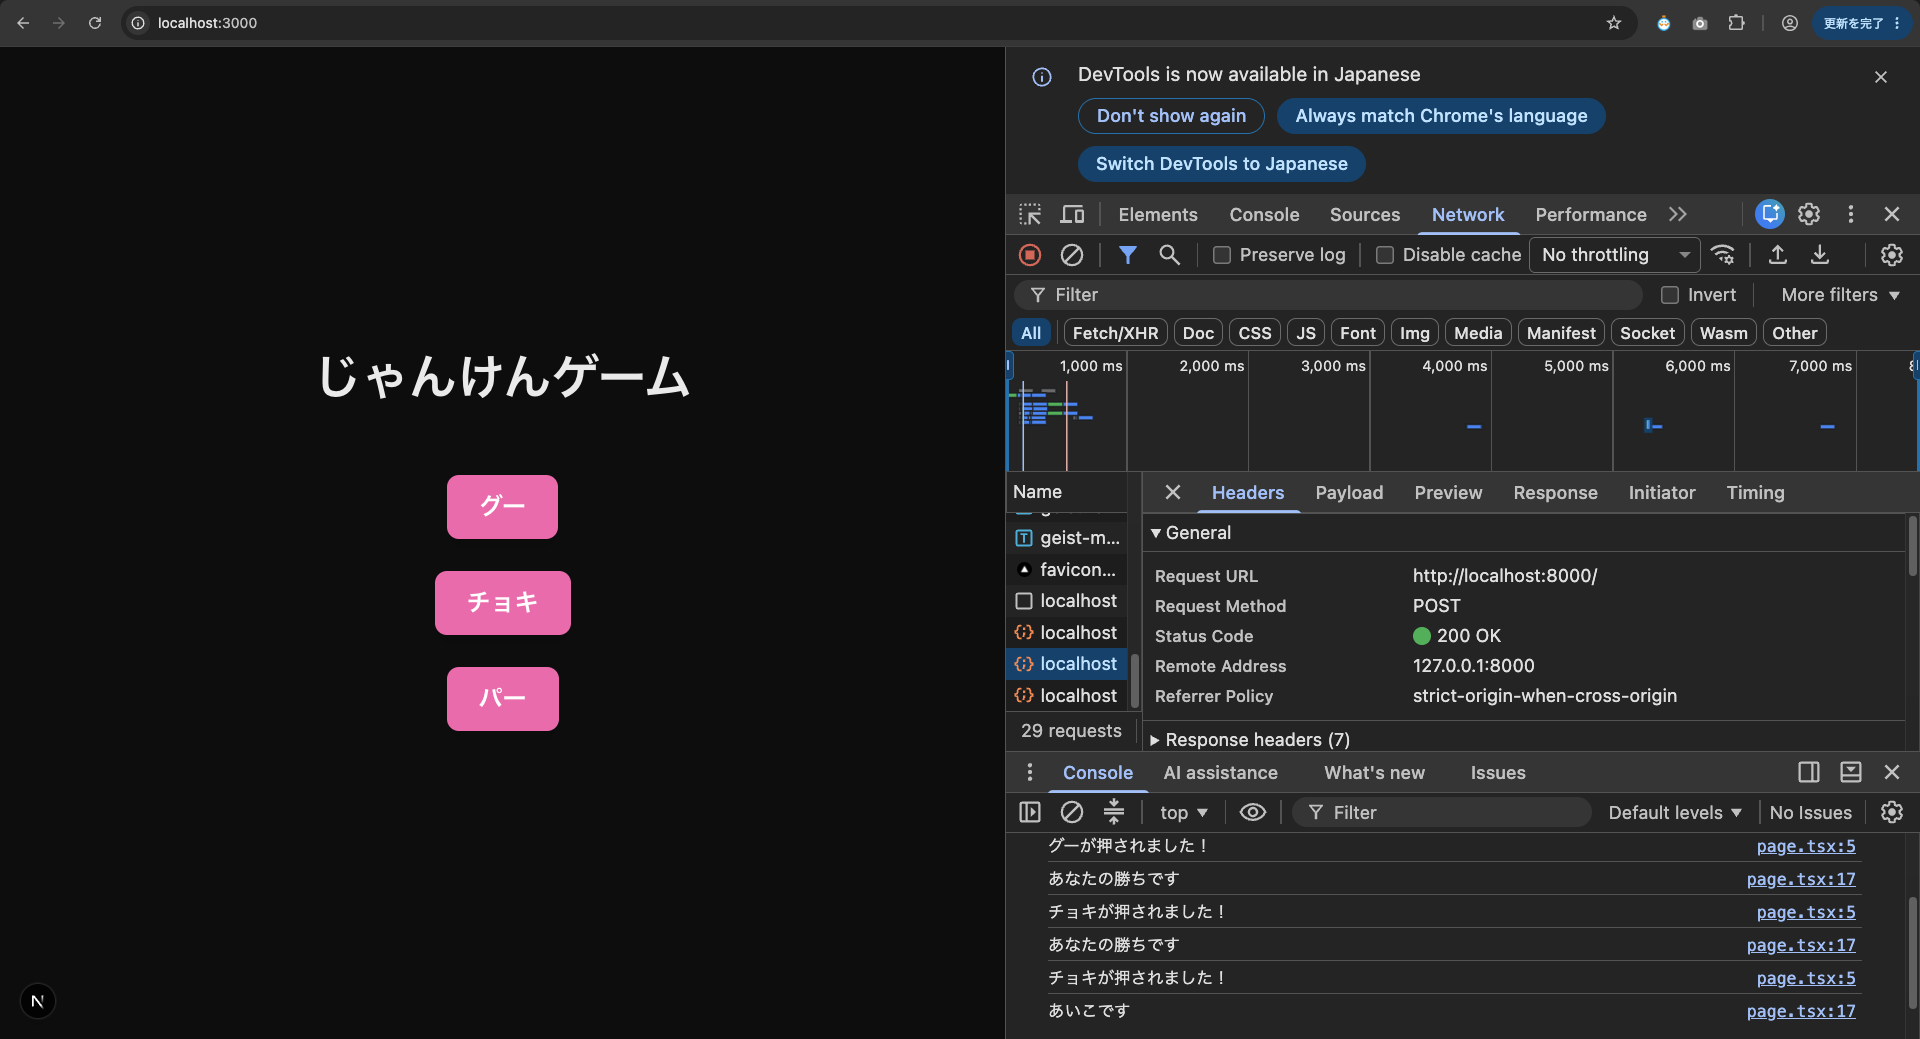
💚200 OK💚
が確認でき、バックエンドと通信できたことが確認できました!🙌🏻
やったー!!!🙌🏻
終わりに
AIに頼らずバックエンドとフロントエンドを自力で作成したことで、PythonやNext.jsの基本的な文法、HTML/CSSの基礎を改めてしっかり学ぶことができました。
また、今回はあえてAWS環境を使わなかったことで、API連携に必要なリクエスト・レスポンスボディの設定やCORSの仕組みなど、Webの根本的な理解も深まりました。
超シンプルな「じゃんけんアプリ」ですが、多くのことを学ぶきっかけになりました。
最後まで読んでいただきありがとうございました!🥰
 簡単30秒
簡単30秒