「Magnito」とは何か??

Cognitoを手軽にローカルでお試しできる、OSSツールのようです。
裏側はReactが使われているようですね。
ロゴも、Cognitoをモチーフにしているであろうロゴでいいですね。

手順
簡単にMagnitoを使用してみます。その際の手順を下記に記しています。
①DokerHubからdockerイメージをpullしてくる
docker pull frourio/magnito
PS C:\(docker-compose.ymlを作成したファイルへのパス)> docker pull frourio/magnito
Using default tag: latest
latest: Pulling from frourio/magnito
ec99f8b99825: Pull complete
6d985aef5380: Pull complete
173915e8f399: Pull complete
642bc8a8ff82: Pull complete
48fd1c3f887b: Pull complete
de270e1f5b87: Pull complete
f7d920a471aa: Pull complete
712dd7c40d75: Pull complete
fa404cce9a32: Pull complete
b5196eb0addc: Pull complete
3596bfbce17c: Pull complete
Digest: sha256:aa235a003ce44c06903077e374e0aaf210e65da9acfaa0d2acc6d1f205254a96
Status: Downloaded newer image for frourio/magnito:latest
http://docker.io/frourio/magnito:latest
What's Next?
  View a summary of image vulnerabilities and recommendations → docker scout quickview frourio/magnito
②docker-compose.yml作成
任意のディレクトリを作成し、その中でdocker-compose.ymlを作成します。
サンプルコードがリポジトリに記載されているため、それをコピーします。
services:
  magnito:
    image: frourio/magnito:latest
    ports:
      - 5050:5050 # Cognito API
      - 5051:5051 # web interface
    environment:
      COGNITO_USER_POOL_ID: ap-northeast-1_example
      COGNITO_USER_POOL_CLIENT_ID: example-client-name
      COGNITO_ACCESS_KEY: magnito-access-key
      COGNITO_SECRET_KEY: magnito-secret-key
      COGNITO_REGION: ap-northeast-1
      SMTP_HOST: inbucket
      SMTP_PORT: 2500
      SMTP_USER: fake_mail_user
      SMTP_PASS: fake_mail_password
    volumes:
      - magnito:/usr/src/app/data

  inbucket:
    image: inbucket/inbucket:3.0.3
    ports:
      - 2500:2500 # SMTP
      - 9000:9000 # web interface
    volumes:
      - inbucket:/storage

volumes:
  magnito:
    driver: local
  inbucket:
    driver: local
③docker-compose up -d実行
今回は個人のPC(Windows)で試しています。
(おそらくmacでも似たような挙動になると思います)
docker-compose.ymlを作成したディレクトリ内で、
docker-compose up -d を実行します。
実行結果
PS C:(docker-compose.ymlを作成したファイルへのパス)> docker-compose up -d
[+] Running 9/9
✔ inbucket 8 layers [⣿⣿⣿⣿⣿⣿⣿⣿] 0B/0B Pulled 8.3s
✔ 530afca65e2e Pull complete 0.9s
✔ 866f56904284 Pull complete 1.0s
✔ e356c9130232 Pull complete 0.9s
✔ 8d4341af276d Pull complete 2.6s
✔ 82a73217a072 Pull complete 2.9s
✔ 64b833ffe729 Pull complete 2.7s
✔ a77af8706e66 Pull complete 3.5s
✔ 9c842edb6049 Pull complete 3.6s
[+] Running 5/5
✔ Network magnito-test_default Created 0.3s
✔ Volume “magnito-test_magnito” Create… 0.0s
✔ Volume “magnito-test_inbucket” Creat… 0.0s
✔ Container magnito-test-magnito-1 Sta… 3.9s
✔ Container magnito-test-inbucket-1 St… 3.9s
④ローカル起動
localhost:5051にアクセスすると、以下のようにCognitoを使用する際と同じようなUIが表示されます。
実際にアカウントを作成してみます。
ユーザー名・パスワード・メールアドレスを入力し、アカウントを作るを押下します。
すると、以下のような画面になります。
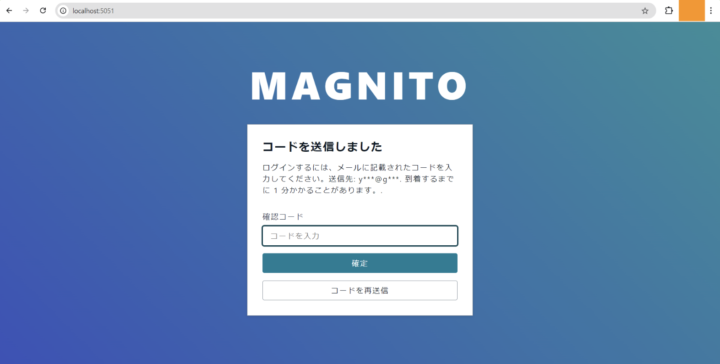
⑤認証コードの確認/認証コードの入力
Cognitoを使った認証であれば、アカウント作成時に、認証コードが入力されたメールアドレス宛に届くかと思います。
が、Magnitoでは、入力されたメールアドレス宛には実際にはメールは届きません。
しかし、localhost:9000にアクセスすることで、送信されたメールの中身を確認することができます。
初期ページはこのような表示です。
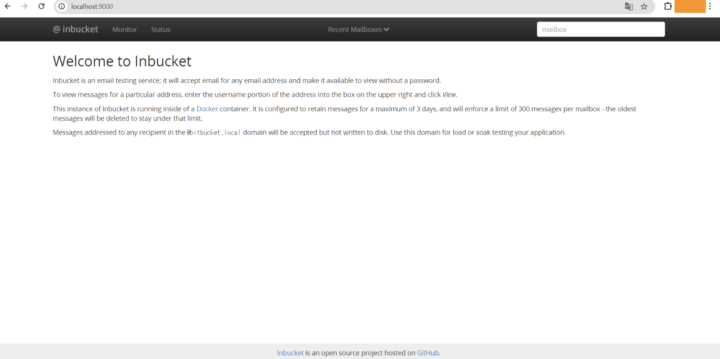
Inbucket is an email testing service; it will accept email for any email address and make it available to view without a password.
To view messages for a particular address, enter the username portion of the address into the box on the upper right and click View.
This instance of Inbucket is running inside of a https://www.docker.com/ container. It is configured to retain messages for a maximum of 3 days, and will enforce a limit of 300 messages per mailbox – the oldest messages will be deleted to stay under that limit.
Messages addressed to any recipient in the @bitbucket.local domain will be accepted but not written to disk. Use this domain for load or soak testing your application.
上記の記載のように、
Inbucketに保存される情報は3日後に削除されるようになっており、最大300メッセージを保持しておくことができるようです。(それ以上貯まった場合は古いものから削除される)
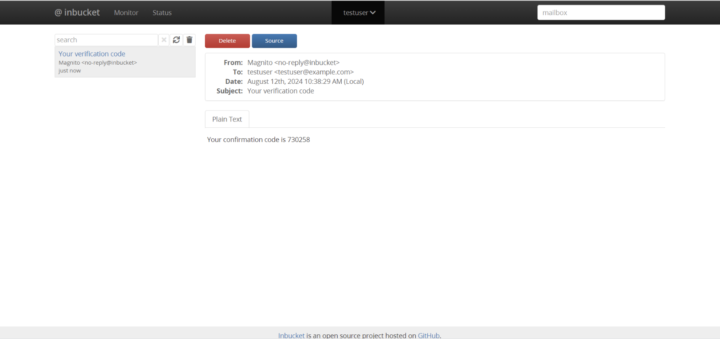
認証コードを確認し、入力画面にて入力後、認証コードの入力を行うと、ログイン画面に遷移します。
そこで先ほど登録したユーザー名とパスワードを入力します。
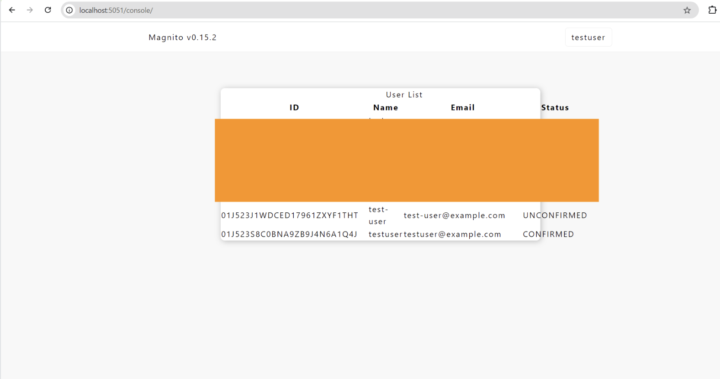
ログインに成功するとlocalhost:5051/consoleに遷移し、
ユーザーの一覧および、認証ステータス(CONFIRMED:認証済/UNCONFIRMED/未認証)を確認することができるようです。
その他できること
- プロフィールの確認
- ログイン中のユーザーのユーザー名とメールアドレスの確認
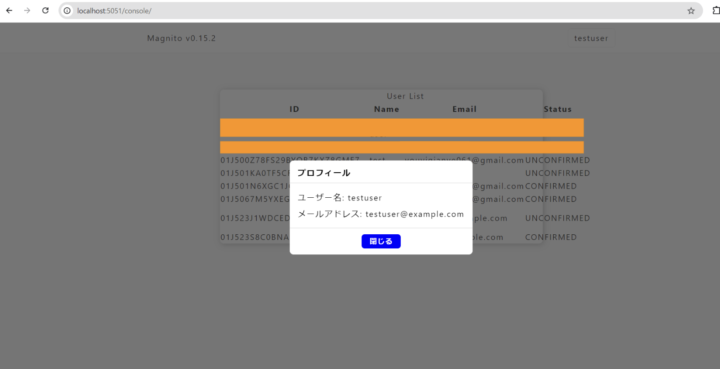
- ログイン中のユーザーのユーザー名とメールアドレスの確認
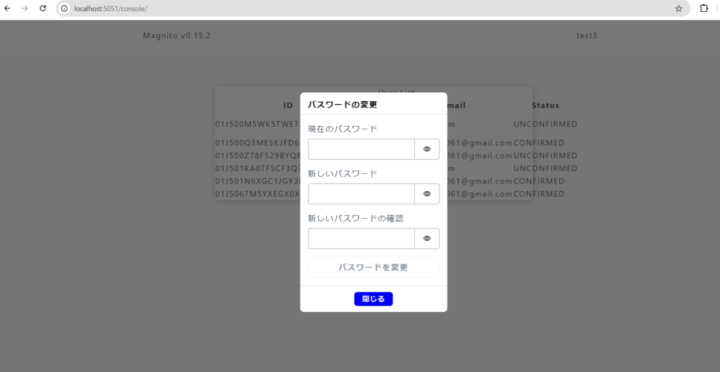
- パスワードの変更
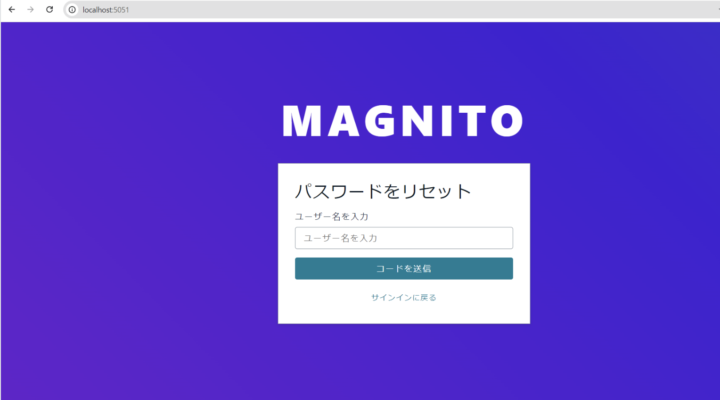
- パスワードのリセット
以上のように、Cognitoを使う際と同じような形で認証機能を利用することができることが分かりました。
まとめ
今回は「Mangito」を使って、簡単にCognitoでの認証のテストを試してみました。
特段Cognitoの構築の知識がない私でも、Githubにサンプルのコードがあり、15-20分ほどで試すことができました。
ローカルでパパッとログイン周りを構築してしまいたい時などに便利そうですね。
Amplify UIと組み合わせればカスタマイズできるようなので拡張性もありそうです。
エミュレータツールに関しては全然知見がなかったですが、今回調べてみて非常に興味深いなと思いました!
引き続き調べていけたらなと思います!
参考
- Magnito Githubリポジトリ
https://github.com/frouriojs/magnito?tab=readme-ov-file - Inbucketについてのサイト
https://inbucket.org/about/