- 前回の記事で
- メモ
— 環境
— Solr を起動
— Core の作成
— ドキュメントの登録
— 一旦、検索
— Commit
— 改めて検索
— 削除
— Commit
— 改めて検索
— 最適化(マージ処理) - 以上
前回の記事で
Lucene をちょっと触る機会を得たので、Lucene を生で触るよりも Solr を試してみることにしたのでメモ。
inokara.hateblo.jp
ホントにメモ。そして「Solr とは」とかには触れない。
メモ
環境
$ sw_vers
ProductName:    Mac OS X
ProductVersion: 10.11.6
BuildVersion:   15G17023

$ java -version
java version "1.8.0_144"
Java(TM) SE Runtime Environment (build 1.8.0_144-b01)
Java HotSpot(TM) 64-Bit Server VM (build 25.144-b01, mixed mode)

$ ./bin/solr -version
5.5.5
Solr を起動
こちら から zip ファイルを取得して適当なディレクトリに展開して以下のように Solr を起動する。
./bin/solr start
以下のように出力される。
$ ./bin/solr start
Waiting up to 30 seconds to see Solr running on port 8983 [|]
Started Solr server on port 8983 (pid=51921). Happy searching!
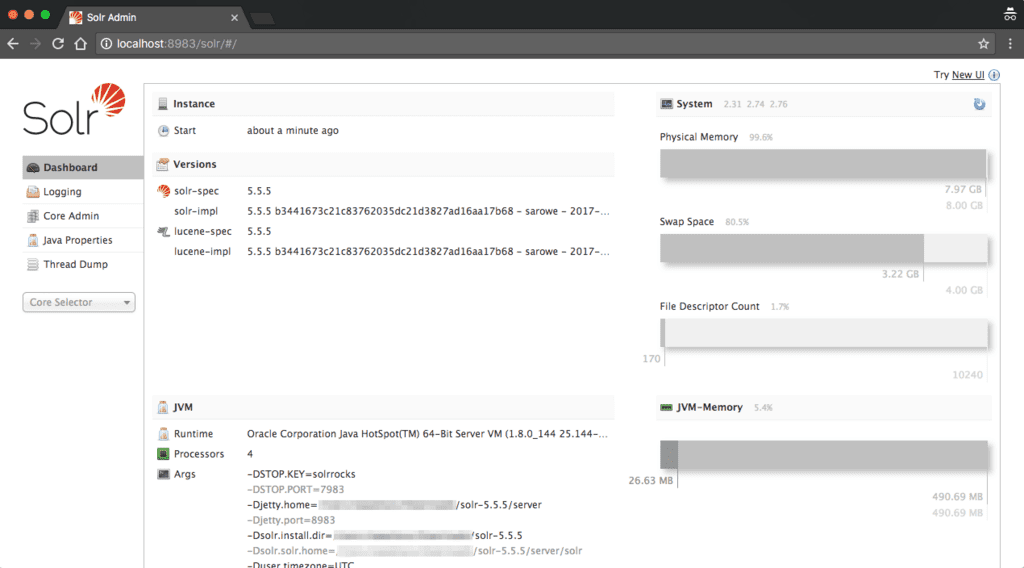
ブラウザで http://localhost:8983 にアクセスすると下図のように表示される。

Core の作成
Solr では Core と呼ばれる RDB 言うところのスキーマを作成する必要がある。Core 毎にスキーマ定義やクエリ設定を行うことが出来る。
Core は以下のように実行して作成する。
bin/solr create -c collection1
以下のように出力される。
$ bin/solr create -c collection1

Copying configuration to new core instance directory:
/Path/To/solr-5.5.5/server/solr/collection1

Creating new core 'collection1' using command:
http://localhost:8983/solr/admin/cores?action=CREATE&name=collection1&instanceDir=collection1

{
  "responseHeader":{
    "status":0,
    "QTime":2088},
  "core":"collection1"}
ドキュメントの登録
Core にドキュメントを登録する場合、XML と JSON そして CSV で登録することが出来るが、今回は以下のように JSON で登録する。
curl -X POST -H 'Content-Type: application/json' \
'http://localhost:8983/solr/collection1/update?wt=json&indent=on' --data-binary '
[
  {
    "id": "1",
    "title": "Doc 1"
  },
  {
    "id": "2",
    "title": "Doc 2"
  },
  {
    "id": "3",
    "title": "Doc 3"
  },
  {
    "id": "4",
    "title": "Doc 4"
  },
  {
    "id": "5",
    "title": "Doc 5"
  },
  {
    "id": "6",
    "title": "Doc 6"
  },
  {
    "id": "7",
    "title": "Doc 7"
  },
  {
    "id": "8",
    "title": "Doc 8"
  },
  {
    "id": "9",
    "title": "Doc 9"
  },
  {
    "id": "10",
    "title": "Doc 10"
  },
  {
    "id": "11",
    "title": "Doc 11"
  }
]'
以下のように出力される。
$ curl -X POST -H 'Content-Type: application/json' \
'http://localhost:8983/solr/collection1/update?wt=json&indent=on' --data-binary '
[
  {
    "id": "1",
    "title": "Doc 1"
  },

... (略) ...

{
  "responseHeader":{
    "status":0,
    "QTime":222}}
一旦、検索
curl -X GET 'http://localhost:8983/solr/collection1/select?q=*:*&wt=json&indent=on'
以下のように出力されるだけ。
$ curl -X GET 'http://localhost:8983/solr/collection1/select?q=*:*&wt=json&indent=on'
{
  "responseHeader":{
    "status":0,
    "QTime":19,
    "params":{
      "q":"*:*",
      "indent":"on",
      "wt":"json"}},
  "response":{"numFound":0,"start":0,"docs":[]
  }}
Solr では登録したドキュメントを検索出来るようにするには commit 処理が必要になる。
Commit
ということで Commit する。
curl -X GET 'http://localhost:8983/solr/collection1/update?commit=true&wt=json&indent=on'
以下のように出力される。
$ curl -X GET 'http://localhost:8983/solr/collection1/update?commit=true&wt=json&indent=on'
{
  "responseHeader":{
    "status":0,
    "QTime":5}}
改めて検索
curl -X GET 'http://localhost:8983/solr/collection1/select?q=*:*&wt=json&indent=on'
以下のように出力される。
$ curl -X GET 'http://localhost:8983/solr/collection1/select?q=*:*&wt=json&indent=on'
{
  "responseHeader":{
    "status":0,
    "QTime":3,
    "params":{
      "q":"*:*",
      "indent":"on",
      "wt":"json"}},
  "response":{"numFound":11,"start":0,"docs":[
      {
        "id":"1",
        "title":["Doc 1"],
        "_version_":1583237681930829824},

... (略) ...

      {
        "id":"10",
        "title":["Doc 10"],
        "_version_":1583237682111184896}]
  }}
削除
以下のように ID を指定してドキュメントを削除する。
curl -X POST -H 'Content-Type: application/json' \
'http://localhost:8983/solr/collection1/update' --data-binary '
{
  "delete": "10"
}'
以下のように出力さる。
$ curl -X POST -H 'Content-Type: application/json' \
> 'http://localhost:8983/solr/collection1/update' --data-binary '
> {
>   "delete": "10"
}'> }'
{"responseHeader":{"status":0,"QTime":6}}
削除の場合にも Commit を行う。
Commit
curl -X GET 'http://localhost:8983/solr/collection1/update?commit=true&wt=json&indent=on'
以下のように出力される。
$ curl -X GET 'http://localhost:8983/solr/collection1/update?commit=true&wt=json&indent=on'
{
  "responseHeader":{
    "status":0,
    "QTime":4}}
改めて検索
curl -X GET 'http://localhost:8983/solr/collection1/select?q=*:*&wt=json&indent=on'
以下のように ID: 10 のドキュメントは削除され、検索結果に出力されない。
$ curl -X GET 'http://localhost:8983/solr/collection1/select?q=*:*&wt=json&indent=on'
{
  "responseHeader":{
    "status":0,
    "QTime":6,
    "params":{
      "q":"*:*",
      "indent":"on",
      "wt":"json"}},
  "response":{"numFound":10,"start":0,"docs":[
      {
        "id":"1",
        "title":["Doc 1"],
        "_version_":1583237681930829824},
      {

... (略) ...

      {
        "id":"9",
        "title":["Doc 9"],
        "_version_":1583237682110136320},
      {
        "id":"11",
        "title":["Doc 11"],
        "_version_":1583237682111184897}]
  }}
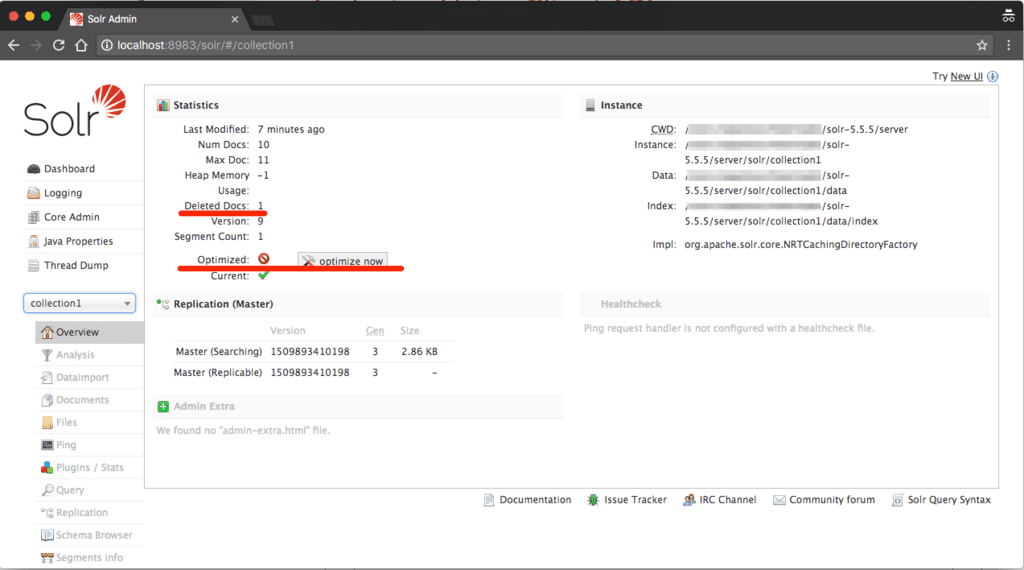
但し、ここでの「削除」はマージ処理が行われていないので、完全な削除にはなっていないので、Solr ダッシュボード → Core → Dashboard では以下のように出力されている。

Deleted Document は 1 にカウントアップされていて、Optimized が実施可能な状態になっている。
最適化(マージ処理)
ということで、最適化を行う。
curl -X GET 'http://localhost:8983/solr/collection1/update?optimize=true&wt=json&indent=on'
以下のように出力される。
$ curl -X GET 'http://localhost:8983/solr/collection1/update?optimize=true&wt=json&indent=on'
{
  "responseHeader":{
    "status":0,
    "QTime":106}}
以上
メモでした。


