DX開発事業部の西田です。

こちらの記事に関連し、画像に写った個人を特定できないようにするための検証で、指紋の画像をGoogle CloudのAIサービスで検知できないか調査しました。
意外ですが、ピースサインの写真から指紋を盗まれる可能性もあるようです。
Cloud Vision APIによるオブジェクト検出
Cloud Vision APIでは学習済みのモデルで画像に映るオブジェクトを検出することができます。
例えば次のように、検出した座標とランドマークの情報からオブジェクトのエリアを描画することができます。
!pip install --upgrade google-cloud-vision==3.7.2
from google.cloud import vision
import requests
import io
import json
from PIL import Image, ImageDraw, ImageFont
import os

# 画像データからオブジェクトを検出
def detect_objects(image_bytes):

    client = vision.ImageAnnotatorClient()
    api_image = vision.Image(content=image_bytes)
    return client.object_localization(api_image)


# 検出されたランドマークに矩形を描画
def draw_object_landmarks(image, annotations):
    ANNOTATION_COLOR = "#FF0000"
    BORDER_WIDTH = 2
    FONT_SIZE = 20

    draw = ImageDraw.Draw(image)

    try:
        font = ImageFont.truetype("./Arial.ttf", FONT_SIZE) # フォントファイルを用意しておく
    except IOError:
        font = ImageFont.load_default()

    # アノテーションを一つずつ処理
    for object in annotations.localized_object_annotations:
        v = object.bounding_poly.normalized_vertices

        # 矩形領域
        left = v[0].x * image.width
        top = v[0].y * image.height
        right = v[2].x * image.width
        bottom = v[2].y * image.height

        # 矩形を描画
        draw.rectangle([left, top, right, bottom], outline=ANNOTATION_COLOR, width=BORDER_WIDTH)

        # ラベルを描画
        text_position = (left, top - FONT_SIZE)
        draw.text(text_position, object.name, fill=ANNOTATION_COLOR, font=font)


# 「ぱくたそ」の画像を使用( https://www.pakutaso.com/ )
url = "https://user0514.cdnw.net/shared/img/thumb/trPAR57780013_TP_V4.jpg"
image_bytes = requests.get(url).content

annotations = detect_objects(image_bytes)

pil_image = Image.open(io.BytesIO(image_bytes))
draw_object_landmarks(pil_image, annotations)

display(pil_image)
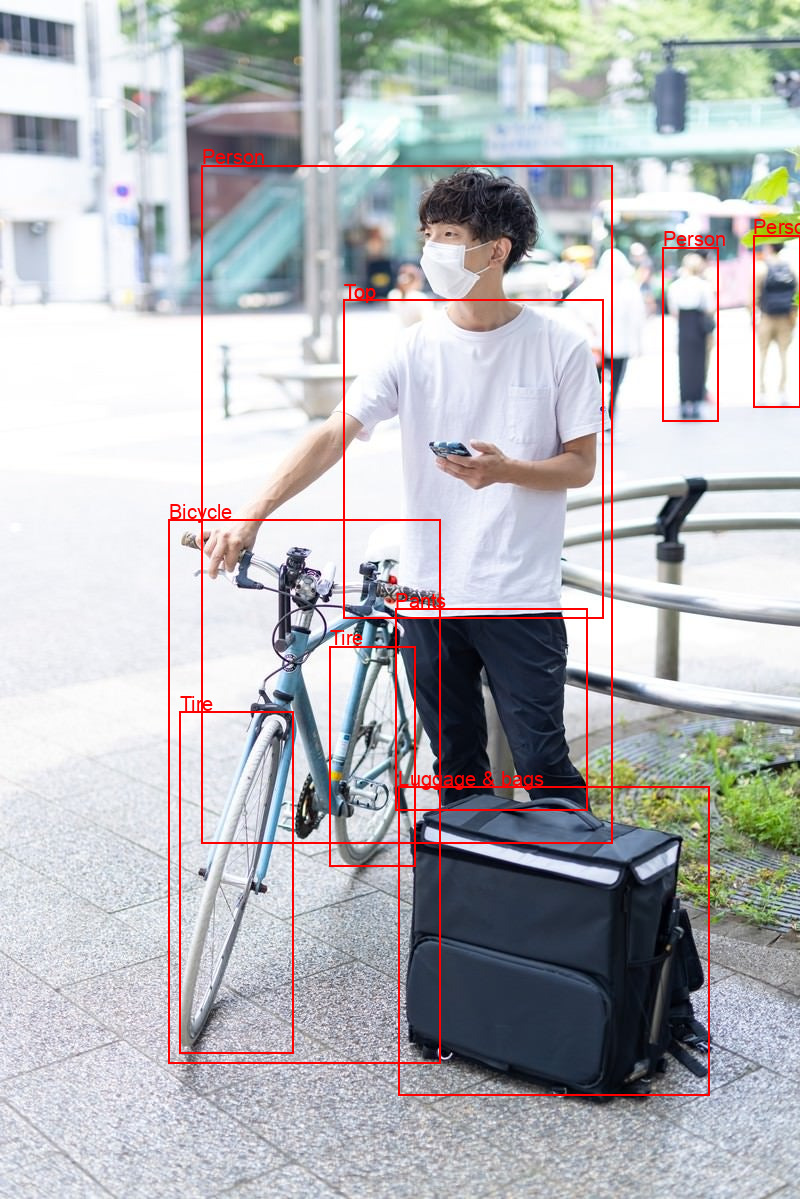
これでお手軽に指紋も検知できないかなーと思いましたが、そう甘くなく。
指紋は学習されていないようで検知はできませんでした。
Vertex AI Geminiにマルチモーダルで問い合わせてみる
次にVertex AIとGemini生成モデルを利用して画像を解析させる方法を思いついたので試してみました。
!pip install google-cloud-aiplatform==1.53.0
import vertexai
from vertexai.generative_models import GenerativeModel, Image
import time


def generate(prompt, image_file_path):
  # Files APIを使用してアップロード
  image = Image.load_from_file("./fingerprint.jpeg")

  vertexai.init(project=PROJECT_ID, location=LOCATION)
  model = GenerativeModel(
    "gemini-1.5-flash-001",
    system_instruction="あなたは画像解析を行う専門家であり、画像に写っているものを識別する役割があります。",
    tools=[],
  )
  responses = model.generate_content(
      [
          prompt,
          image
      ],
      generation_config={
        "max_output_tokens": 8192,
        "temperature": 0,
        "top_p": 0.95,
      },
      stream=False,
  )

  print(responses.text)


generate("""
指紋は写っていますか。YesかNoで答えてください。
""", "./fingerprint.jpeg")
これもいくつかのパターンで試しましたがよい結果は得られませんでした。
写っていることが確認できてもプラスで座標の情報も精度よく取得できないと部分加工ができないので現状のモデルではまだ難しそうです。
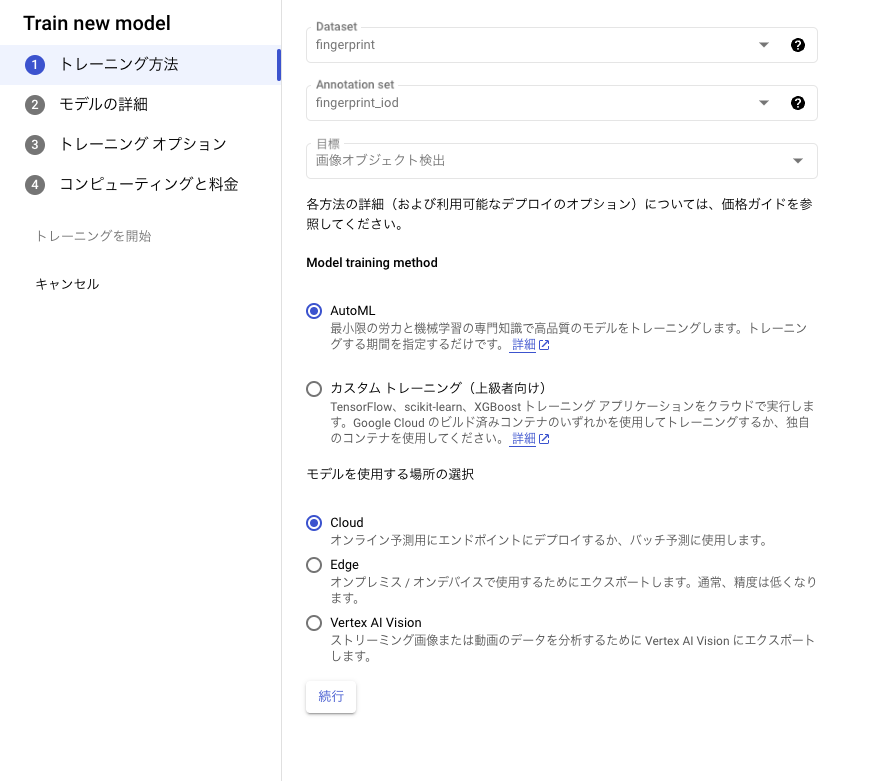
Vertex AI AutoMLで学習したモデルで検知する
こちらが本命です。かつてはAutoML Visionと呼ばれていたサービスです。
AutoMLではデータセットを登録し、ラベル付を行うだけで、自動でトレーニング、モデルのエンドポイントへのデプロイを行ってくれます。
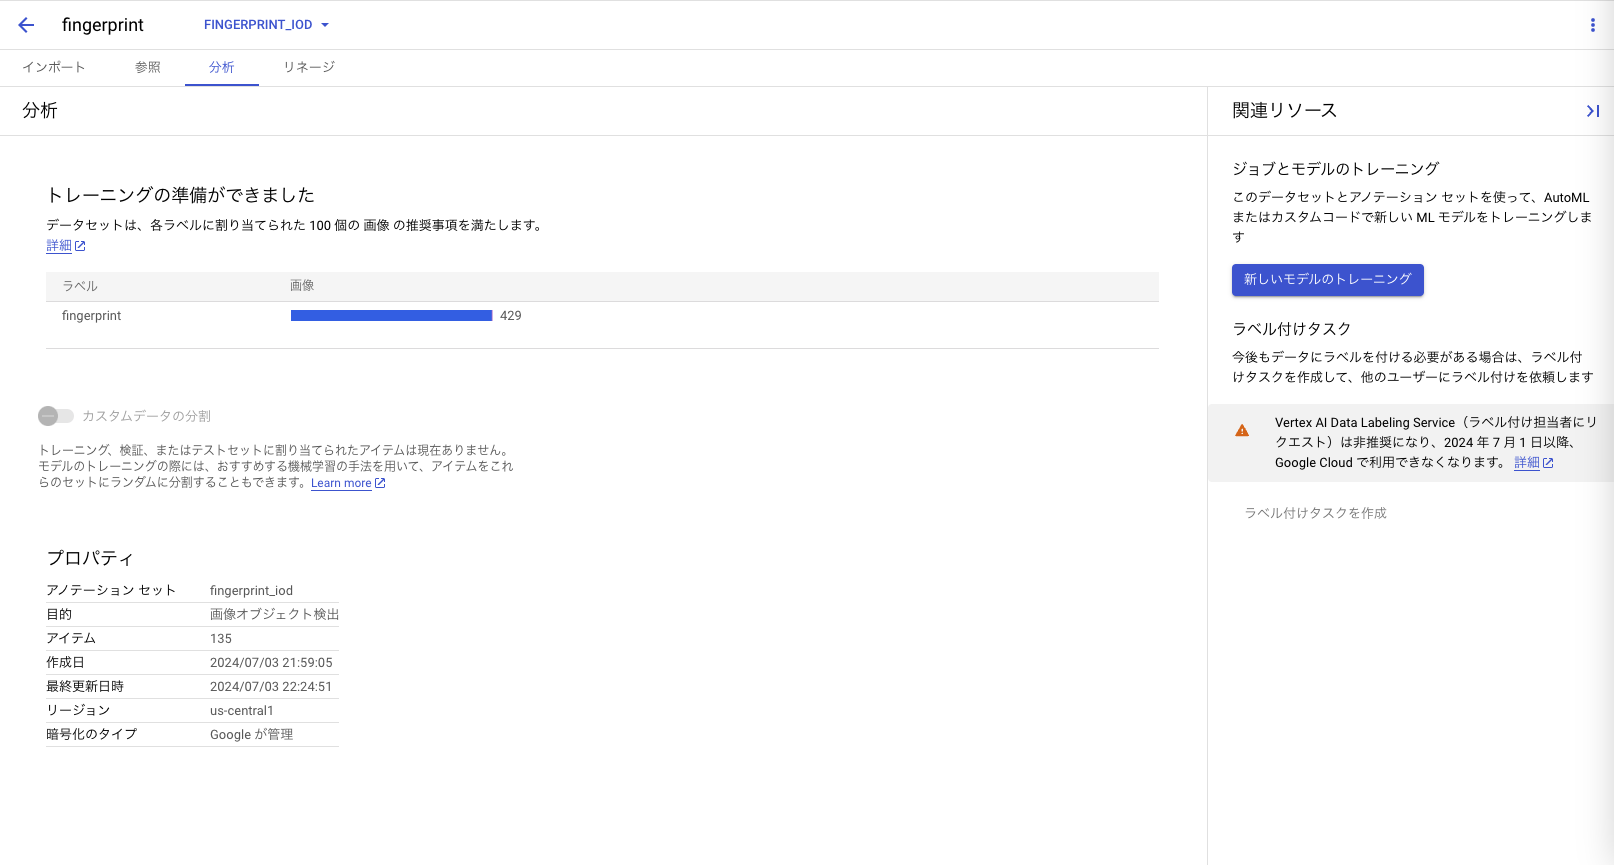
まずはデータセットを登録します。
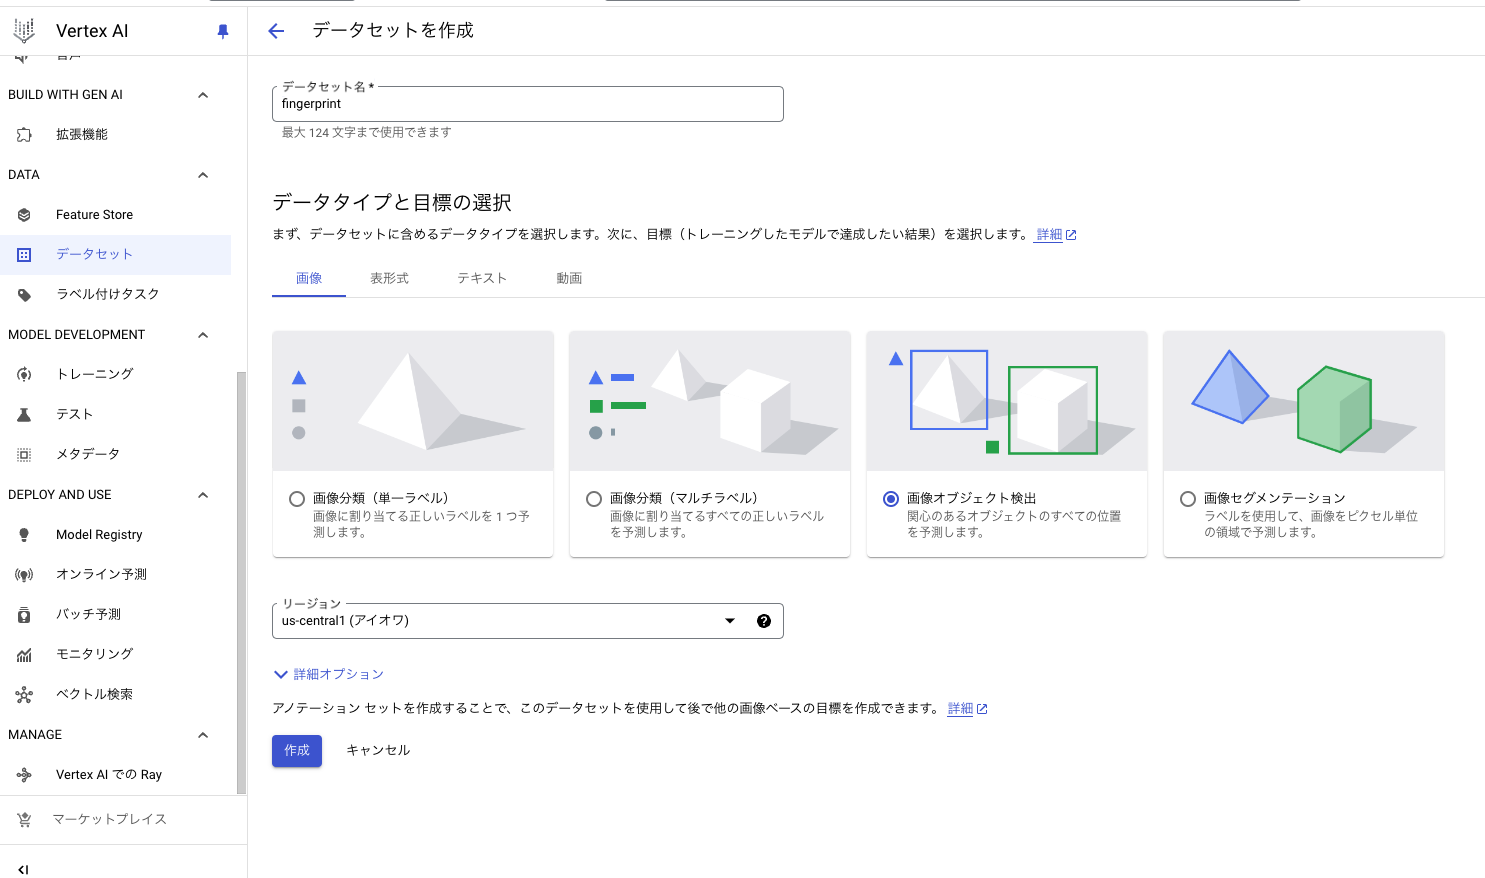
指紋をオブジェクトとして検出したいので画像オブジェクト検出を選択します。
GCSを作成しデータをアップロードします。
トレーニング用の指紋のデータとしてこちらを利用しました。
https://www.kaggle.com/datasets/mahdieizadpanah/birjand-university-mobile-palmprint-databasebmpd
Izadpanahkakhk M, Razavi SM, Taghipour-Gorjikolaie M, Zahiri SH, Uncini A. Novel mobile palmprint databases for biometric authentication. International Journal of Grid and Utility Computing. 2019;10(5):465-74.
トレーニング精度を出すには100枚以上の画像が推奨されています。
アップロードが完了するとメールが届きます。
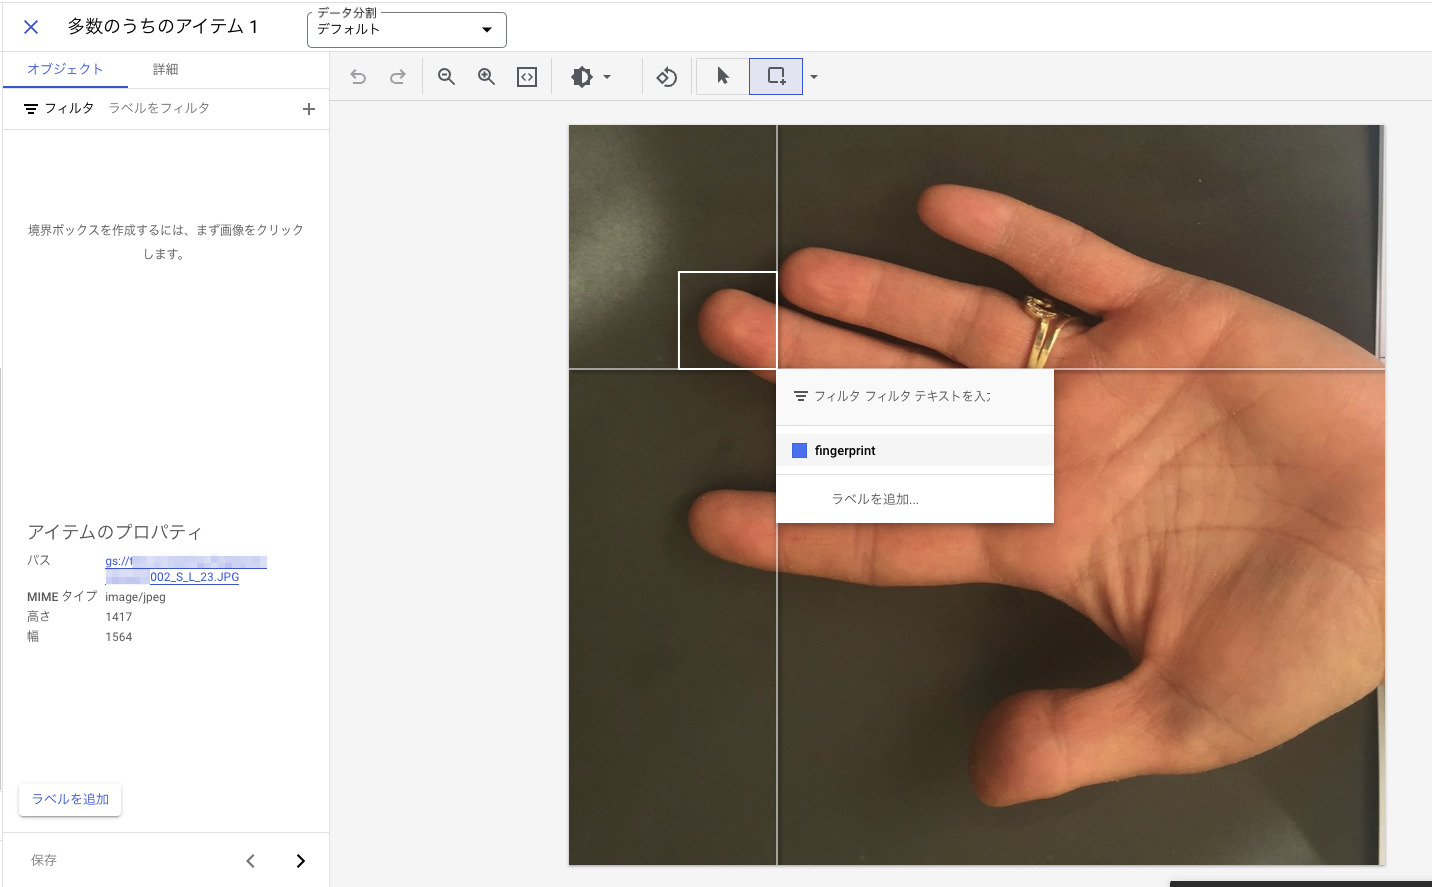
あとは心を無にしてどんどんラベル付けをしていきます。
ラベル付のためのインターフェースが用意されていて簡単にラベル付できますが量が多いのでなかなか大変です。
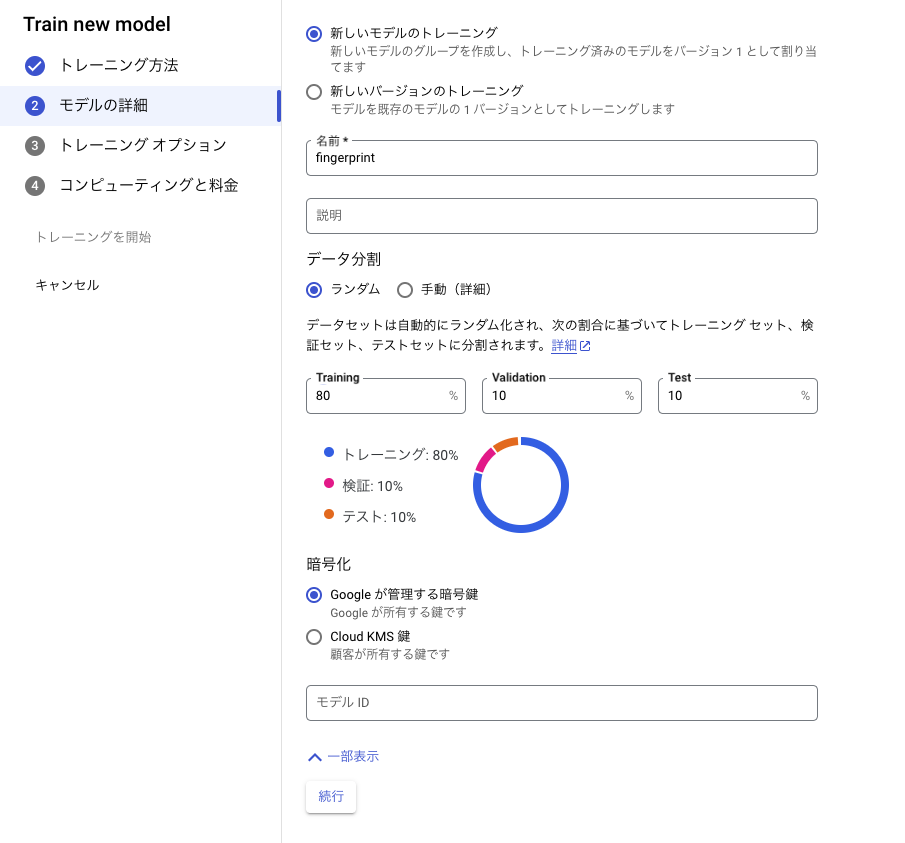
ラベル付が完了したらトレーニングを開始します。
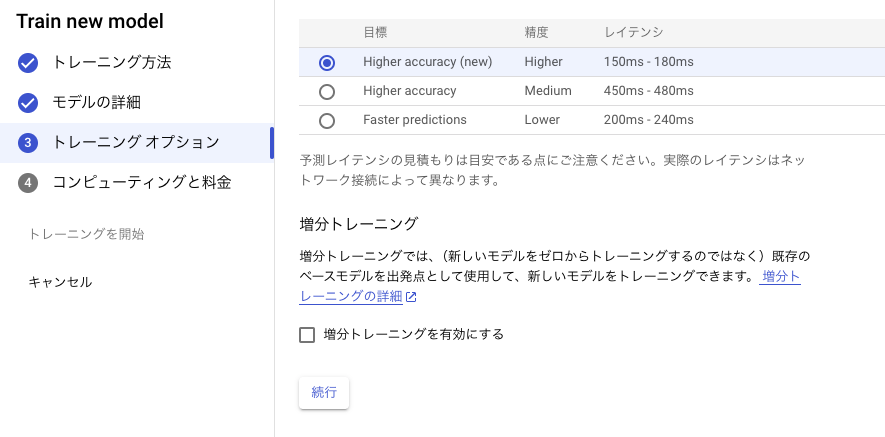
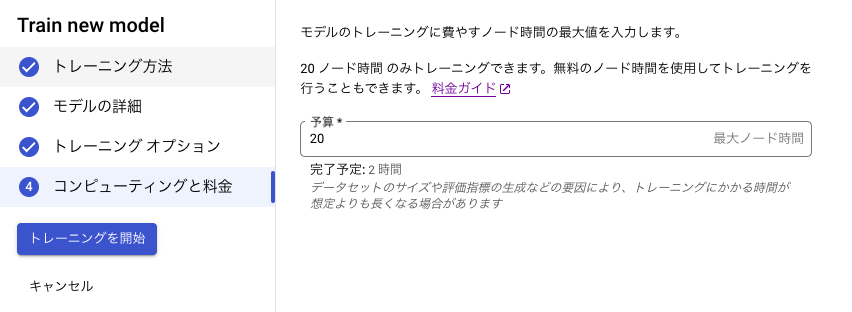
トレーニングにはしばらく時間がかかります。
完了するとメールが届きます。
今回は2時間43分かかりました。
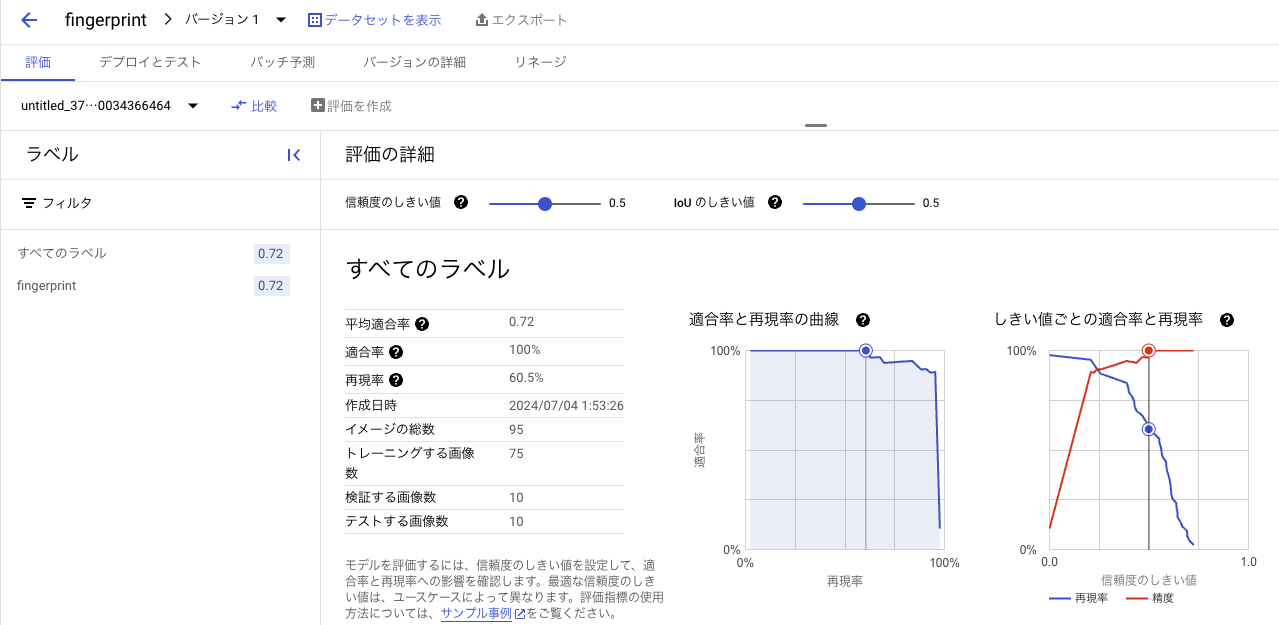
トレーニングが完了するとモデルの評価を確認することができます。
このモデルは適合率100%で再現率が60.5%となっています。
偽陽性(指紋以外を指紋と判断する)の割合は少なく、偽陰性(指紋が写ってても写っていないと判断する)の割合が多いと言えそうです。
トレーニングデータを増やせばまた違った結果になると思います。
トレーニングが済んだモデルはエンドポイントにデプロイできます。
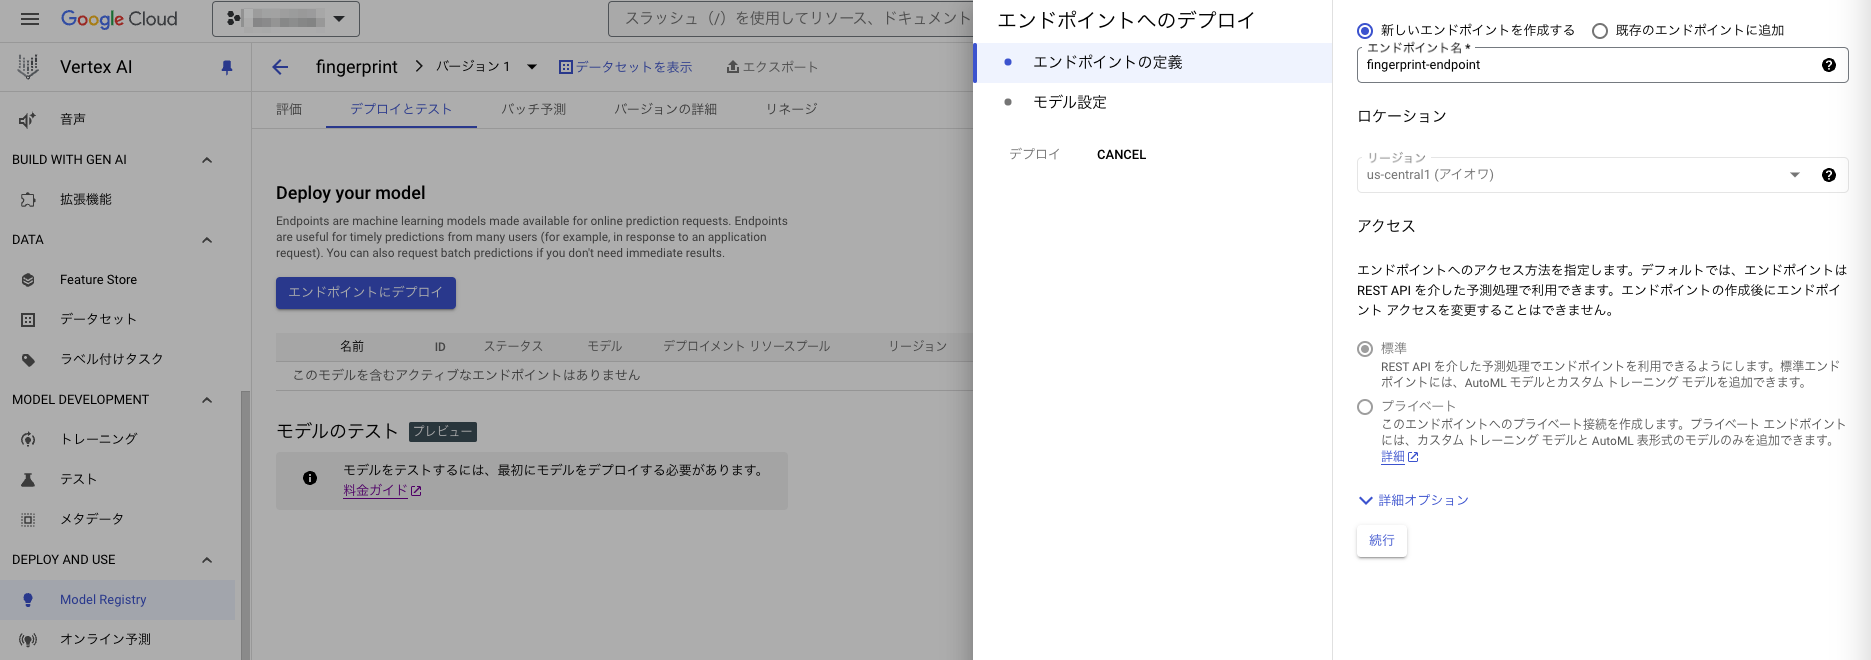
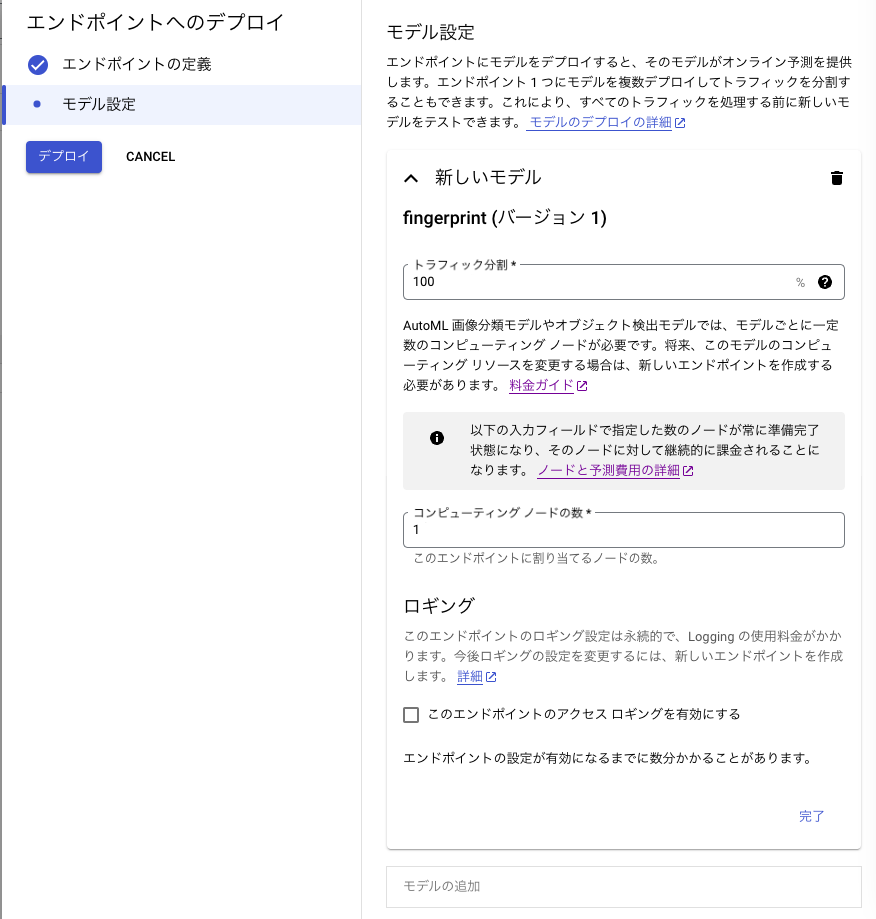
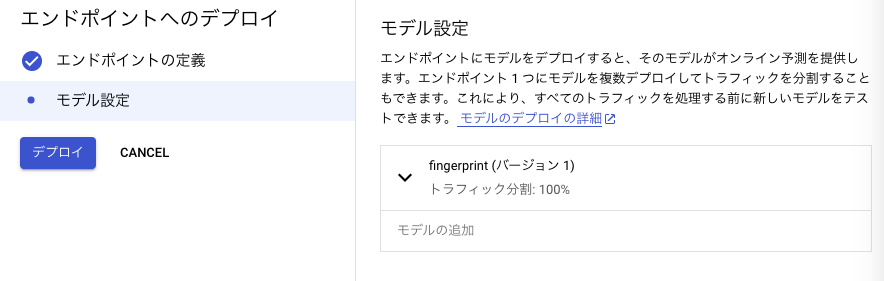
デプロイが完了するとまたメールが届き、いよいよ完成したモデルを試すことができます。
Kaggleのデータセットのうちトレーニングに使ってなかった画像で試した結果がこちら。
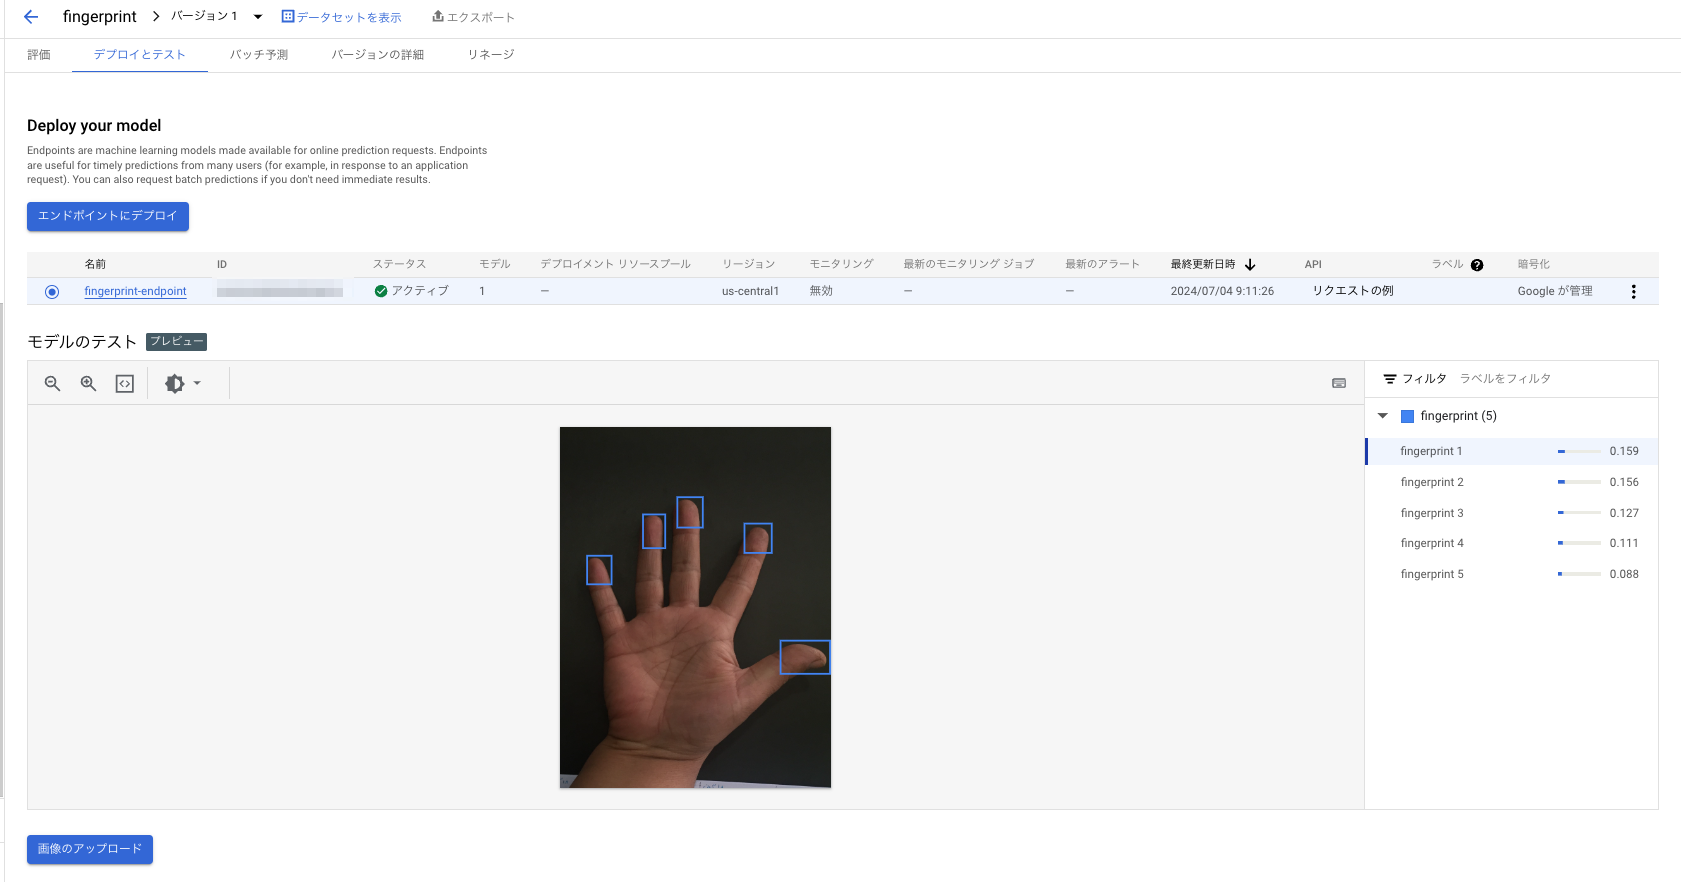
指紋というよりは指先を検出してるように見えますが判定ができています。
別のパターンでこちらの画像を検証した結果がこちら
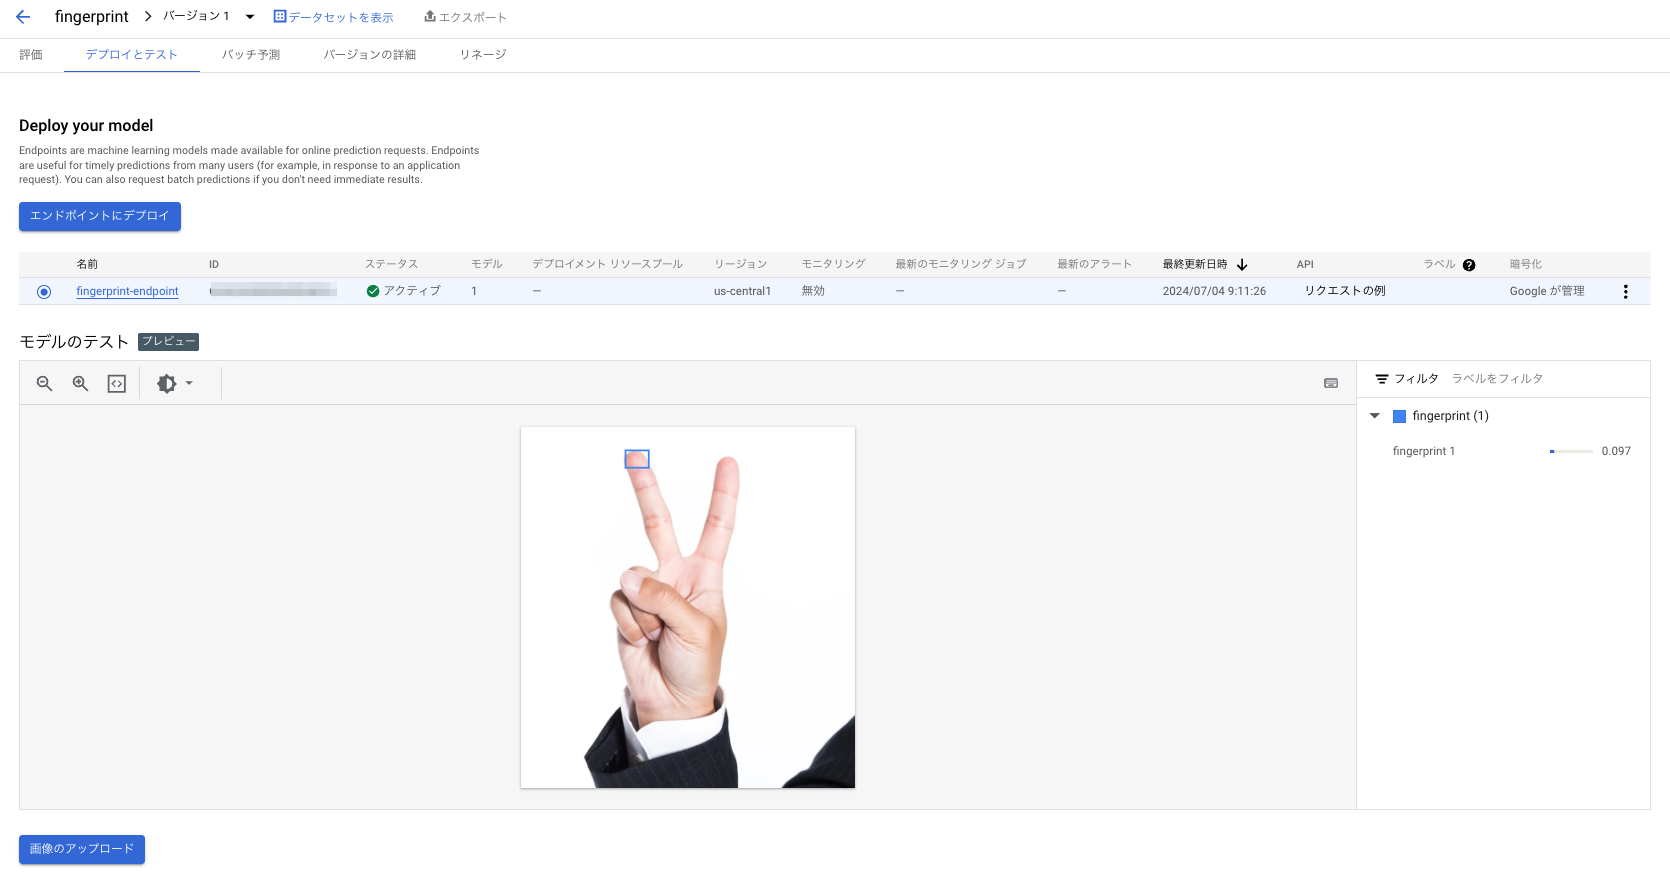
中指だけは検知できました。トレーニングに使ったデータとはパターンが違うと精度ガクッと落ちる印象です。
これもデータセットを増やせば改善ができそうな気がします。
「リクエストの例」からAPIやPythonから呼び出す例を取得することもできます。
これを用いて検出した座標をモザイク加工してみます。
!pip install google-cloud-aiplatform==1.53.0
import base64
from google.cloud import aiplatform
from google.cloud.aiplatform.gapic.schema import predict
from PIL import Image, ImageDraw


def predict_image_object_detection_sample(
    project: str,
    endpoint_id: str,
    filename: str,
    location: str = "us-central1",
    api_endpoint: str = "us-central1-aiplatform.googleapis.com",
):
    # The AI Platform services require regional API endpoints.
    client_options = {"api_endpoint": api_endpoint}
    client = aiplatform.gapic.PredictionServiceClient(client_options=client_options)

    with open(filename, "rb") as f:
        file_content = f.read()

    encoded_content = base64.b64encode(file_content).decode("utf-8")
    instance = predict.instance.ImageObjectDetectionPredictionInstance(
        content=encoded_content,
    ).to_value()
    instances = [instance]

    parameters = predict.params.ImageObjectDetectionPredictionParams(
        confidence_threshold=0.5,
        max_predictions=5,
    ).to_value()

    endpoint = client.endpoint_path(
        project=project, location=location, endpoint=endpoint_id
    )

    response = client.predict(
        endpoint=endpoint, instances=instances, parameters=parameters
    )

    predictions = response.predictions
    return predictions


def anonymize_boxes(image, boxes, anonymization_pixels=10):
    img_w, img_h = image.size

    for box in boxes:
        xmin, xmax, ymin, ymax = box
        xmin = int(xmin * img_w)
        ymin = int(ymin * img_h)
        xmax = int(xmax * img_w)
        ymax = int(ymax * img_h)

        xmin = max(0, xmin)
        ymin = max(0, ymin)
        xmax = min(img_w, xmax)
        ymax = min(img_h, ymax)

        box_area = (xmin, ymin, xmax, ymax)
        box_region = image.crop(box_area)

        box_w, box_h = box_region.size
        pixel_dim = max(box_w, box_h) // anonymization_pixels
        if pixel_dim < 1:
            pixel_dim = 1

        box_region = box_region.resize((max(box_w // pixel_dim, 1), max(box_h // pixel_dim, 1)), Image.NEAREST)
        box_region = box_region.resize((box_w, box_h), Image.NEAREST)
        image.paste(box_region, box_area)

    return image

project = "<PROJECT_NO>"
endpoint_id = "<ENDPOINT_ID>"
location = "us-central1"
filename = "./fingerprint.JPG"

predictions = predict_image_object_detection_sample(
    project=project,
    endpoint_id=endpoint_id,
    location=location,
    filename=filename
)

bboxes = predictions[0]["bboxes"]

image = Image.open(filename)
anonymized_image = anonymize_boxes(image, bboxes, anonymization_pixels=20)

display(image)
指先をモザイク加工することができました!
結果としてAutoMLで良いモデルを作れれば指紋(指先)を検出して匿名加工を施すことができそうというのが確認できました。