
概要
PagerDutyに Incident Workflows という機能があります。
PagerDutyインシデント(以下インシデント)が作成された際に事前に設定しておいた処理を自動実行するもので、人手で実行することによるミスを削減できます。
機能の存在は知っていたものの使ったことがなかったため、設定方法とWebhook経由で実行できる外部プログラムの処理結果について確認してみました。
※ Incident Workflows は「ビジネス」以上のプランで利用可能です。
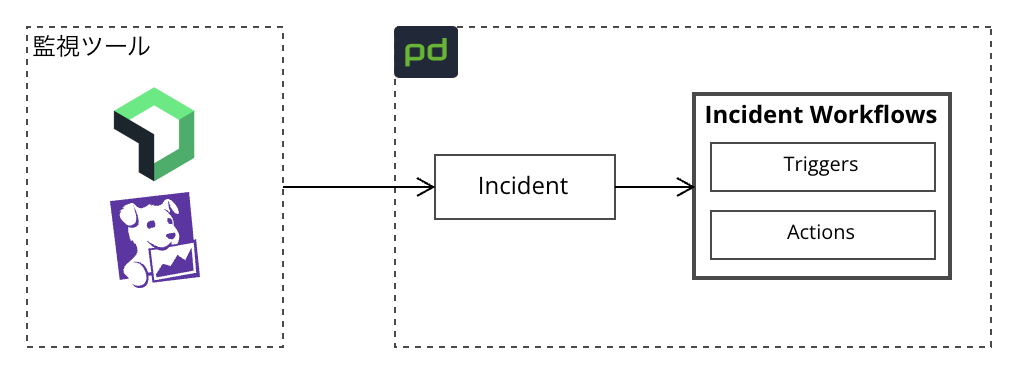
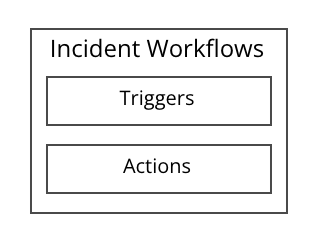
Incident Workflows の構成
Incident Workflows の起動方法を指定する “Triggers”、起動後に実行する “Actions” の2つから構成されます。
Triggers
基本的なトリガーとして Conditional Triggers と Manual Triggers の2種類があります。
- Conditional Triggers … すべてのインシデントが作成された時、もしくは特定の条件が満たされた場合にワークフローを実行します。複数の条件を重ねることができます。
- 特定の条件:インシデントが作成された時の “Priority / Status / Urgency”の各フィールドの値がマッチする時/しない時を評価します。
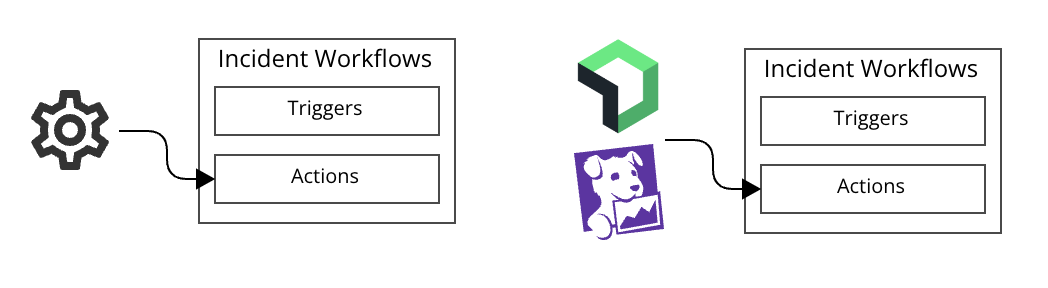
- Manual Triggers … 以下のサービスから利用者(Responder)が手動で直接ワークフローを実行します。
- PagerDuty Webアプリ
- PagerDuty モバイルアプリ
- Slack
- Microsoft Teams
Conditional Triggers と Manual Triggers はどちらか、もしくは両方指定することができます。

これらのトリガーはPagerDutyのWebアプリから設定できますが、他にプログラムから直接ワークフローを実行できる API Triggers や Integration Triggers もあります。
Actions
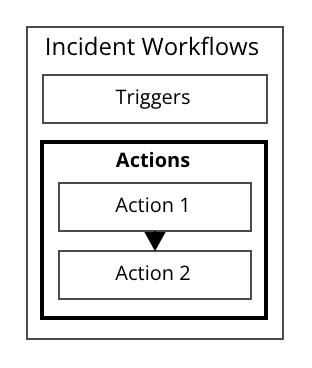
ワークフローは複数のアクションで構成され、指定した順番で実行されます。
数えてみるとアクションは17種類ありました(2024年3月時点)
- Add Conference Bridge
- Add Responders
- Add Stakeholders
- Create a Dedicated Chat in Microsoft Teams
- Create Conference Bridge in Microsoft Teams
- Google Meet: Create a Meeting
- Create a Zoom Meeting
- Create a Slack Channel for an Incident
- Link a Slack Channel to an Incident
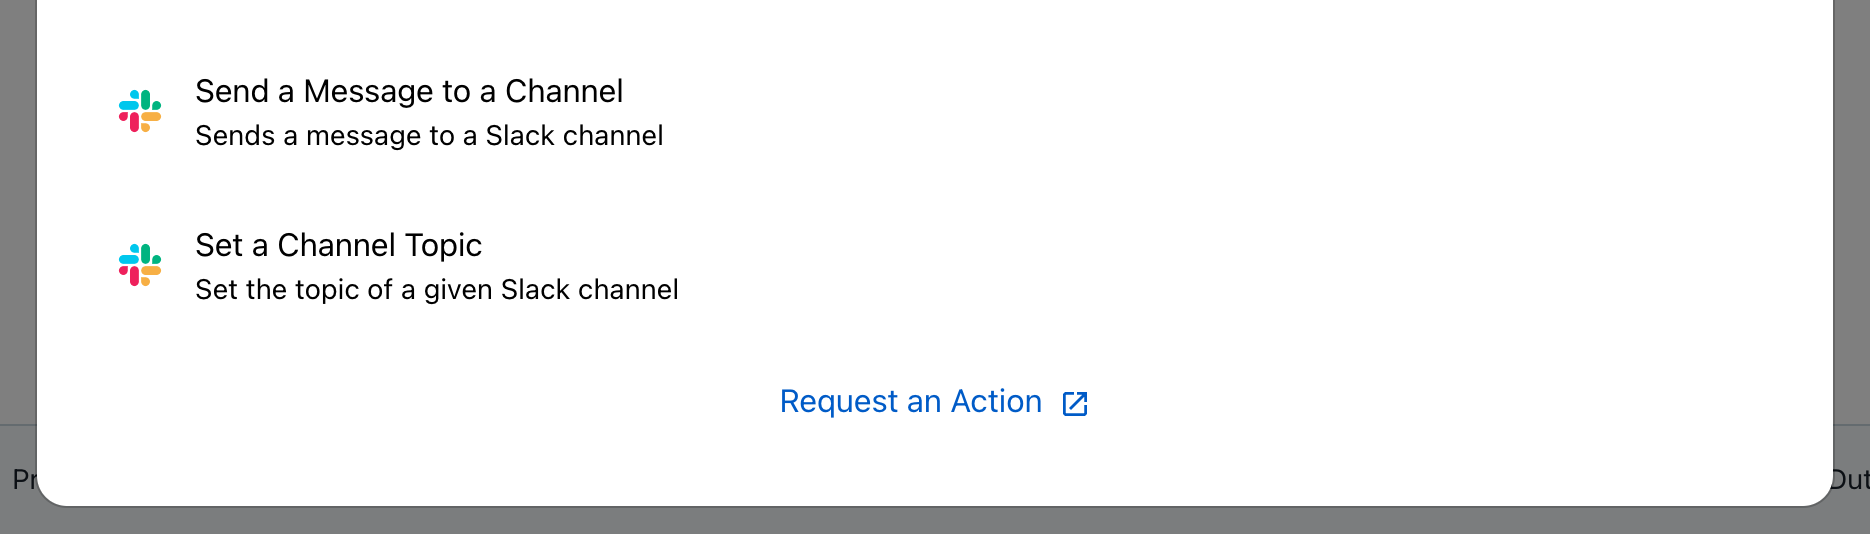
- Send a Message to a Slack Channel
- Set a Slack Channel Topic
- Reassign the Incident
- Run an Automation Action
- Send Status Update
- Datadog: Create a Graph Snapshot
- Datadog: Get a Monitor’s Details
- Send a Webhook POST
各アクションの詳細についてはドキュメントを参照してください。
https://support.pagerduty.com/lang-ja/docs/incident-workflows#add-actions
なおアクション選択ダイアログの最後に “Request an Action” というリンクがあり、アクション追加を要望できるので今後増えるかもしれません。
“Send a Webhook POST” で任意のプログラムを実行する
様々なアクションが用意されていますが、今回は “Send a Webhook POST” で任意のプログラムの呼び出してみます。
仕様
- インシデントが Acknowledged(以下Ack) になると Incident Workflows が起動(①②)
- Webhook URLにPOSTし、bodyに入れたJSONの値を取り出しprintで出力(③④)
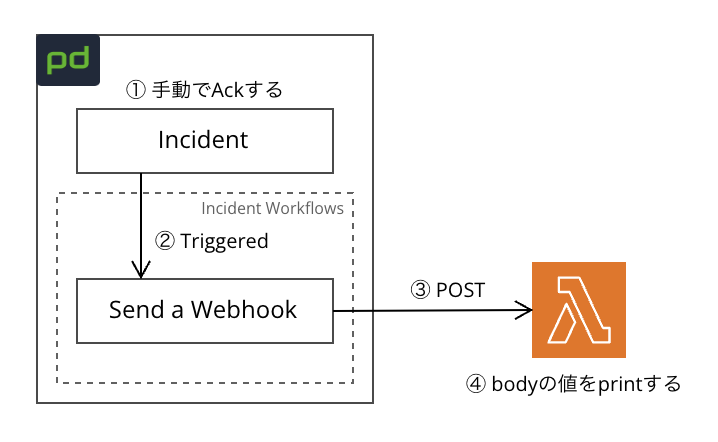
Webhookの宛先ですが、簡単にするため AWS Lambda の関数URLを使って直接リクエストを送信できるようにしています。
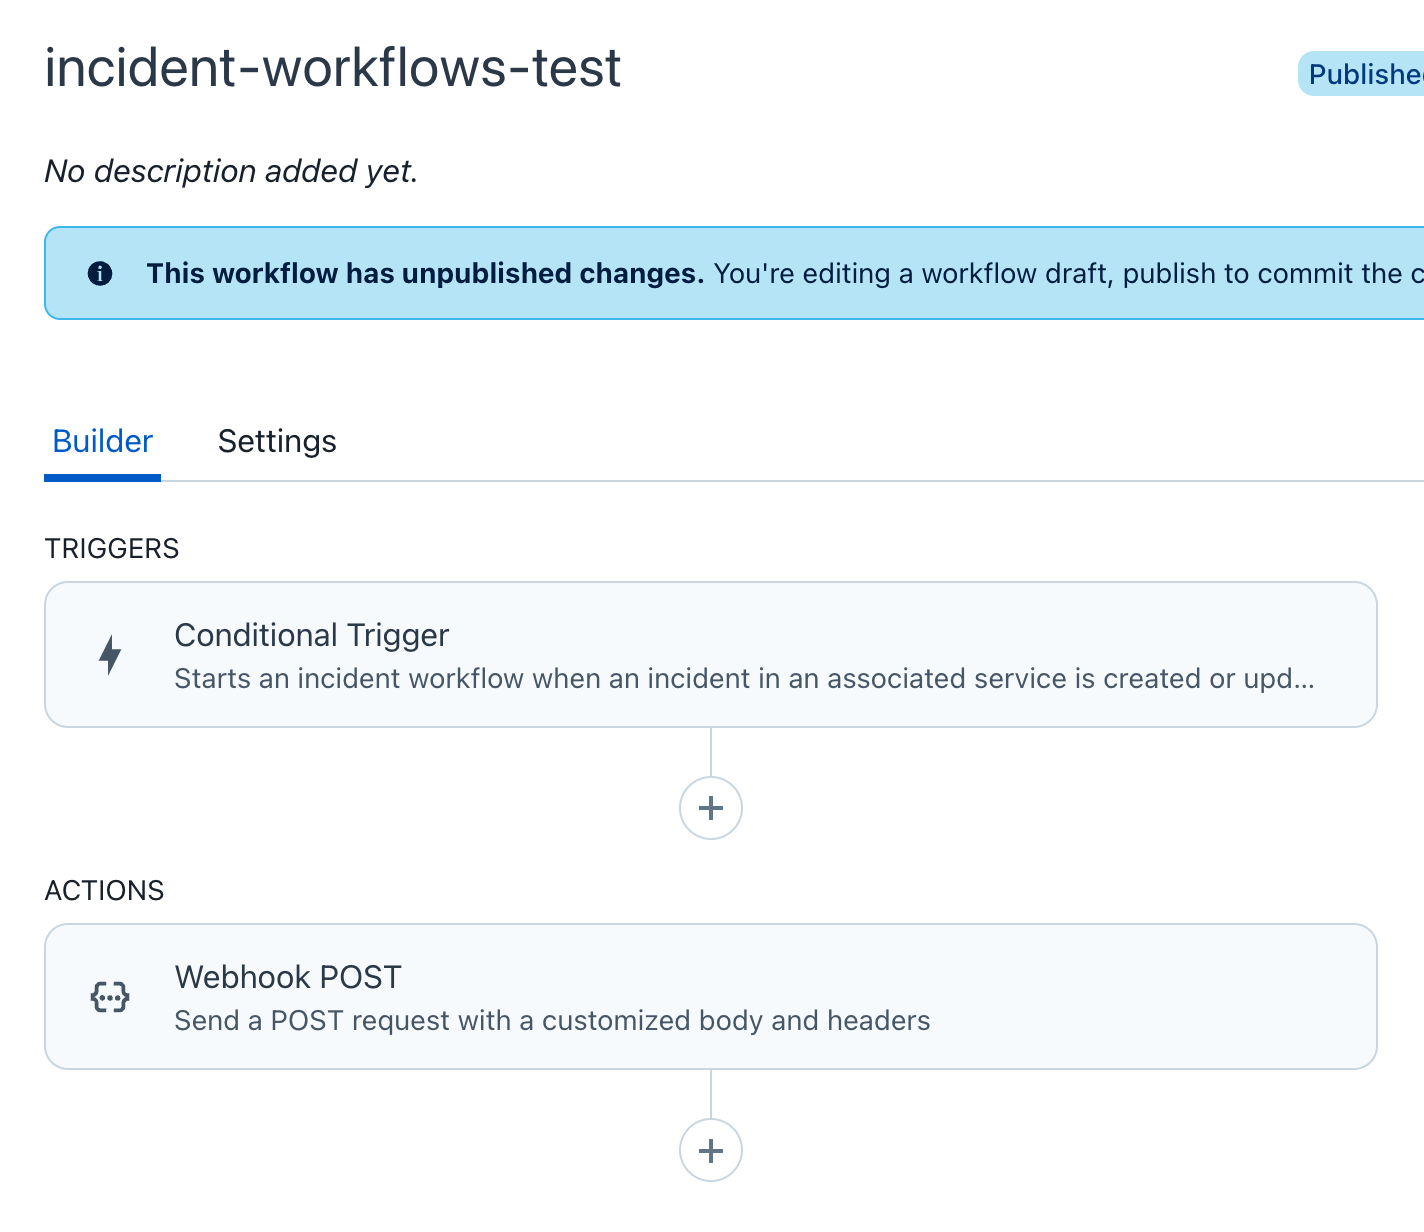
Triggers と Actions の設定
手動でAckにするため Conditional Triggers で以下のように設定しました。

なお最後の項目 “Services that this rule applies to” で、すべて、もしくは任意のPagerDutyサービスにこのワークフローを適用させるか選択できます。
本番用とテスト用のPagerDutyサービスが混在している場合は意図せぬワークフローを実行させないためにも、適用するサービスの指定を忘れないようにしてください。
次にWebhookの設定。
最後の項目Bodyに入力した値(JSON)が宛先のURLに送られます。
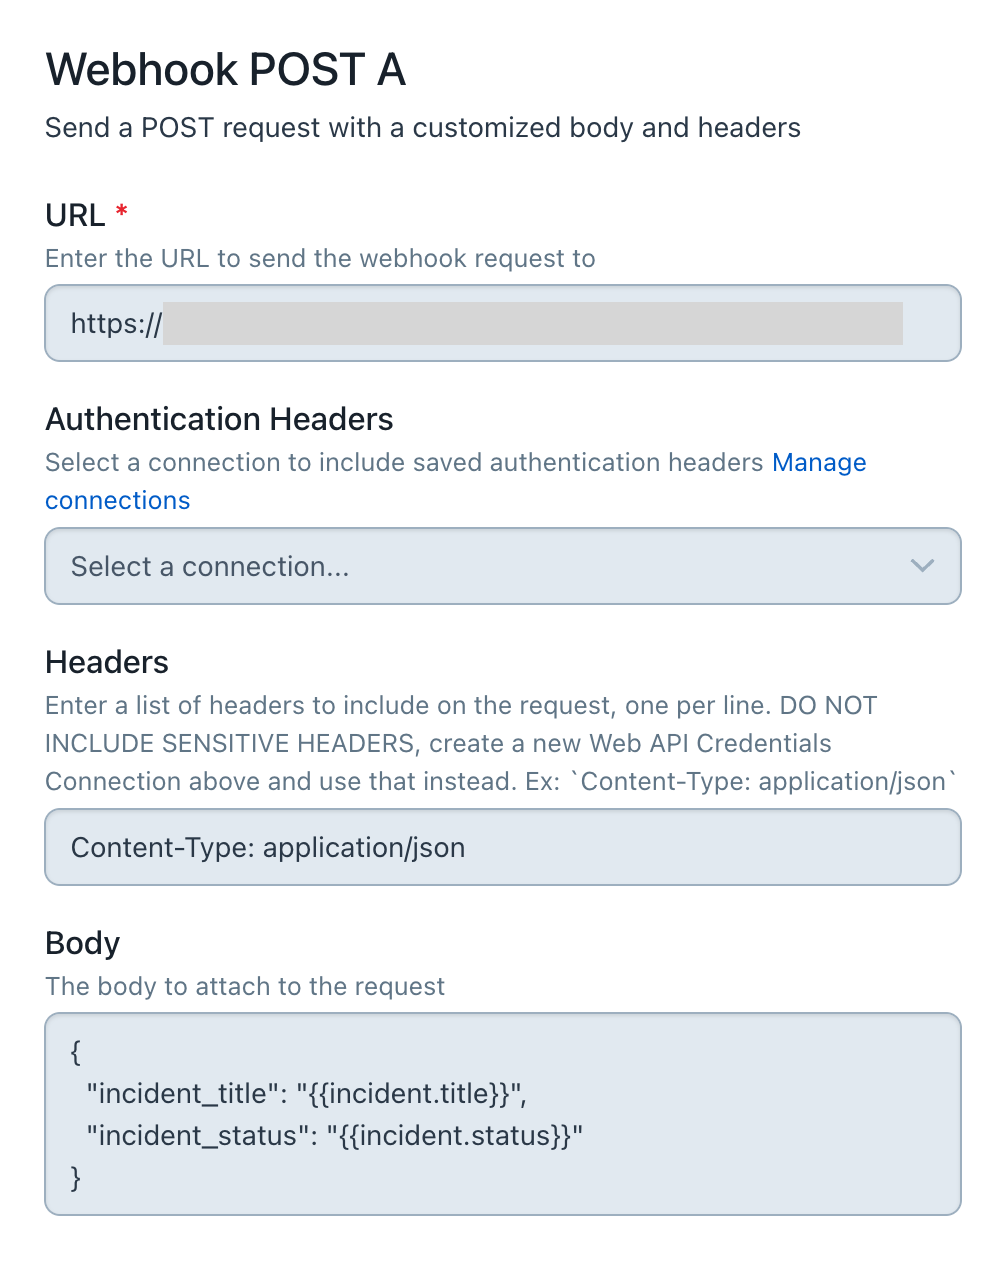
二重波括弧で囲まれた値はPagerDutyがあらかじめ用意している変数です。
以下の種類がありますが、ここではインシデントのタイトル(incident.title)とステータス(incident.status)を表示させてみます。
引用:Incident Workflows より
| Field name | {{field-name}} |
|---|---|
| current_date | {{current_date}} |
| time_zone | {{time_zone}} |
| incident.id | {{incident.id}} |
| created_at | {{incident.created_at}} |
| incident.updated_at | {{incident.updated_at}} |
| incident.resolved_at | {{incident.resolved_at}} |
| incident.incident_key | {{incident.incident_key}} |
| incident.incident_number | {{incident.incident_number}} |
| incident.title | {{incident.title}} |
| incident.status | {{incident.status}} |
| incident.url | {{incident.url}} |
| incident.urgency | {{incident.urgency}} |
| incident.priority | {{incident.priority}} |
| incident.service.id | {{incident.service.id}} |
| incident.service.name | {{incident.service.name}} |
| incident.conference_bridge.conference_number | {{incident.conference_bridge.conference_number}} |
| incident.conference_bridge.conference_url | {{incident.conference_bridge.conference_url}} |
| workflow.id | {{workflow.id}} |
| workflow.name | {{workflow.name}} |
Triggers と Actions の全体。1つずつの設定なのでシンプルです。
Webhook先のプログラムではPagerDutyから受け取った値をprintするだけです。
import json

def lambda_handler(event, context):
    body = json.loads(event.get('body'))
    incident_title = body.get('incident_title')
    print(f'Incident Title: {incident_title}')
    incident_status = body.get('incident_status')
    print(f'Incident Status: {incident_status}')
    return {
        'statusCode': 200,
        'headers': {'Content-Type': 'application/json'},
        'body': '{ "message": "Hello, world!" }',
        'isBase64Encoded': False
    }
テスト
手動でインシデントを作成し、Ackにすると以下のようなタイムラインになりました。
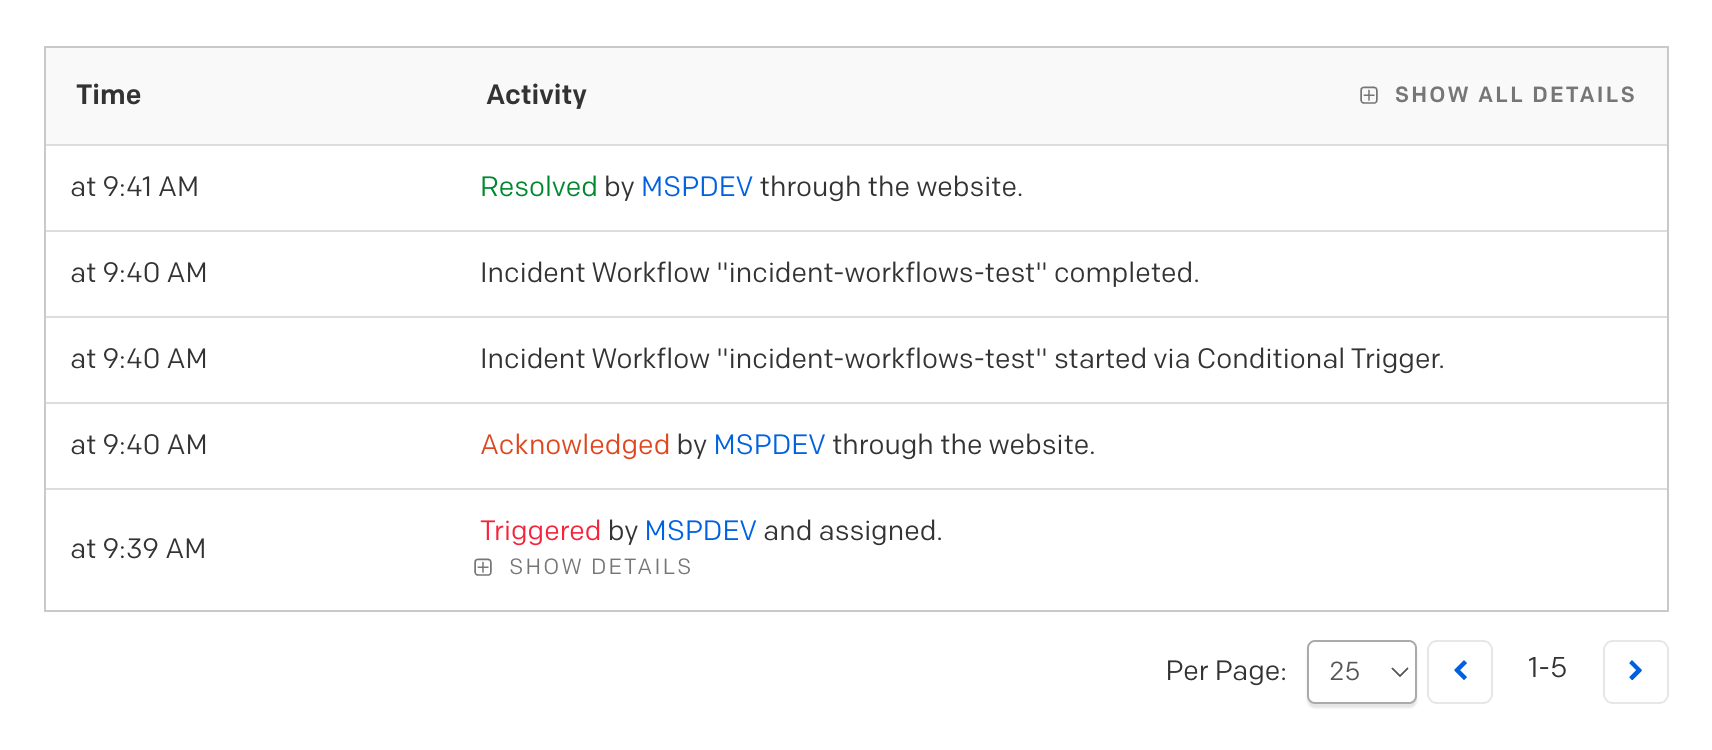
Ackに変更後 Incident Workflows が起動され、完了していることがわかります。
AWS Lambda のログを見るとWebhook先のプログラムでも想定通りにprintされていました(2〜3行目)
START RequestId: xxxx Version: $LATEST
Incident Title: An Incident for a Webhook POST 2
Incident Status: acknowledged
END RequestId: xxxx
プログラムがエラーで終わった場合はどうなるか見てみます。
import json

def lambda_handler(event, context):
    body = json.loads(event.get("body"))
    incident_title = body.get('incident_title')
    print(f'Incident Title: {incident_title}')
    incident_status = body.get('incident_status')
    print(f'Incident Status: {incident_status}')
    return foo  # error! 存在しない変数
ログではエラーが確認できました。
START RequestId: xxxx Version: $LATEST
Hello from PagerDuty!
LAMBDA_WARNING: Unhandled exception. The most likely cause is ...
[ERROR] NameError: name 'foo' is not defined ...
END RequestId: xxxx
ただPagerDutyのタイムラインでは成功時と同じ “completed” となっており、タイムライン上では失敗したことはわかりませんでした。
Webhookへの送信が成功すればワークフローとしては成功と判断するようです。
“Send a Webhook POST” から出力される内容の確認
アクションから別のアクションを繋げることにより、前のアクションの結果を次のアクションに渡すことができます。
前のアクションに関連する変数としては以下が用意されています。
引用:Incident Workflows より
| Name | Description |
|---|---|
| Response Status Code | レスポンスのステータスコード。 |
| Successful Status Code Response | レスポンス・ステータス・コードが成功を示しているかどうか (2XX )。 |
| Response Headers | レスポンスに設定されたHTTPヘッダー。 |
| Response Time in Milliseconds | リクエストに対してレスポンスが送信されるまでの時間(ミリ秒)。 |
| Result | アクションが成功したかどうかを示す値。”成功 “または “失敗 “のいずれか。 |
| Result Summary | そのアクションが何をしたか、あるいは失敗したかについての簡単な説明。 |
| Error | アクションが失敗した場合に入力される簡単な説明。 |
この中に前のアクションの返り値(returnした値)を出力する変数がなさそうなのが気になりました。
# returnされるこれらの値を取りたい
return {
    'statusCode': 200,
    'headers': {'Content-Type': 'application/json'},
    'body': '{ "message": "Hello, world!" }',
    'isBase64Encoded': False
}
それぞれの変数がどのような内容で出力されるのか確認してみます。
出力確認用アクションの追加
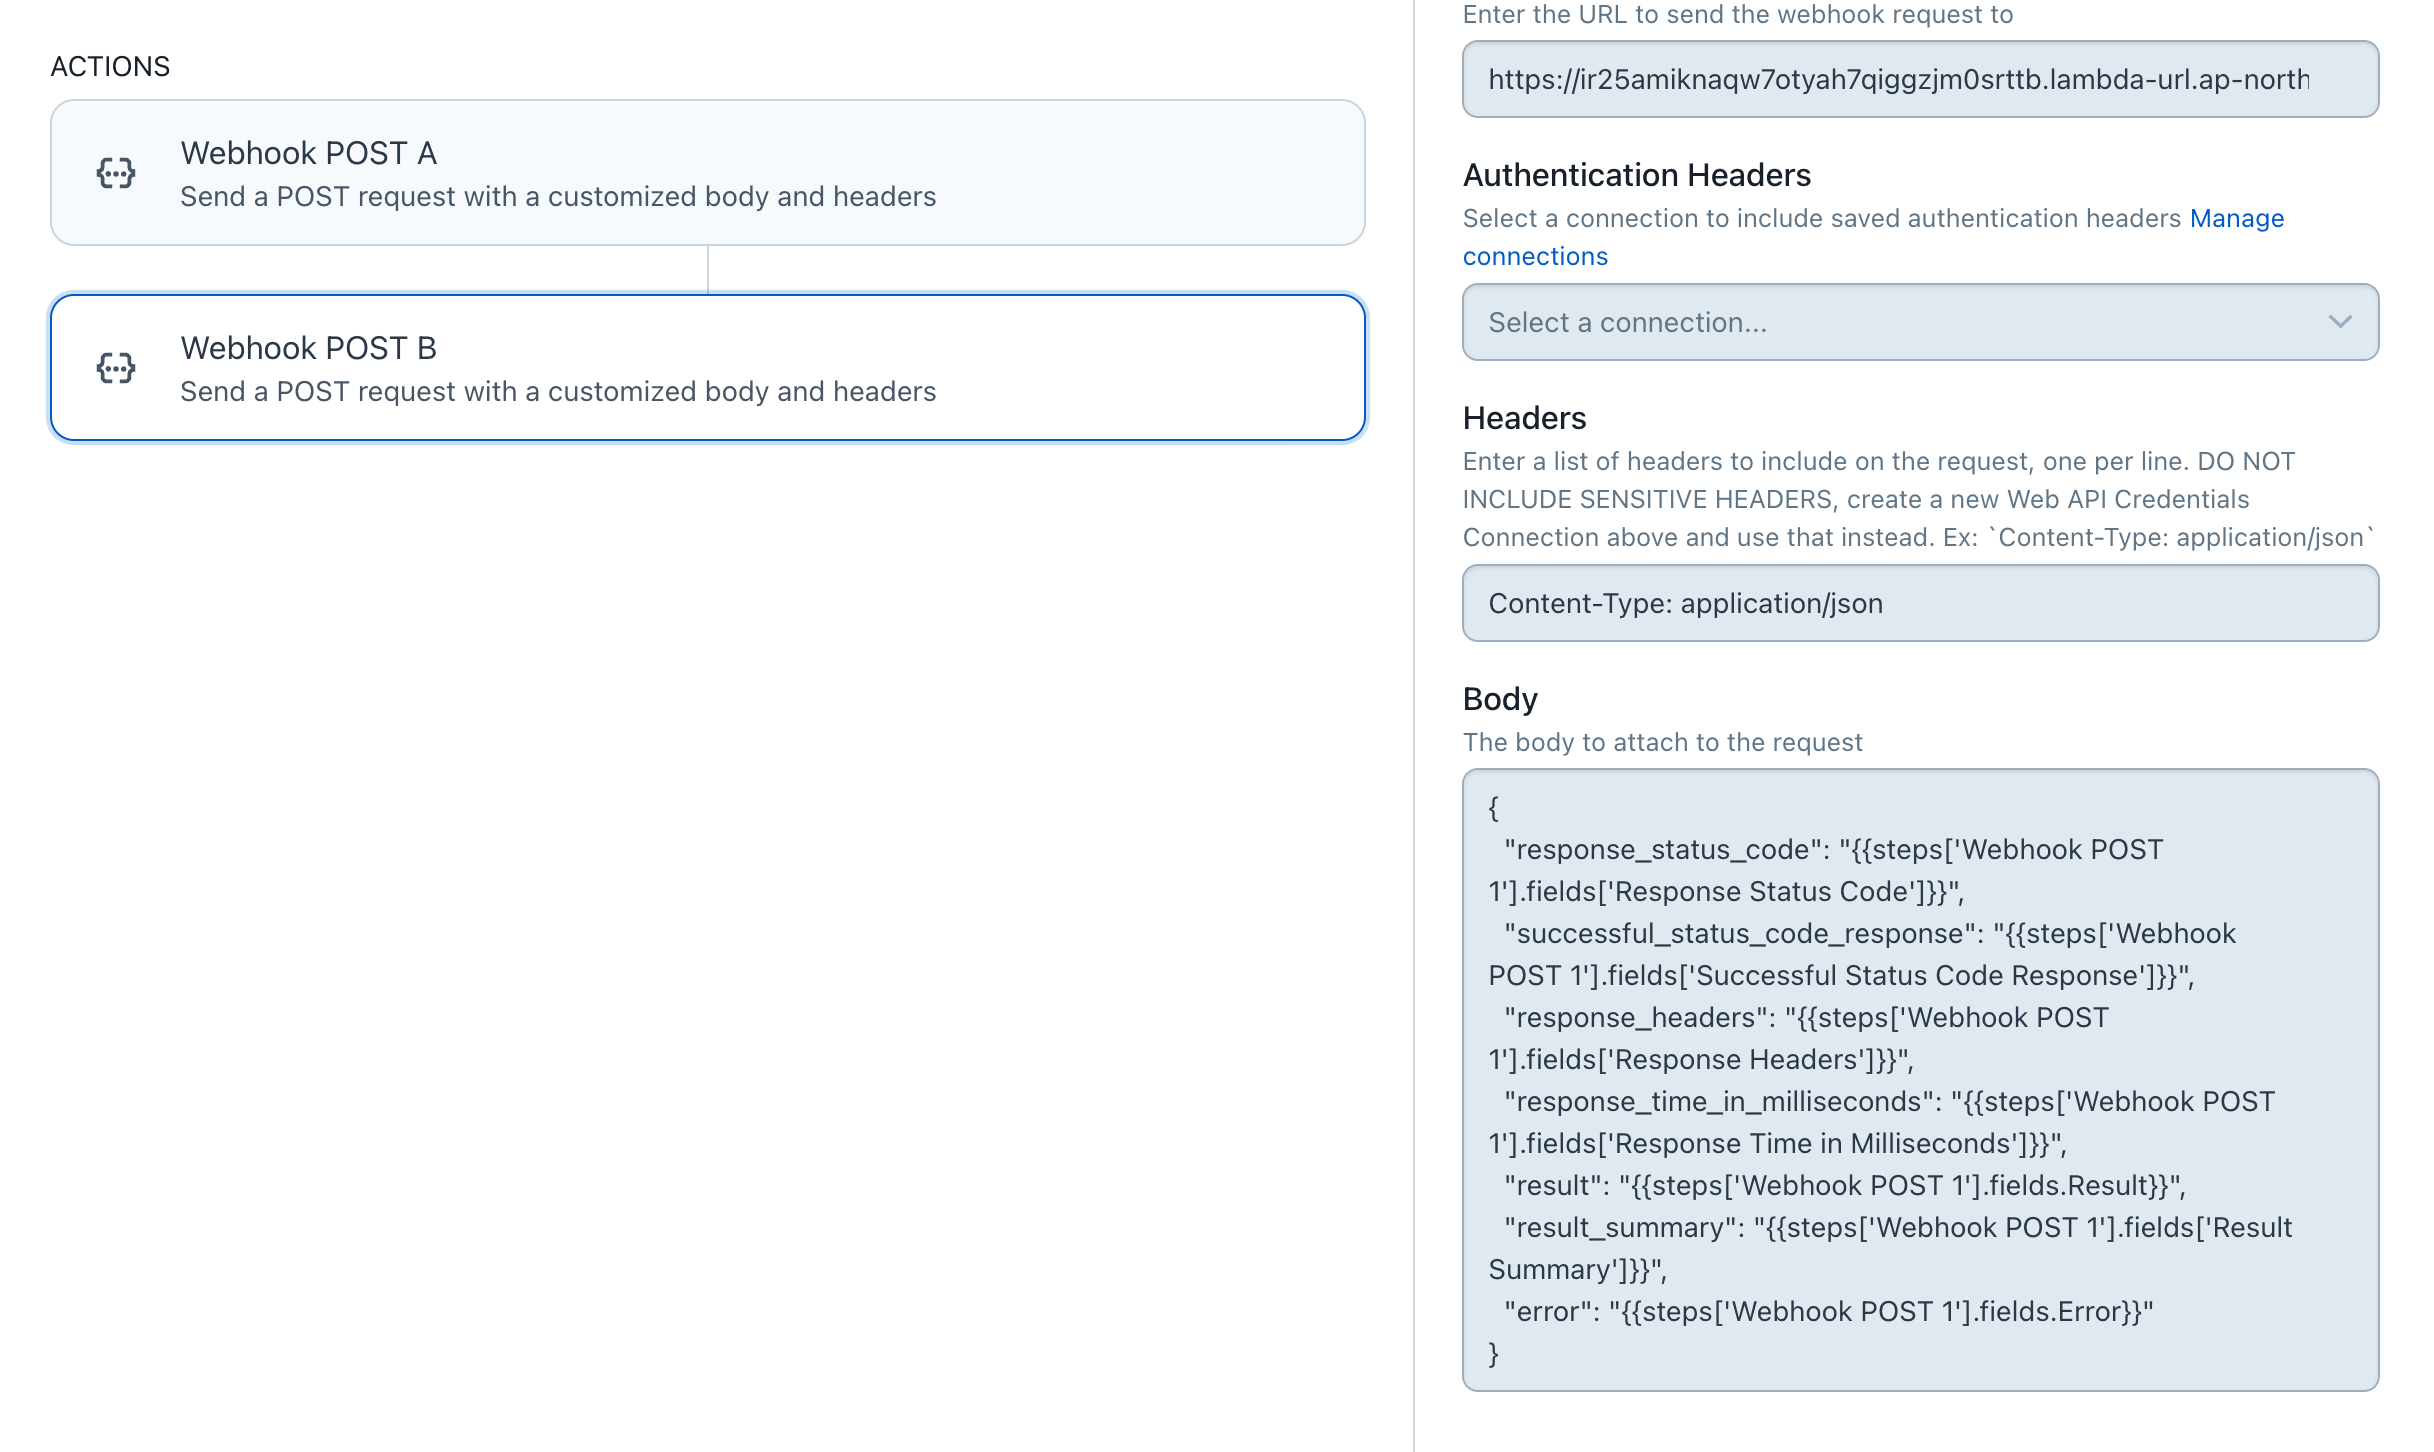
先ほどテストしたアクション(Webhook POST A)の下に “Webhook POST B” を追加しました。
Bodyには上掲の表にある各値を渡すようにしています(二重波括弧で囲まれた値)
“Webhook POST B” で呼び出す関数では渡された各値をprintしていきます。
import json

def lambda_handler(event, context):
    body_json = event.get('body')
    body = json.loads(body_json, strict=False) if body_json else None
    if body:
        response_status_code = body.get('response_status_code', '')
        print(f'[response_status_code] {response_status_code}')
        successful_status_code_response = body.get('successful_status_code_response', '')
        print(f'[successful_status_code_response] {successful_status_code_response}')
        response_headers = body.get('response_headers', '')
        print(f'[response_headers] {response_headers.replace('\n', ', ')}')
        response_time_in_milliseconds = body.get('response_time_in_milliseconds', '')
        print(f'[response_time_in_milliseconds] {response_time_in_milliseconds}')
        result = body.get('result', '')
        print(f'[result] {result}')
        result_summary = body.get('result_summary', '')
        print(f'[result_summary] {result_summary}')
        error = body.get('error', '')
        print(f'[error] {error}')
    return body if body else 'body is None.'
結果
インシデントを作成しAckにすると Incident Workflows が実行され、以下の出力が確認できました。
[response_status_code] 502
[successful_status_code_response] false
[response_headers] date: Mon, 9 Mar 2024 01:52:25 GMT, content-type: application/json, content-length: 21, connection: close, x-amzn-requestid: xxxx, x-amzn-trace-id: root=xxxx;parent=xxxx;sampled=0;lineage=xxxx:0
[response_time_in_milliseconds] 1115
[result] Success
[result_summary] API Call sent with status code 502
[error]
“Webhook POST A” の「HTTPステータスコードは502」「レスポンスヘッダー」「アクションは成功」等々がわかりましたが、”Webhook POST A” からの返り値を “Webhook POST B” に渡すような変数はなさそうです。
後日PagerDutyの方とお話しする機会がありこの件を相談したところ、やはりWebhookアクションの返り値を次のアクションに直接渡す仕組みはないとのことでした。
どうしても実現したい場合は一例として以下のような方法があるそうです。
- “Webhook POST A” の返り値を Event API V2 で送信しPagerDutyイベント(Event)を作成する
- 送信されたEventを Event Orchestration でキャッチし、ペイロードから “Webhook POST A” の返り値を取り出す
- 取得した返り値を Event Orchestration のWebhookアクションで、”Webhook POST B” の宛先プログラムに直接送信する
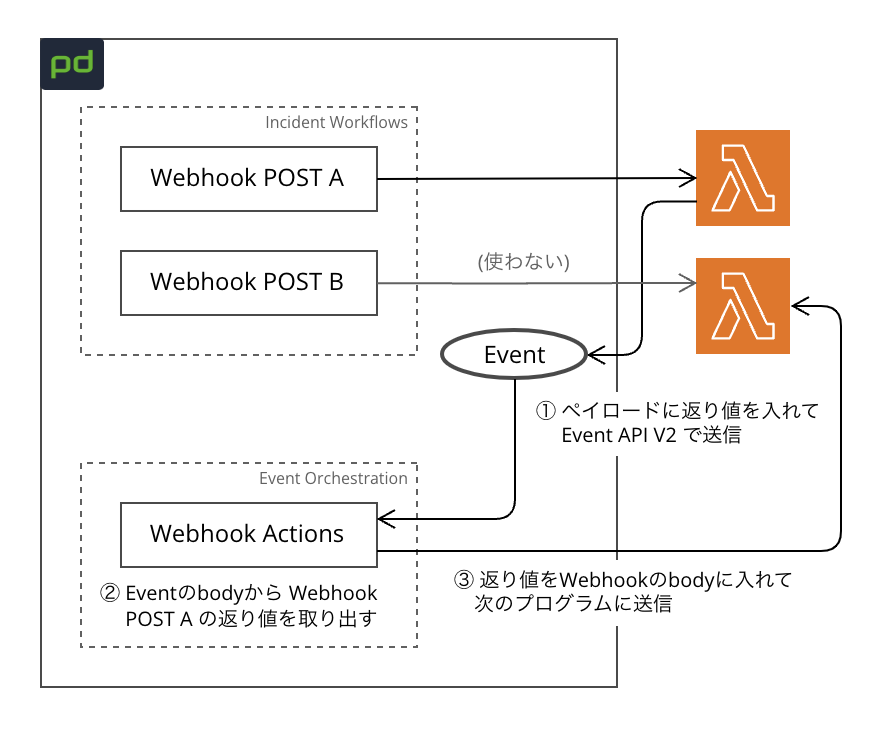
Incident Workflows だけで完結せず複雑な構成になるため、このようなことをしたい場合は Automation Actions を利用するのが望ましいとのことです。
補足:ワークフローのエラー判定
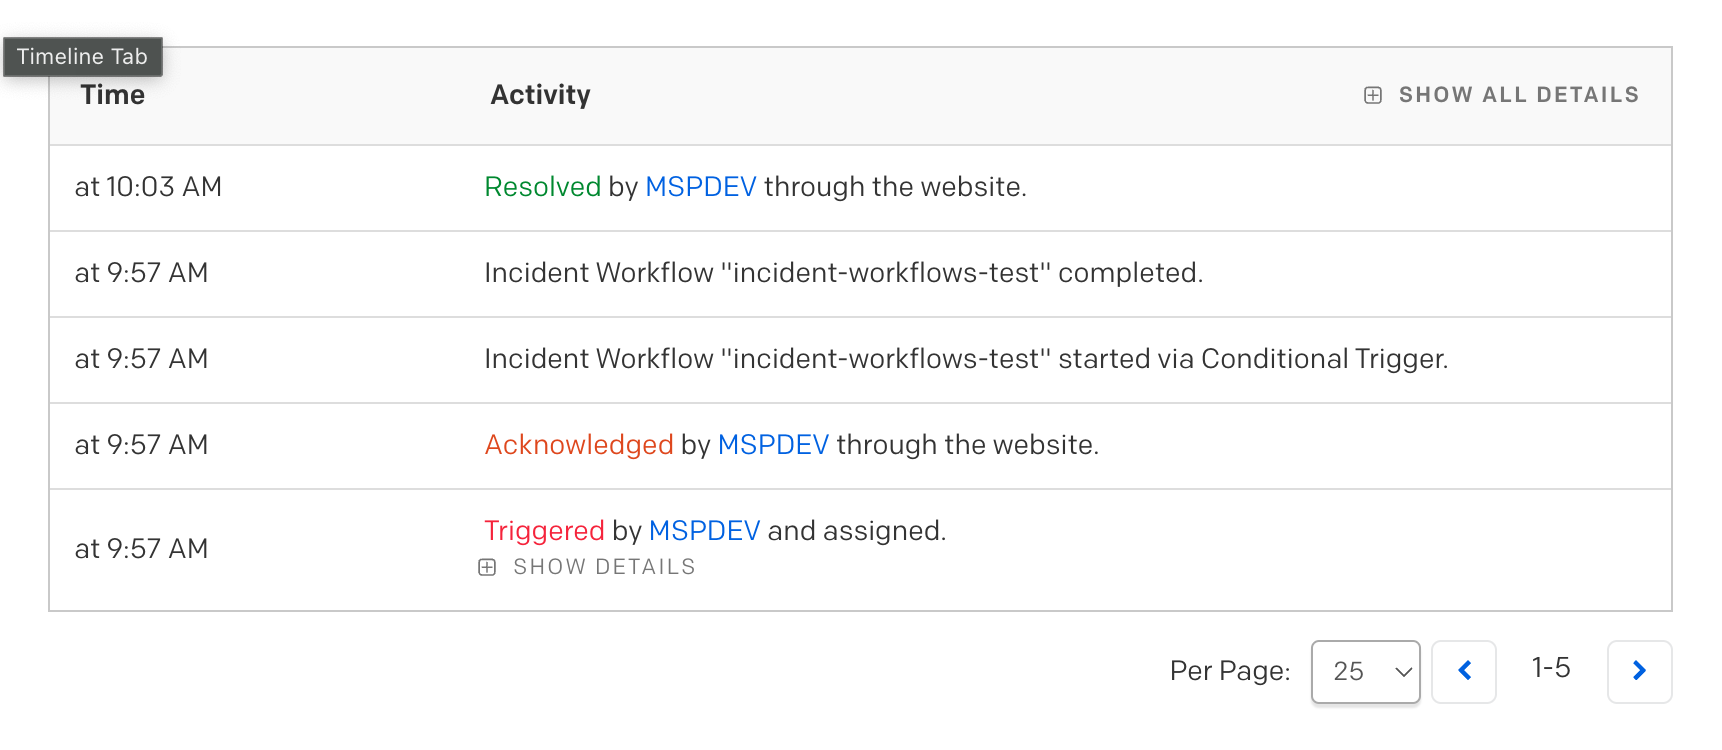
最初のテストでエラー判定を確認したところ、インシデントのタイムライン上では「Incident Workflow “incident-workflows-test” completed.」と表示されていました。
コードの冒頭にエラーを仕込んだりしても変わらなかったので、試しに宛先URLを無効な値に変更してみたところエラーと判定されました。
“Webhook POST A” のURLを “foo” に変更。
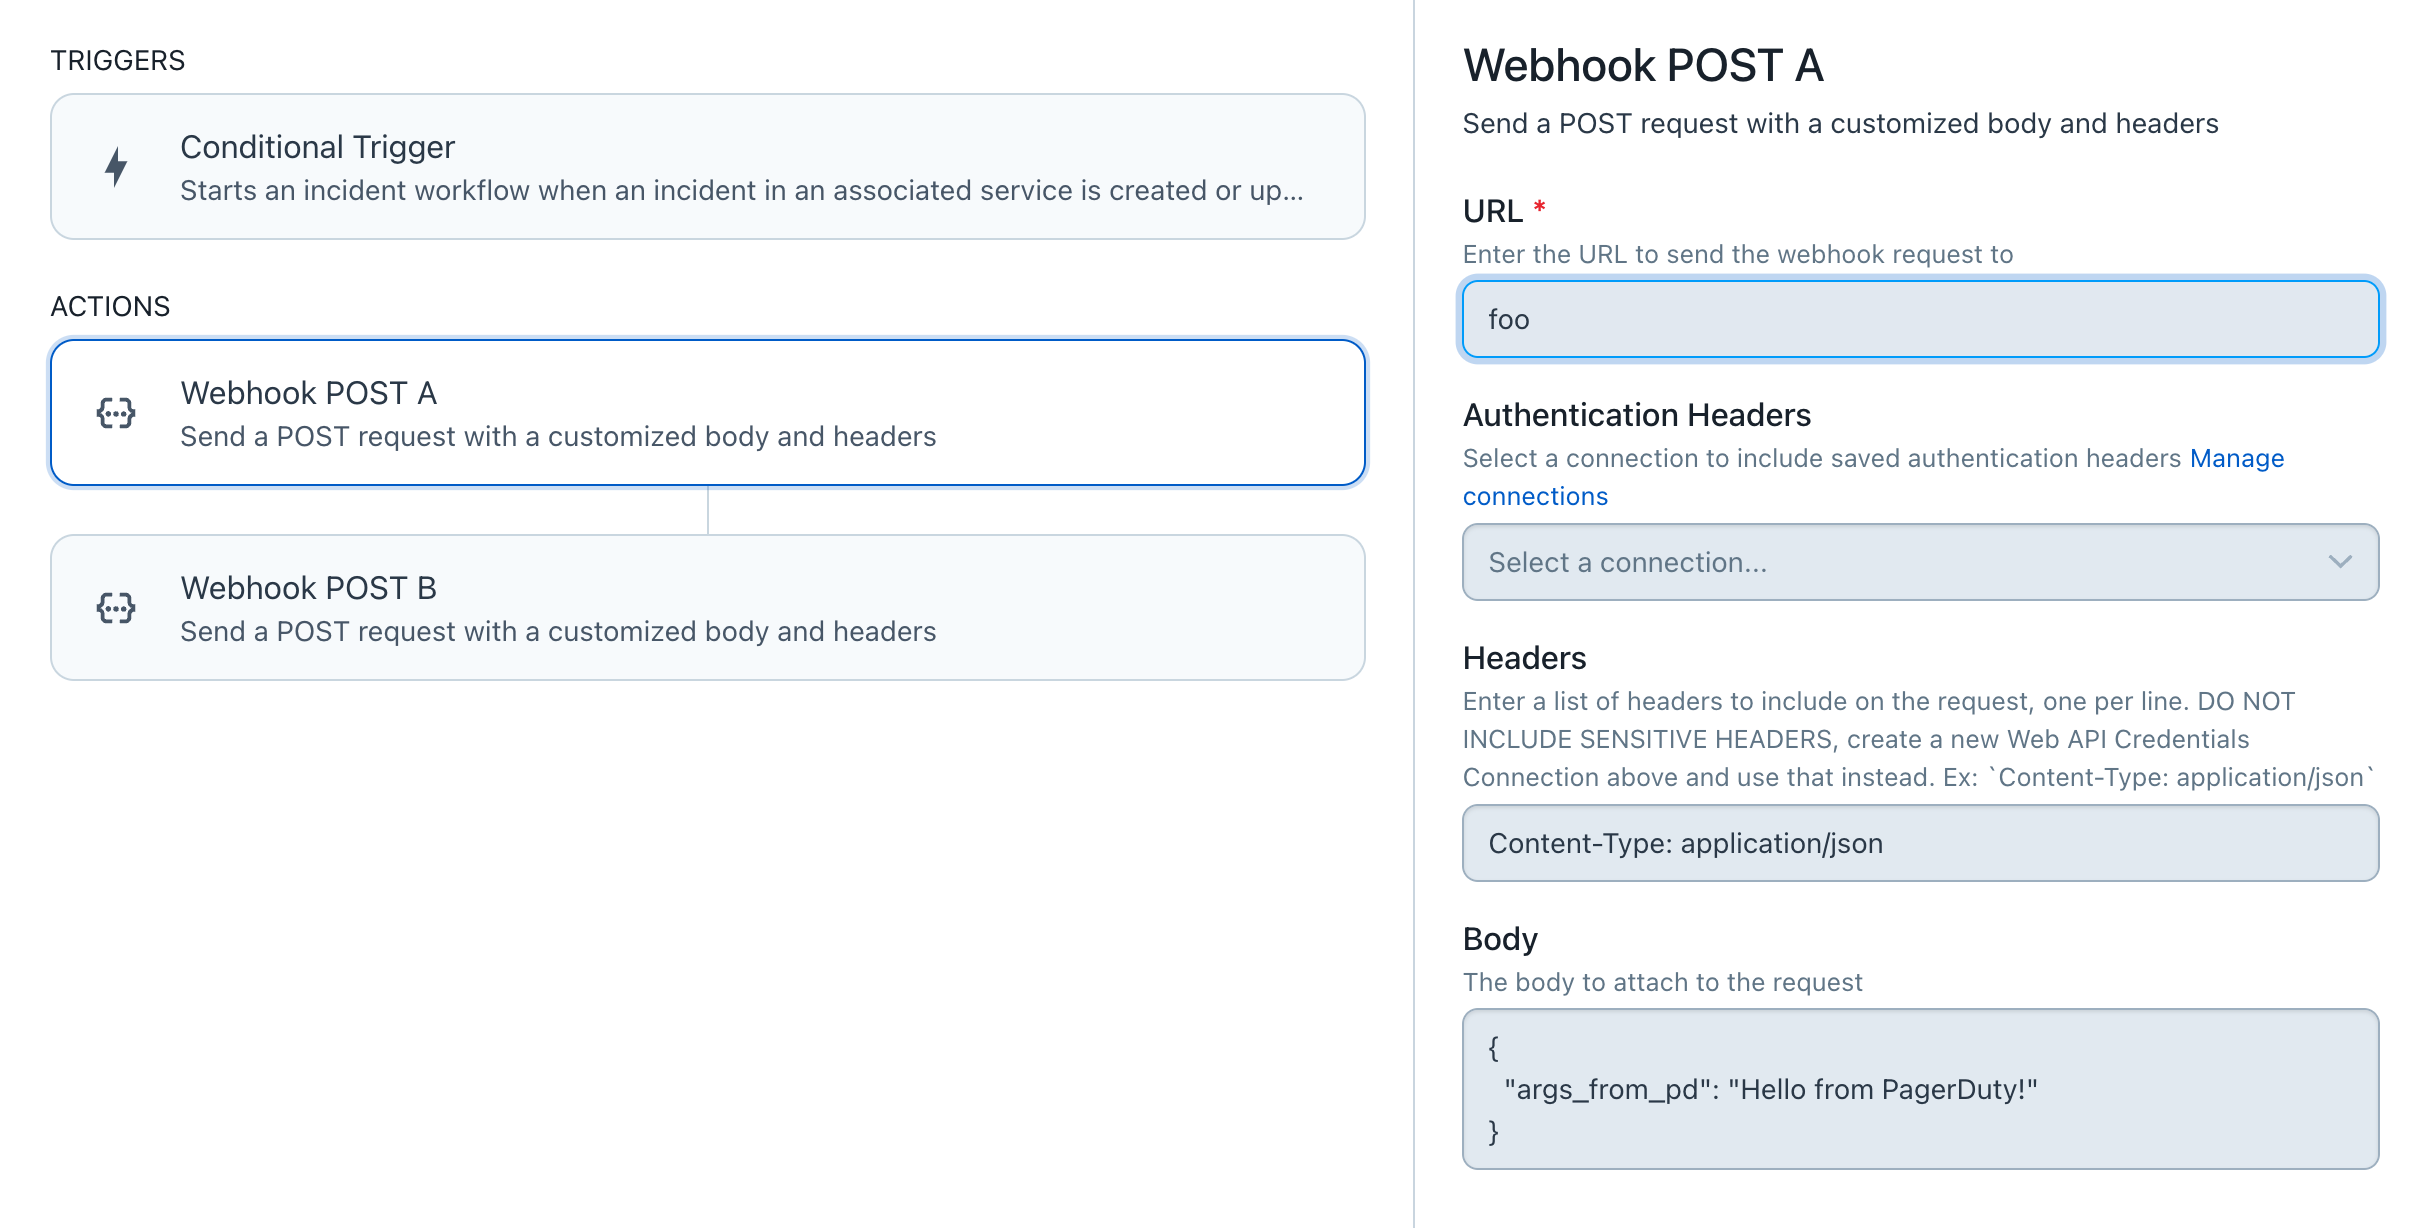
インシデントのタイムラインには「ワークフローはエラーとともに完了」との表示。
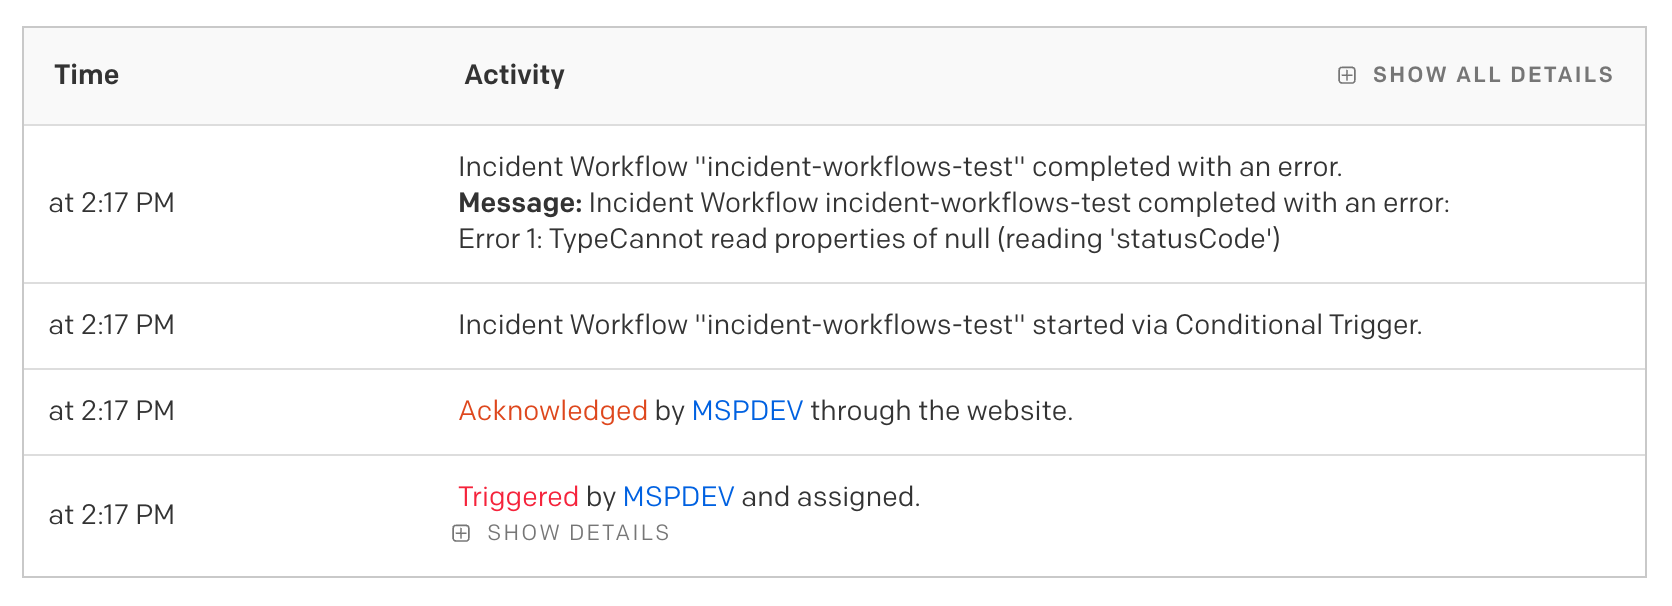
AWS Lambda のログを見ると error の値のみ入っています。
[response_status_code]
[successful_status_code_response]
[response_headers]
[response_time_in_milliseconds]
[result]
[result_summary]
[error] TypeError: Cannot read properties of null (reading 'statusCode')
ちなみに result を出力する方法はわかりませんでした。。(内容的には “Failed” などと表示されるのだとは思いますが)
まとめ
Incident Workflows の概要とWebhookアクションが出力する内容について見ていきました。
Incident Workflows は Event Orchestration と比べるとシンプルでわかりやすく、インシデント作成後の簡単or定型的な処理であればこちらを利用するのが便利だと思いました。
拡張版である Premium Incident Workflows というものあり、条件分岐や AWS Lambda / Azure Functions の直接呼び出しなどより充実した機能が揃っているようです。今後機会があれば触ってみたいと思います。